NOTE: DIAGRAMS & ILLUSTRATIONS NOT TO SCALE.
11
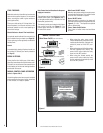
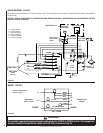
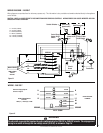
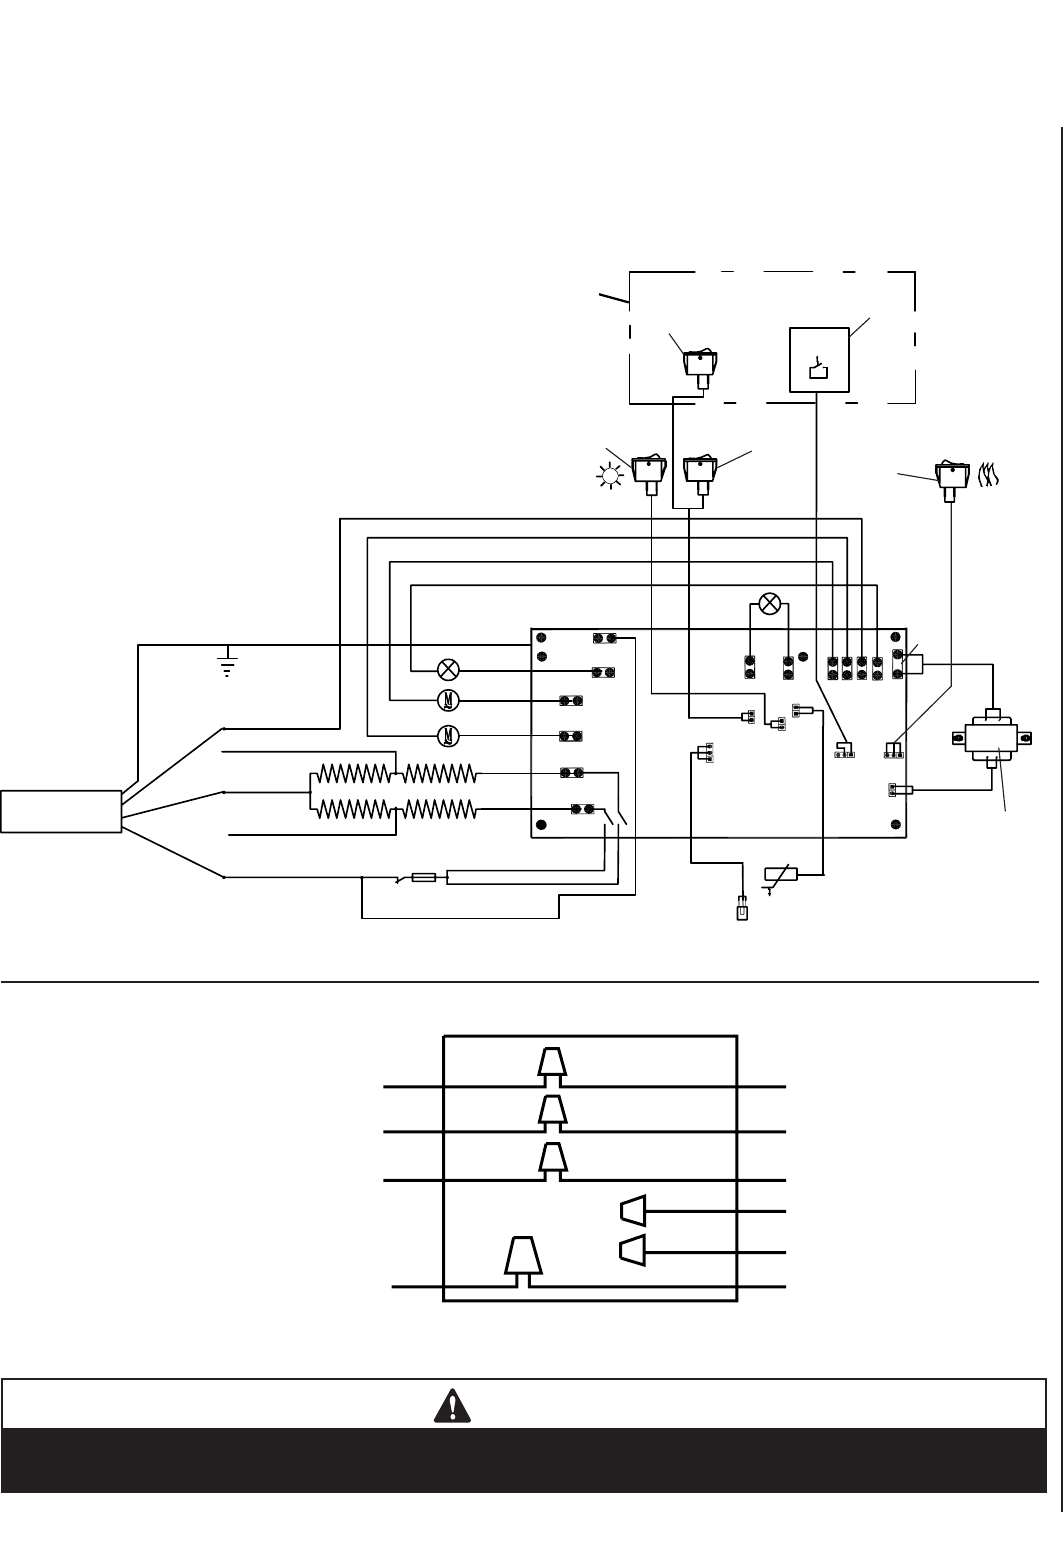
WIRING DIAGRAM - 240 VOLT
Wiring diagrams are provided here for reference purposes only. This information is also provided on schematics attached directly to the appliance
on the left side.
CAUTION: LABEL ALL WIRES PRIOR TO DISCONNECTION WHEN SERVICING CONTROLS. WIRING ERRORS CAN CAUSE IMPROPER AND DAN-
GEROUS APPLIANCE OPERATION.
WIRING - 240 VOLT
Figure 21
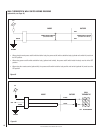
Figure 22
HOME POWER SUPPLY
240 V AC.
120V (L1) + 120V (L2) = 240V
FIREPLACE WIRE
HARNESS
L1 = BLACK (POWER)
L2 = BLACK (POWER)
G = GREEN (GROUND)
N = WHITE (COMMON)
N1 = WHITE (COMMON)
N2 = WHITE (COMMON)
Circuit
Board
Wall Thermostat
Control Panel
Flame / Ember
On/Off Switch
Control Panel
Heater On/Off
Switch
Wall Switch
(power on/off)
MAIN POWER
L1
L1
L2
L2
N1
N2
N
N
Control Panel
(power on/off)
Outside Switches
Transformer
Remote Sensor
Temperature Sensor
P-TRA.
SIP3
SIP2
SIP4
TEM.
SIP7
SIP6
K-H
K-P
L-R1
Heater 1 (L)
Heater 2 (L)
Fan Motor (L)
Flame Motor (L)
Light (L)
L-R2
t104° C t90°C
L-FAN
L-M
P-L
L-LIGHT
N-LIGHT
N-FLAME
L-FLAME
POWER-N
REMOTE
Relay 1
Relay 2
N-FAN
N-M
T-P
SIP13
SIP11
GROUND
GROUND
HOME POWER
SUPPLY
240 V AC.
120 V AC.
120 V AC.
WHITE
BLACK
ORANGE
BLUE
BLUE
YELLOW AND GREEN
GROUND
N
L1
L2
240 V 3000W
GROUND
N
L1
L2
N1
N2
See Power Supply Specifi -
cations on Page 3.
WARNING
Do not install or operate this fi replace through a switch wired in the 120 V AC or 240 V AC circuits. The only approved
wiring for a switch is through the low voltage circuit (24 V AC) as shown on Page 14.


