


On replacement installations, mount the new thermostat in place of the old
one unless the conditions listed below suggest otherwise. On new
installations, please follow these general guidelines:
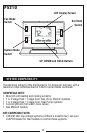
1. Mount the thermostat on an inside wall, about 5 ft. (1.5m) above the
floor.
2. Do not locate the thermostat where air circulation is poor such as in a
corner, alcove, or behind a door that is normally left open.
3. Do not locate the thermostat where unusual heating or cooling
conditions may be present, such as: direct sunlight, above a lamp,
television, or radiator, or on a wall next to an exterior door or window.
4. Do not locate in a damp environment, as this can lead to corrosion that
may shorten thermostat life.
5. If painting or construction work is still ongoing, cover the thermostat
completely or wait until this work is complete before installation.
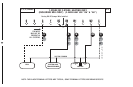
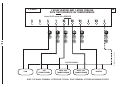
WARNING:
All wiring must conform to the local codes and ordinances that are in your
particular location.
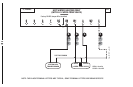
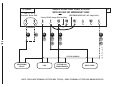
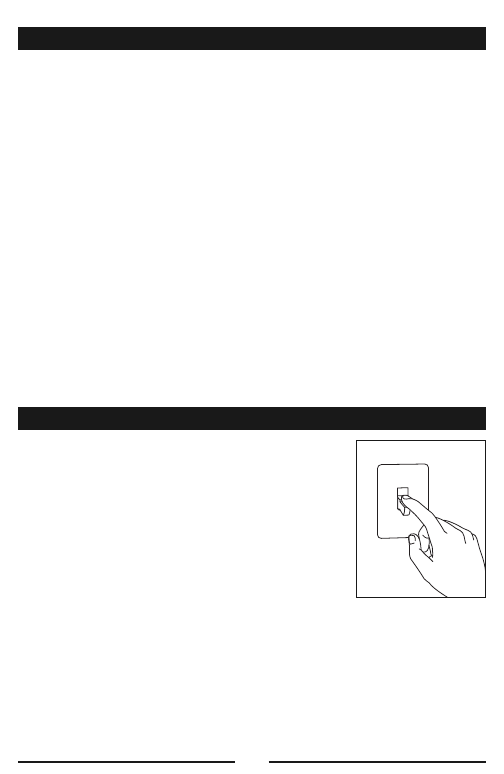
1. Turn OFF the electricity to all heating and
cooling components. Do not turn the
electricity back on until all work is completed.
2. Remove the front portion of your old
thermostat to expose the wiring connections.
3. Write down the letters printed near each wire
terminal that is used, and also the color of
each wire that is connected to it. Self-
adhesive wire labels are also enclosed.
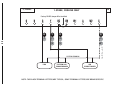
4. Carefully remove the wires one at a time, and bend them in a manner so
that they do not fall back inside the wall. Do not allow bare wire ends to
touch each other.
5. Loosen the mounting screws for the old thermostat and carefully
remove it from the wall.
4
REMOVE OLD THERMOSTAT:
MOUNTING LOCATION:
OFF