


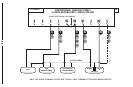

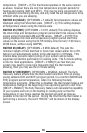
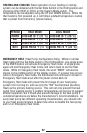

On the thermostat’s circuit board, there is a row of DIP switches, labeled
#1 through #8. The position of these switches will change how the
thermostat operates, and also how information is conveyed to you on the
LCD display screen. If you make any changes to these options, the
changes are not recognized unless you either: change the position of the
HEAT/OFF/COOL mode switch, or press the “HW RST” (Hardware Reset)
button on the circuit board. The use of this button is further described in
the “ADVANCED FEATURES” section of this manual.
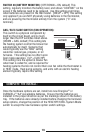
These option switches are very small and should be moved carefully using
objects such as: eyeglass screwdriver, fine-point pen, toothpick, or
similar. The listing below describes the available choices for each option
switch:
SWITCH #1 (SYSTEM): [OFF/DOWN = FURN, default] This setting is used
for the majority of all heating systems that are not heat pumps. Examples
for this setting would be: natural gas furnace, hot water baseboard heat,
and oil heat. [ON/UP = HP] Use this setting if you have a heat pump unit
(which looks just like an outside air conditioning unit, but is used for both
cooing and heating).
SWITCH #2 (TYPE): [OFF/DOWN = PROG, default] The thermostat
controls the room temperature by following temperature program periods
that you set up based upon your daily routine. [ON/UP = MAN] The
thermostat operates manually just like a mechanical or non-
programmable model. This method of operation is very basic and only
shows the room temperature and set temperature; there are no
temperature programs, days of the week, or clock times.
SWITCH #3 (PERIODS): [OFF/DOWN = 4, default] The thermostat uses
four temperature program periods in both heating and cooling (MORN,
DAY, EVE, and NITE). Each period has a separate start time and a set
17
ON
12345678
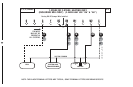
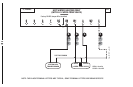
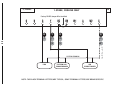
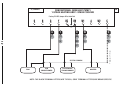
HARDWARE SETUP OPTIONS: