


DIGITAL VIDEO RECORDER
47
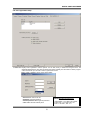
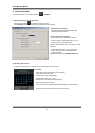
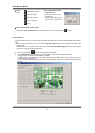
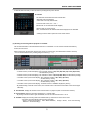
(3) Selecting the recording data for playback on timetable
The recorded information of the selected date is shown on a timetable. You can see the recorded information by
channel, time and event.
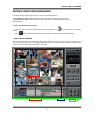
Select a channel for playback and click the point of time on recording bar. (The selected time indicator: blue line)
* You can move the time zone by scrolling using the scroll key (← / →).
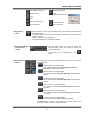
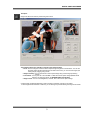
▶ Screen Division: You can see the screen by various division modes of 4,8,9,10,13,16 channels with these buttons.
▪ 4-division screen (4-channels display): Four 4-division screens of A(1~4ch), B(5~8ch), C(9~12ch), D(13~16ch)
are alternated by clicking.
▪ 8-division screen (8-channels display): Two 8-division screens of A(1~8ch), B(9~16ch) are alternated by clicking.
▪ 9-division screen (9-channels display): Two 9-division screens of A(1~9ch), B(8~16ch) are alternated by clicking.
▪ 10-division screen (10-channels display): Two 10-division screens of A(1~10ch), B(7~16ch)
are alternated by clicking.
▪ 13-division screen (13-channels display): Two 13-division screens of A(1~13ch), B(4~16ch)
are alternated by clicking
▪ 16-division screen (16-channels display): 16-division screen of 1~16ch is displayed by clicking
*By double-clicking a channel on the screen, One channel screen of the channel and division screen are changed
alternately.
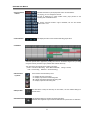
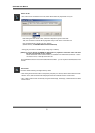
▶ Time Indicator: Display the real time of the recorded data is on playback. (Data of current time: blue line)
▶ Channel Select: Select the channel for playback (by 1-channel mode).
*By moving scroll bar located in right of timetable, use can see channel buttons from 1 to 16.
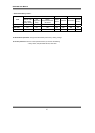
▶ Timetable: Display the recording data of the selected date by channel as bar of the various color.
*The colors of the bar indicate various types of recording:
( Green = Continuous Recording, Red = Motion Detection, Orange = Sensor, Pink = Pre-recording,
White line = Audio Recording )
▶ Select by Event: Use to see the recorded data by event.
▪ A = Display all types of recording.
▪ C = Display only Continuous Recording data. (Green)
▪ M = Display only Motion Detection Recording data. (Red)
▪ S = Display only Sensor Recording data. (Orange)
.
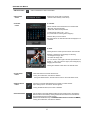
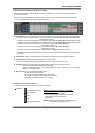
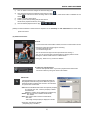
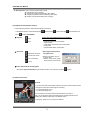
(4) Playback the selected data recorded
Use the following controls to adjust playback specs and direction.
Play tool▶ :
Fast Backward Play (x5)
Backward Play
Stop
Play
Fast Forward Play (x5)
*During play, the following buttons are disabled.
(Enabled during stop.)
▪ Scroll bar and data bar on timetable
▪ Setup, Bookmark, AVI, Panorama, Capture buttons
▪ Remote Search, Zoom in/out buttons
▪ Jump button
[NOTE] Speed of fast forward play and fast backward play
could differ according to PC system.