


NOTE: DIAGRAMS & ILLUSTRATIONS ARE NOT TO SCALE.
8
LENNOX HEARTH PRODUCTS • ESTATE™ SERIES WOOD-BURNING FIREPLACES • MODELS EST-36, EST-42, EST-50 • INSTALLATION INSTRUCTIONS
INSTALLING THE EST-50 OUTER TRANSITION ASSEMBLY
(continued from previous page)
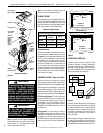
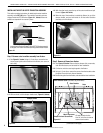
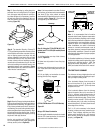
Step 6. Attach damper link to damper handle.
6.1. Attach the damper link to the factory-installed bolt on the damper
handle with one supplied nut, as shown in Figure A-11, below.
NOTE: Use the additional supplied nut. (Do NOT remove the
existing factory-installed nut from the damper handle.)
6.3. Using two 7/16" wrenches, tighten the nut completely; then loosen
1/2-turn.
Step 7. Install outer transition.
7.1. Using at least two people, lift the outer transition into place, as
shown in Figure A-12, below.
WARNING
SINGLE-PERSON LIFT COULD
CAUSE INJURY. USE ASSISTANCE
WHEN MOVING OR LIFTING.
LIFTING HAZARD.
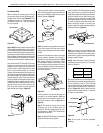
Figure A-12
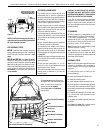
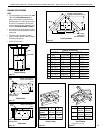
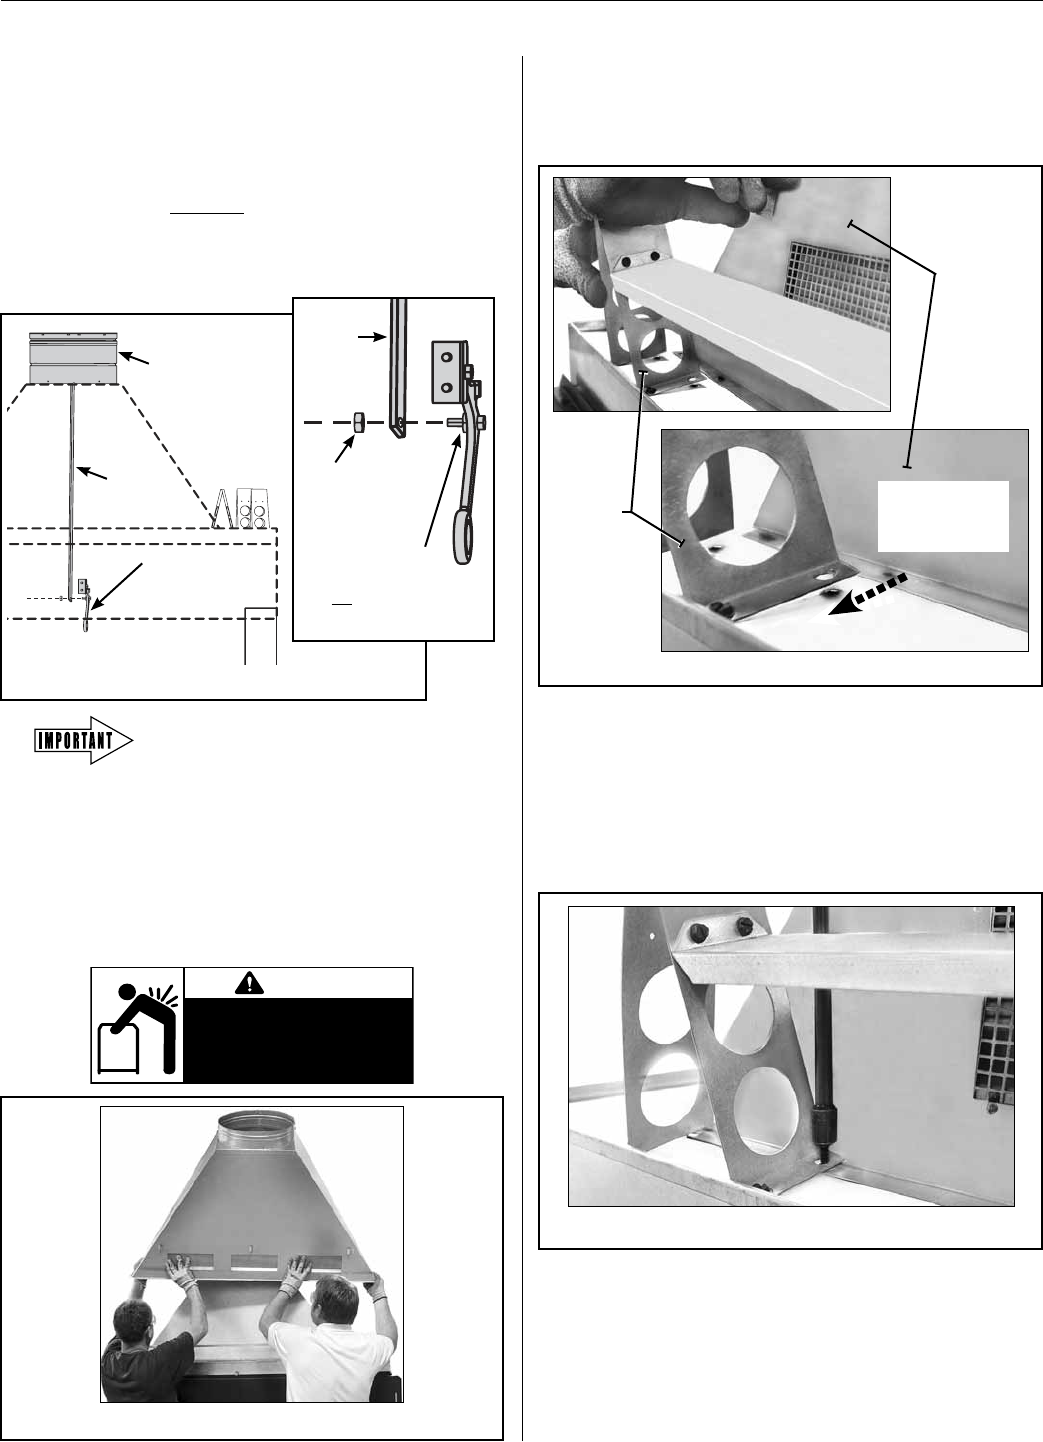
7.2. See Figure A-13, below. While tilting one of the front standoffs
forward, slide the front flange of the outer transition under the rear
holes of the standoff, and align the screw holes.
7.3. Repeat Step 7.2 for the other front standoff.
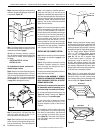
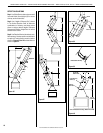
7.4. See Figure A-14, below. Attach fourteen (14) of the provided screws
to secure the outer transition.
Note:
• Make sure the lower flange of the outer transition is UNDER
the rear holes of each front standoff.
• The hardware bag contains more screws than are required
for installation.
Front
Standoff
Outer
Transition
(Front)
Slide transition
flange under rear
holes of standoff.
Figure A-13
Figure A-14
6.4.
BEFORE installing the outer transition, make
sure the damper assembly works properly.
The damper should freely move to a fully closed and fully open
position without interference, and the damper should remain fully
closed when latched. Refer to page 2 of the Care and Operation
Instructions (P/N 506025-04 ) for details on proper damper operation.
Figure A-11
Supplied Nut
(After installing,
loosen 1/2-turn.)
[DETAIL]
Inner Transition
Collar (with
Damper)
Damper Handle
with factory-installed
Bolt and Nut
(Do not remove.)
Damper
Link
Damper Handle
(See DETAIL,
at right.)
Damper
Link