


114552Ć2ĆCE
Kohler Co., Kohler, WI
8
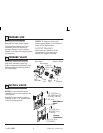
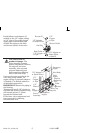
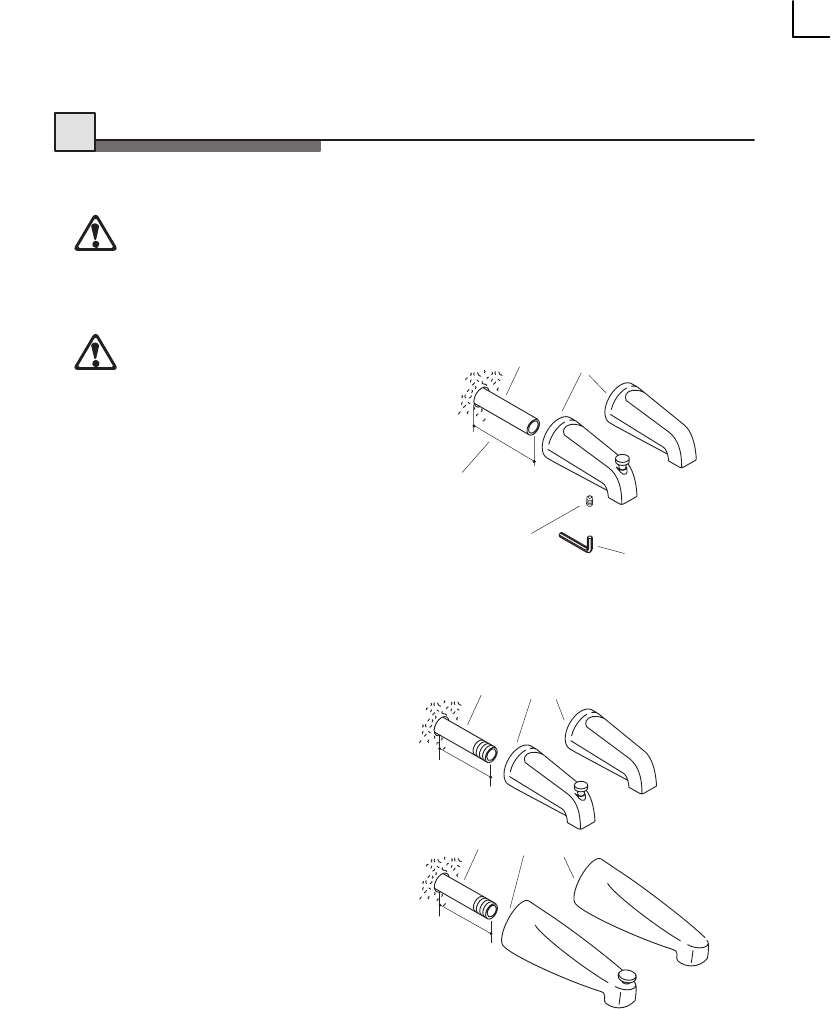
INSTALL SPOUT
6.
Remove the temporary nipple from
the bath elbow.
CAUTION: Risk of
internal seal damage.
Loosen the spout setscrew
with a 5/32" hex wrench
before installing the spout.
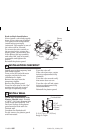
CAUTION: Risk of
internal seal damage. Do
not use petroleumĆbased
lubricants. If the spout will
not slide over the tubing, use
soapy water or a
siliconeĆbased lubricant to
help assembly.
For a slipĆfit spout, apply thread
sealant and install a 1/2" copper
tube to extend between 1Ć1/2"
(3.8cm) and 2Ć7/8" (7.3cm) beyond
the finished wall. Deburr the copper
tubing.
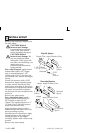
Loosen the setscrew with a 5/32"
hex wrench. Apply plumbers putty
or other sealant around the inlet
end of spout according to the putty
manufacturer's instructions. Install
the spout and carefully retighten
the setscrew. Do not overtighten the
setscrew.
Remove any excess putty.
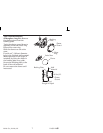
For a threaded spout, apply
thread sealant and install a 1/2"
NPT nipple to extend 3Ć7/8"
(9.8cm) (for standard spouts) or 7"
(17.8cm) (for 8" (20.3cm) spouts)
beyond the finished wall.
Apply plumbers putty or other
sealant around the inlet end of the
spout according to putty
manufacturer's instructions. Apply
thread sealant to the nipple and
install the spout to the nipple.
Carefully tighten with a clean strap
wrench.
Remove any excess putty.
3Ć7/8"
(9.8cm)
Apply Plumbers Putty
Nipple
7"
(17.8cm)
Nipple
1Ć1/2" (3.8cm)
- 2Ć7/8" (7.3cm)
Copper Tube
Setscrew
5/32"
Hex
Wrench
Apply Plumbers Putty
Apply Plumbers Putty
Standard
Spouts
8" (20.3cm)
Spouts
SlipĆFit
Spouts
SlipĆFit Spouts
Threaded Spouts