


6
Side Burner
Installation
Checking and
adjusting the
burners
The burners are tested and factory-set for
most efficient operation. However,
variations in gas supply and other
conditions may make minor adjustments
to low flame setting necessary.
Adjustments must be done by a qualified
service technician.
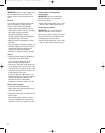
Checking and adjusting the burner flames
requires removing the grate.
5.Carefully lift off cover and grate
and set aside. Remove packing from
around burners. Reinstall grate.
6.Carefully move Side Burner
completely into enclosure.
grate
cover
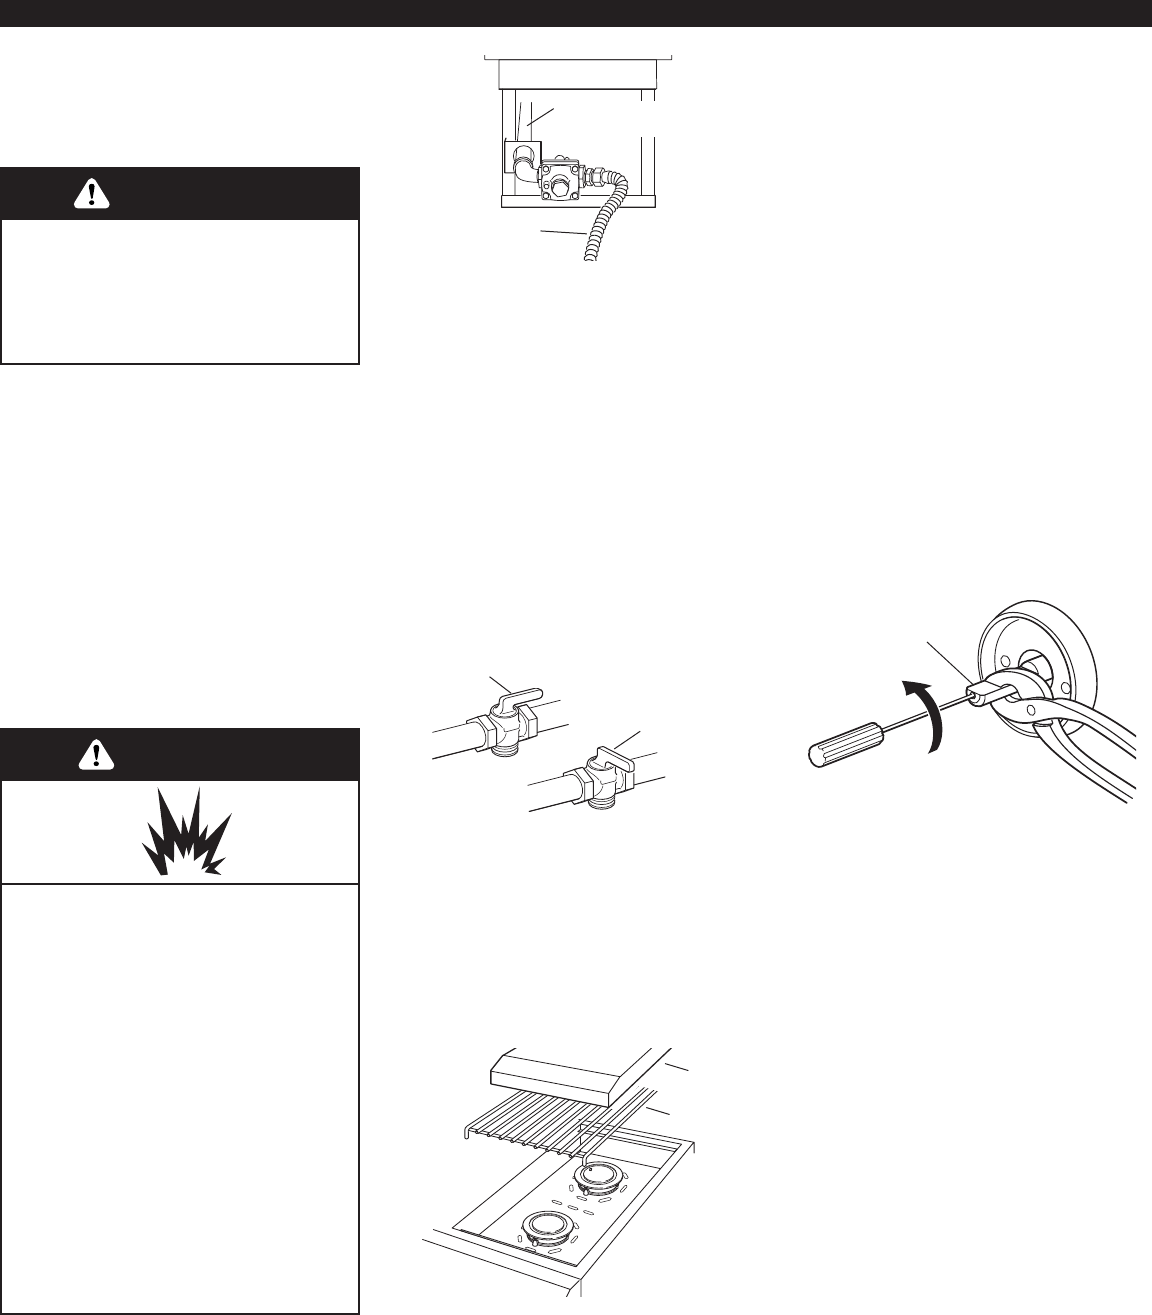
Low flame adjustment:
If flame goes out on the LO setting, the
low flame setting must be adjusted.
Light the burner and turn control knob to
its lowest setting and remove knob. Hold
the valve stem with pliers and insert a
thin flat blade screwdriver into the shaft.
Watch the flame and slowly turn
screwdriver counterclockwise. Adjust
flame to the minimum stable flame.
Replace control knob.
Reassemble grate.
valve stem
This installation must conform with local
codes and ordinances**. In the absence of
local codes, installations must conform
with either the National Fuel Gas Code
ANSI Z223.1, or CAN/CGA-B149.1*
Natural Gas and Propane installation code.
Natural Gas
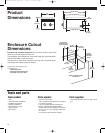
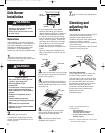
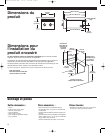
1.Place side burner into outdoor
enclosure, but leave enough room in back
to connect to gas supply.
rear of
side burner
1/2" side burner
gas pipe
flexible gas
connector
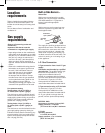
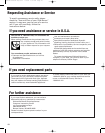
valve open
3.Open shutoff valve in the gas supply
line. The valve is open when the handle is
parallel to the gas pipe.
4. Test all connections by brushing on
an approved non-corrosive leak-detection
solution. Bubbles will show a leak. Correct
any leak found.
• If local codes permit, use a flexible
stainless steel tubing gas connector,
design-certified and marked "outdoor" by
AGA or CSA International, to connect
the side burner to the rigid gas supply
line. 5/8" diameter line is recommended.
Using a wrench to tighten, connect the
gas supply to the side burner. Use pipe
joint compound on all non-flared male
threads. Do not kink or damage the
flexible connector when moving the side
burner.
• Pipe-joint compounds suitable for use
with L.P. gas must be used. Do not use
Teflon
®
tape.
valve closed
Copies of the standards listed may
be obtained from:
* CSA International
8501 East Pleasant Valley Rd.
Cleveland, Ohio 44131-5575
** for local codes, contact your local
building inspector
®Teflon is a registered trademark of E.I. Du Pont
de Nemours and Company.
Excessive Weight Hazard
Use two or more people to move
and install side burner.
Failure to do so can result in back
or other injury.
WARNING
WARNING
Explosion Hazard
Use a new AGA or CSA approved
“outdoor” gas supply line.
Securely tighten all gas
connections.
If connected to LP, have a qualified
person make sure gas pressure
does not exceed 11” (28 cm) water
column.
Examples of a qualified person
inclued:
licensed heating personnel,
authorized gas company personnel,
and
authorized service personnel.
Failure to do so can result in death,
explosion, or fire.
2.Make gas connections.
A combination of pipe fittings must be
used to connect the side burner to the
existing gas line.
7.Go to "Checking and adjusting the
burners".
YR30135/8190046 eng-6-11 7/2/03 1:27 PM Page 6