


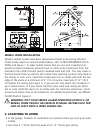
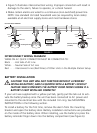

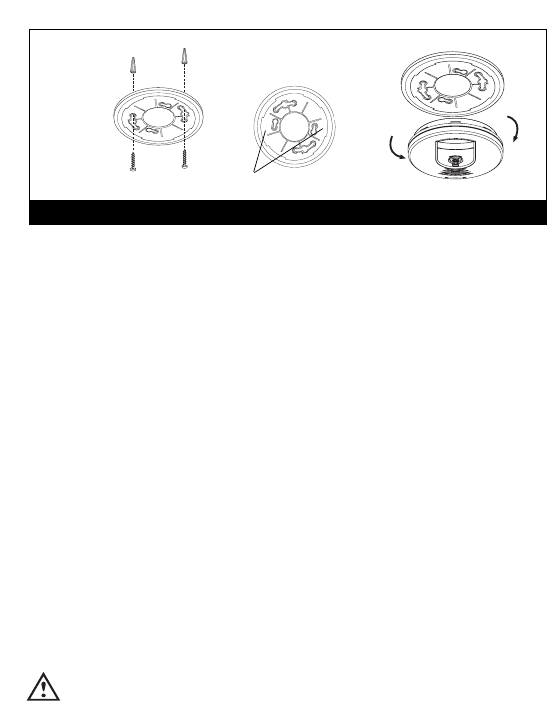
2. After selecting the proper smoke alarm location as described in Section 1
and wiring the AC Quick Connector as described in the WIRING INSTRUC-
TIONS, attach the trim ring to the electrical box (see Figure 8). To ensure
aesthetic alignment of the alarm, the “A” line on the mounting bracket
should be parallel with the hallway when ceiling mounted, or horizontal
when wall mounted.
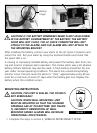
3. Pull the AC Quick Connector through the center hole in the mounting
bracket and secure the bracket, making sure that the mounting screws are
positioned in the small ends of the keyholes before tightening the screws.
4. Plug the AC Quick Connector into the back of the alarm (see Figure 5),
making sure that the locks on the connector snap into place. Then push the
excess wire back into the electrical box through the hole in the center of the
mounting bracket.
5. Install the alarm on the mounting bracket and rotate the alarm clockwise
until the alarm ratchets into place (this ratcheting function allows for aes-
thetic alignment). NOTE: The alarm will mount to the bracket in 4 positions
(every 90 degrees).
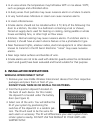
6. Turn on the AC power. The green Power On Indicator should be lit when
the alarm is operating from AC power. Confirm unit operation by pressing
the test button.
7. Test the unit to ensure proper operation by pressing the Test Button. All
interconnected alarms should respond.
CAUTION: Due to the loudness of the alarm, always stand an arm’s
length away from the unit when testing.
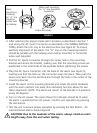
FIGURE 8
When
mounting in
a hallway,
the “A” line
should be
parallel with
the hallway.
When wall mounting,
the “A” line should be
horizontal.
Alignment Marks
Remove
Install
A
A