


INSTALLATION
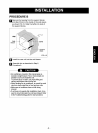
We strongly recommend the removal of the
old wall sleeve and the installation of a new
Kenmore Wall Sleeve,
If youdecideto keeptheexistingwallsleeve,
youhaveto redirectthe louvers at theback ofthe
wall sleeve illustration. The use of pliers is
recommended. If you DO NOT redirect,you run
the risk of poor performance or product failure.
This is not covered under the terms ofthe
Kenmorewarranty.
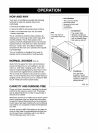
• Pick a location which will allow the conditioned air
to blow into the area you want. Good installation
with special attention to the proper position of the
unit will lessen the chance that service will be
needed.
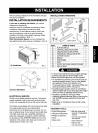
ITEMS IN INSTALLATION HARDWARE
You may not need all parts in the kit. Discard
unused parts
ITEM (inches)
Plastic grille
Vertical insulation strip
Around Insulation Strips
Horizontal Insulation Strip
Support Block
Baffle
Shim
Trim Frame
Washer Screw
Nuts(Plastic)
Grille Rear
263/4 x 161/2
159/16 x 13/8x 13/8
674/8 x 13/8x 25/32
5927/32 x 1% x 1%
237/32 X 13/8 X 13/16
13/4X 13/8 X45/16
14 X 4_/2 X _/6
t 1_3/_6X 1 XS/4
Qty.
1
1
1
1
1
2
1
2
2
4
4
1
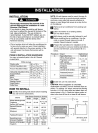
HOW TO INSTALL
_1 Identify the existing wall sleeve before installing
the unit from the listed below.
Brand
White-Westinghouse
Frigidaire
Carrier (52F series)
General Electric
/Hotpoint
Wail Sleeve Dimensions (inches)
Width Height Depth
25-1/2 15-1/4 16, 17-1/2
or 22
26 15-5/8 16-7/8
17-1/8
Whirlpool 25-7/8 16-1/2
or 23
Fedders/Emerson 27 16-3/4 16-3/4
or 19-3/4
Sears/Kenmore 25-7/8 15-17/32 16-23/32
Emerson/Fedders 26-3/4 15-3/4 15
Carrier (51S Series) 25-3/4 16-7/8 18-5/8
Friedrich 27 16-3/4 16-3/4
NOTE: All wall sleeves used to mount the new Air
Conditioner must be in sound structural condition
and have a rear grille that securely attaches to
sleeve, or rear flange that serves as a stop for the
Air Conditioner.
I_ Remove old air conditioner from existing wall
sleeve.
i[_l Clean the interior of an existing sleeve.
(Do not disturb seals.)
I_ll Wall sleeve must be securely fastened in wall
before installing the air conditioner. Use the
nails or screws through sleeve into wall, if
needed. Repaint sleeve if needed.
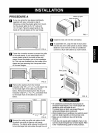
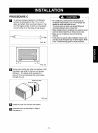
II_ Prepare the wall sleeve for installation of the
unit. If you plan to use your existing wall sleeve,
and it is not Kenmore, use procedure B or C
below.
Procedure
A
Brand
Sears/Kenmore
White-Westinghouse
Frigidaire Carrier
(52F series)
General Electric
/Hotpoint
Whirlpool
Carrier (51S series)
Fedders/Emerson
C
Emerson/Fedders
Friedrich
Depth(inches)
16-23/32
16, 17-1/2
or 22
16-7/8
17-1/8 or 23
18-5/8
16-3/4
or 19-3/4
15
16-3/4
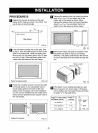
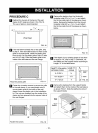
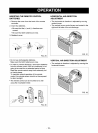
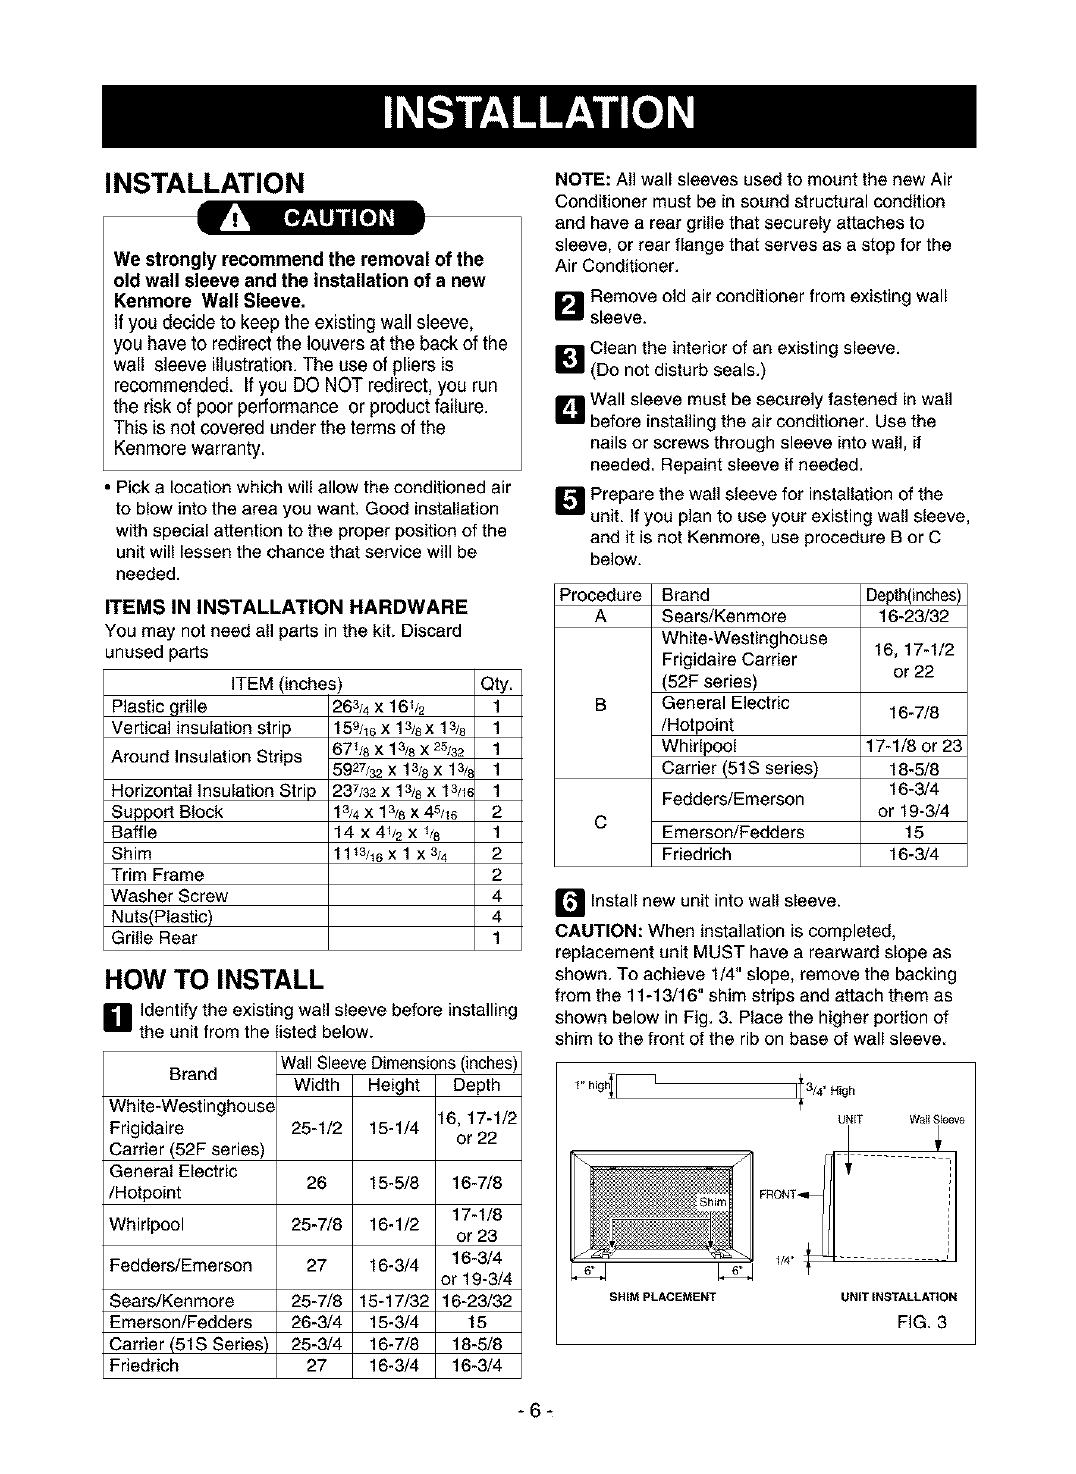
rlt install new unit into wall sleeve.
CAUTION: When installation is completed,
replacement unit MUST have a rearward slope as
shown. To achieve 1/4" slope, remove the backing
from the 11-13/16" shim strips and attach them as
shown below in Fig. 3. Place the higher portion of
shim to the front of the rib on base of wall sleeve.
I3/4.i0.
UNIT Wall sleeve
SHIM PLACEMENT
UNIT INSTALLATION
FiG. 3
-6-