


6
D
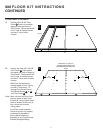
Nails every 12" (30 cm)
through Floor Panels into all
Floor Bond Boards and Joists
C
E
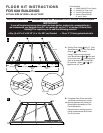
A A
A
AAB
DE
DE
DE
C
92-5/8"
120"
24"
(61 cm)
24"
(61 cm)
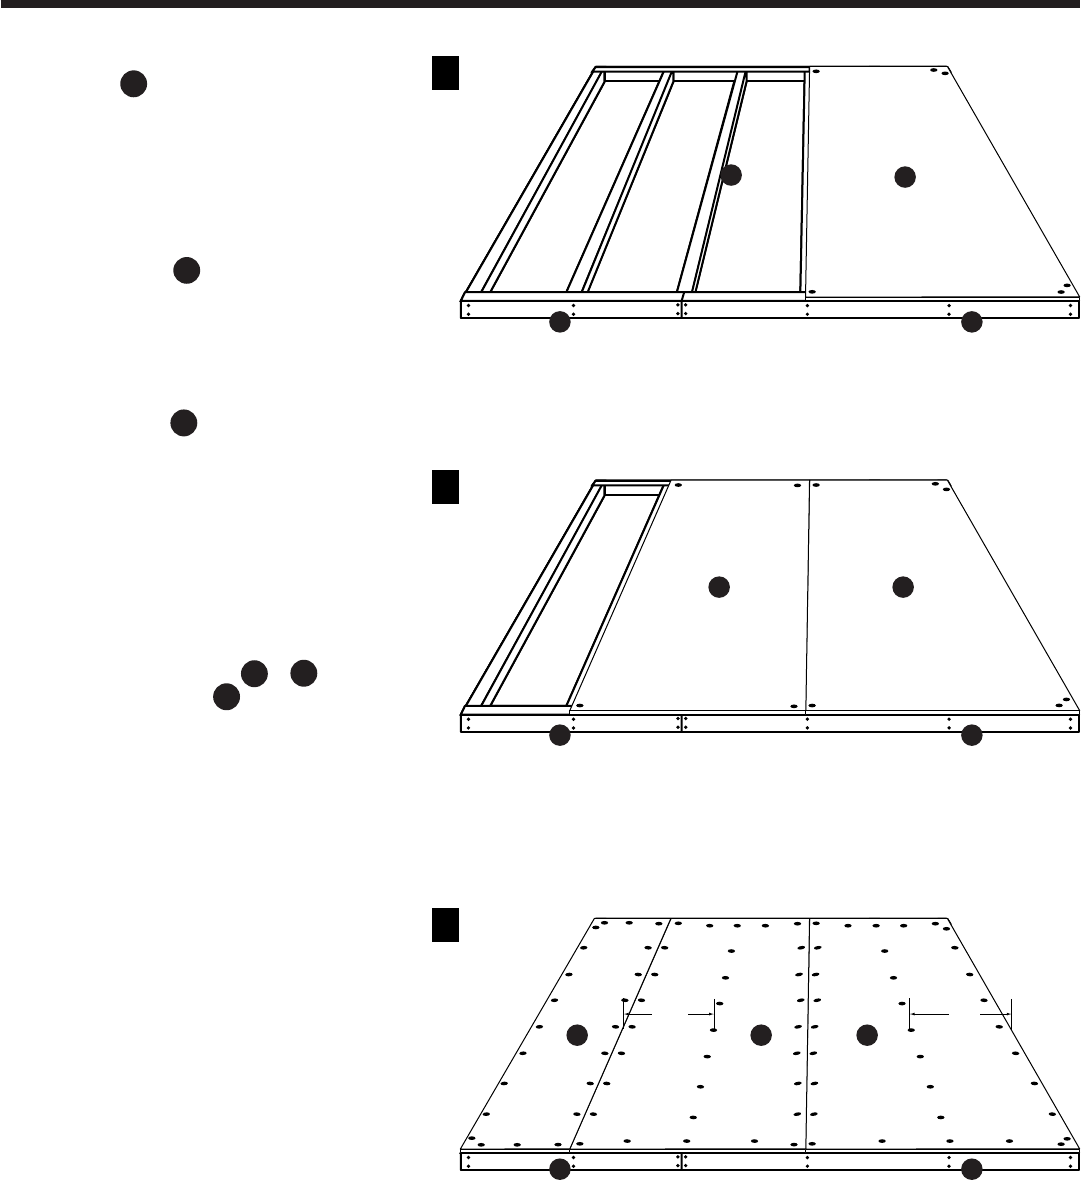
FLOOR PANEL ATTACHMENT:
C: Position a 48 x 92-5/8” Floor
Panel flush to the outside
edges of sides and back of
Floor Frame. Secure panel with
two 2” nails at outside corners
and one 2” nail at other corners.
D: Position the other 48” x 92-5/8”
Floor Panel flush against
first panel and flush to edges of
Floor Frame. Secure panel with
one 2” nail at each of the four
corners.
E: Position the 23-7/8” x 92-5/8”
Floor Panel flush against
second panel and flush to
edges of Floor Frame. Secure
panel with two 2” nails at
outside corners and one 2” nail
at each of other corners.
With Floor Panels flush to
outside edges of Floor Frame,
nail with 2” nails every 12”
through Floor Panels into all
Floor Bond Boards &
and Floor Joists .
Note: Mark a line on the Floor Panel
over the center of each Floor
Joist @ 24” using a pencil and a
piece of lumber from the kit (or
use a chalk line) to make
nailing easier.
Your Floor is now complete.
Check to be sure it is properly
positioned and leveled to
ground before beginning
assembly of your Handy Home
Wooden Storage Building.
10X8 FLOOR KIT INSTRUCTIONS
CONTINUED
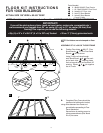
A
A
C
D
E
B