8 42733-01 04/26/2007
ENGLISH
ASSEMBLY CONTINUED
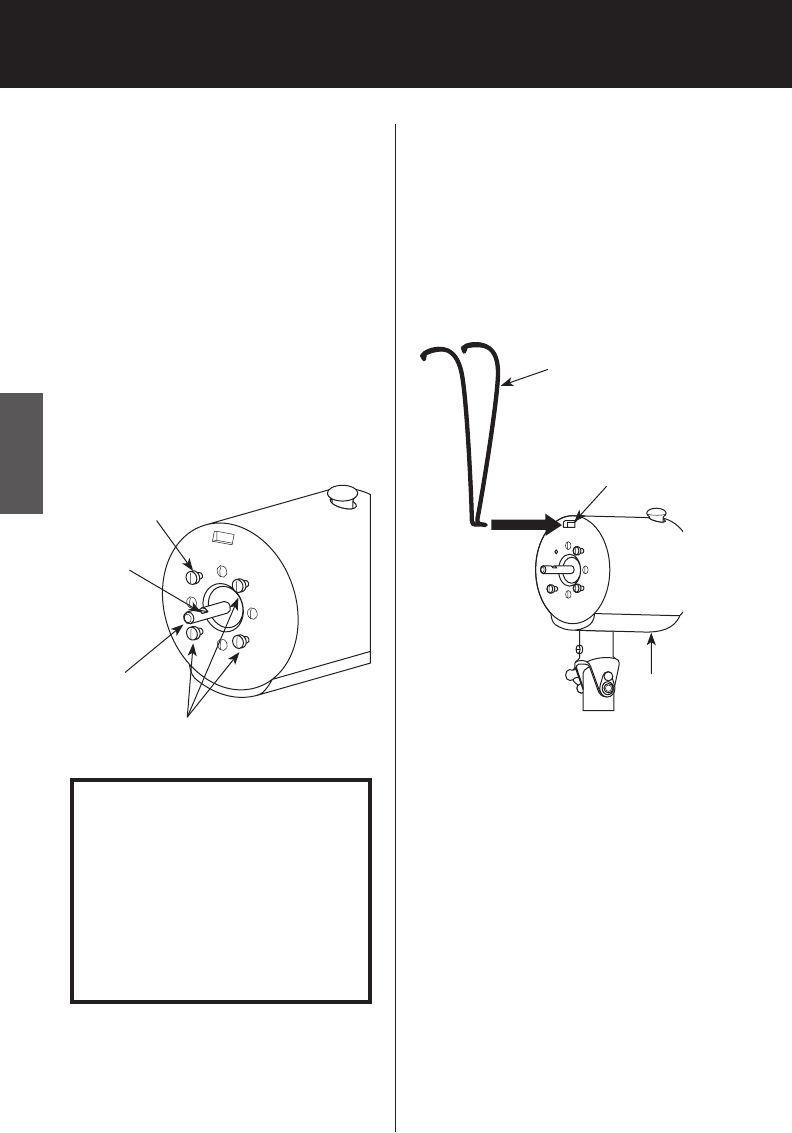
Upper Left Grille
Mounting Screw
FIGURE 5
Flat Portion
Motor Shaft
Grille Mounting Screws
14. Insert the threaded portion of
the Telescoping Pole into the
Motor Mount. See Figure 3.
Turn the Fan Motor to tighten
the joint, then re-install the Mo-
tor Mount Setscrew to secure
the Fan Motor to the Telescop-
ing Pole.
15. Remove the upper left Grille
Mounting Screw from the Mo-
tor Face. See Figure 5. Loosen
the three remaining Grille
Mounting Screws.
Fan Motor
Hole in Motor Face
Interlock Bracket
FIGURE 6
ATTENTION: This fan has a
built-in safety switch that will
not allow the fan to operate
unless the Interlock Bracket is
properly installed, the Grille is
fully assembled to the Motor
Face, and the Interlock Bracket
is secured into place.
16. Install the Interlock Bracket as
shown in Figure 6. NOTE: DO
NOT remove the rubber bar-
rier from the hole in the Motor
Face. Insert the bottom of the
Interlock Bracket into the open-
ing protected by the rubber bar-
rier.


