


6
7
Wire Labeling
• CAUTION! TURN OFF POWER TO THE HEAT PUMP SYSTEM BEFORE YOU ATTEMPT
TO ACCESS THE THERMOSTAT’S WIRING.
• IMPORTANT! BEFORE DISCONNECTING ANY WIRES FROM THE EXISTING
THERMOSTAT, APPLY THE PROVIDED SELF-ADHESIVE LABELS TO THE WIRES.
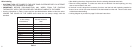
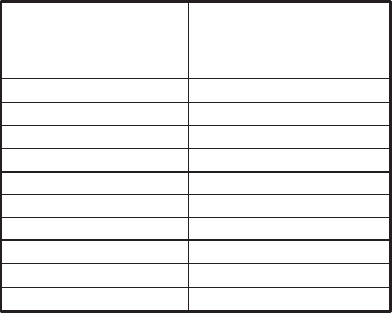
• Use the information in Table 1 below and the provided adhesive labels to label the wires.
IGNORE THE COLOR OF THE WIRES since these do not always comply with the
standard.
• After labeling the wires, disconnect them from the existing thermostat terminals.
• Remove existing wallplate. To make sure wires do not fall back into wall opening, you may
want to secure them to the wall.
• If the hole in wall is larger than necessary for wires, seal the hole with insulating material so
that no hot or cold air can enter the back of the thermostat from the wall. This air could cause
a false thermostat reading.
• A wiring diagram is provided on page 23 of these instructions.
Table 1
If the terminal letter
on the existing
thermostat is. . .
R, V-VR, or VR-R R
Y, Y1, or M Y1
Y2 Y2
W1, W2, or W-U W2
E E
G or F G
O or R O
B B
L or X L
C, X, or B C (Required)
. . .then mark the
wire with adhesive
label