


3
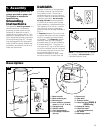
Description
1. Assembly
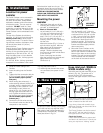
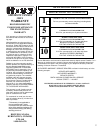
1
2
3
10
14
9
15
11
4
16
5
12
6
8
1-3
6
7
Operate cleaning system only at
voltage specified on power unit.
This system is intended for
household use.
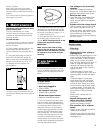
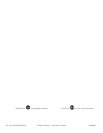
Grounding
Instructions
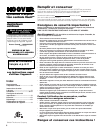
This appliance must be grounded. If it
should malfunction or breakdown,
grounding provides a path of least
resistance for electrical current to
reduce the risk of electric shock. This
appliance is equipped with a cord hav-
ing an equipment-grounding conductor
(A) and grounding plug (B). The plug
must be plugged into an appropriate
outlet (C) that is properly installed and
grounded in accordance with all local
codes and ordinances.
DANGER-
Improper connection of the equipment-
grounding conductor can result in the
risk of electric shock. Check with a
qualified electrician or service person if
you are in doubt as to whether the outlet
is properly grounded. Do not modify
the plug provided with the appliance -
if it will not fit the outlet, have a proper
outlet installed by a qualified electrician.
This appliance is for use on a nominal
120 volt circuit and has a grounding
plug that looks like the plug illustrated in
Fig. 1-1.
A Temporary adapter (D) may be used
to connect this plug to a 2-pole recepta-
cle (E) if a properly grounded outlet is
not available. The Temporary adapter
should be used only until a properly
grounded outlet (C) can be installed by
a qualified electrician. The green col-
ored rigid ear (F), lug, or the like extend-
ing from the adapter must be connected
to a permanent ground such as a prop-
erly grounded outlet box cover.
Whenever the adapter is used, it must
be held in place by a metal screw (G).
1-1
1-2
NOTE: In Canada, the use of a tempo-
rary adapter is Not Permitted by the
Canadian Electrical Code.
B
C
D
E
A
F
G
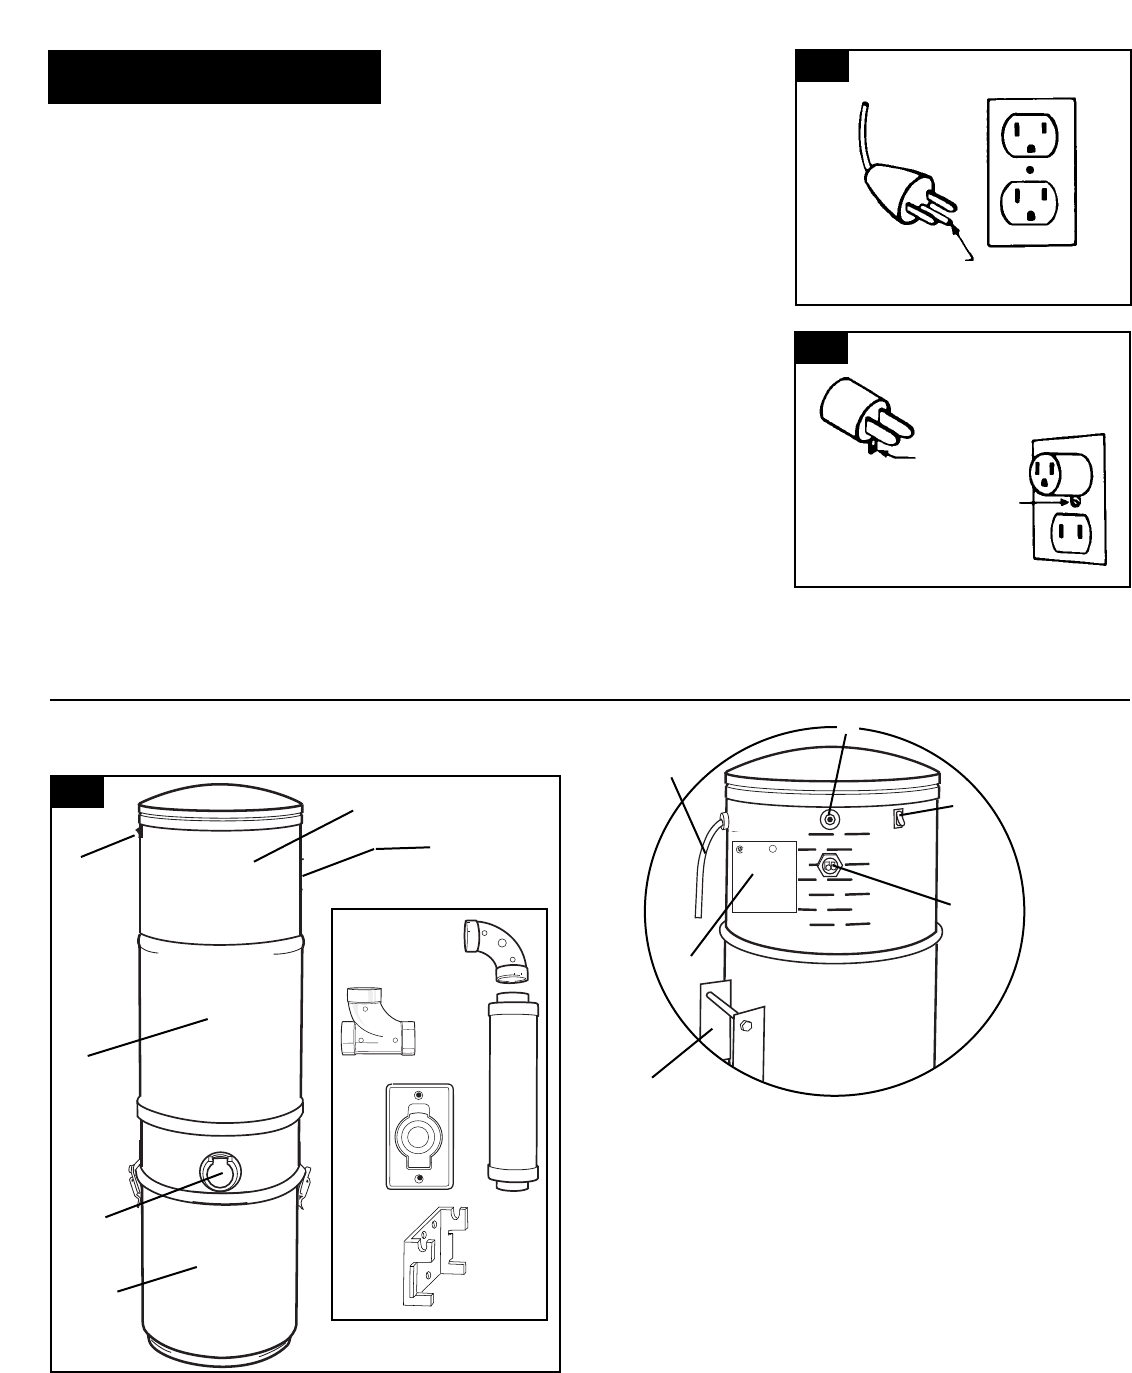
1. Motor module 9. Power cord
2. Motor exhaust port 10. Data label
3. Mounting bar 11. Exhaust muffler
4. Dust container (contains 12. Hose inlet port (
S5626 &
Items 11, 13, 14, 15 & 16) S5636 only)
5. Filtration body 13. Sweep 90° fitting
6. ON-OFF switch 14. Hose inlet valve
7. Over load protector w/24 volt connection)
8. Low voltage receptacle 15. 90° elbow
(24 volt) 16. Mounting bracket
CANAVAC SYSTEMS INC
ONTARIO, CANADA
LR37447
NRTL/C
MODEL
120 V
60 HZ
WARNING:
AVERTISSEMENT:
Serial No.
No. Desérie
Mount at least 12 in. from ceiling.
Connect to individual brance circuit.
To reduce the risk of electric shock do not
use outdoors or on wet surfaces.
Assurer un dégagement d'au moids 12 po. entre les plafond
selon les cas.
Brancher a une derivation distincte
Pour reduire les risgues de choc
matieres humides.
electrique ne pas utiliser a l'exterieur et ne pas aspiere de
E119989
C
U
L
13