Installation and Setup
24
homexpert
by Honeywell THR872CUK Wireless Programmable Thermostat
25
AUTOMANOFF
Activate batteries and test thermostat
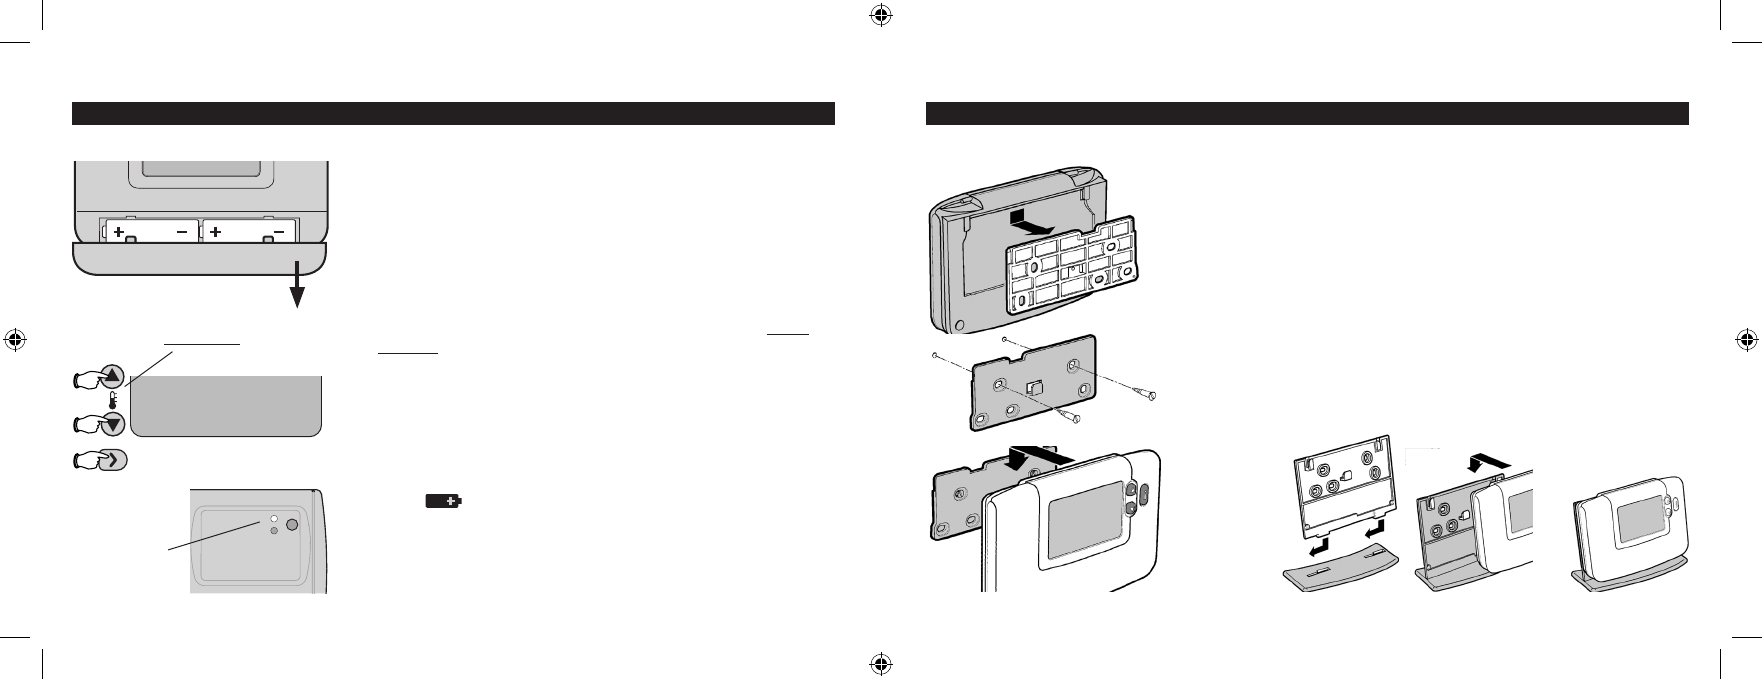
Remove thermostat cover and battery compartment cover, then
discard the plastic tab inside to activate the batteries. The first time
you do this, you will be prompted to set the date, time and preferred
screen language. After this, you should check to make sure the
thermostat can communicate with the relay box.
1 Make sure electrical power is on and thermostat is set to
OFF mode (see page 11).
2 Hold the thermostat 2-3 metres from the relay box, then press
and hold the buttons shown at left until TEST TRANSMIT appears.
3 If the system is working properly, a green light on the relay box
should begin flashing. If nothing happens, or if the red light begins
flashing, see “In Case of Difficulty” on page 32.
To exit Test mode at any time, press any MODE button (Auto, Manual
or Off; see page 11).
Press OFF, then press and hold these
buttons to test
Remove cover and discard plastic tab
inside to activate batteries
TEST TRANSMIT
Green light on
relay box should
begin flashing
Choose location and install thermostat
Install the thermostat on a wall or table about 1.2 to
1.5 metres above the floor. To check a location, set the
thermostat to Test mode (see page 24), then check to verify
that the green light on the relay box is still flashing. If it does
not flash, find another location closer to the relay box
• Donotinstallnearsourcesofhotorcoldair(radiators,
windows, heating or cooling ducts).
• Installatleast30cmfrommetalobjects.
• Installatleast1metreawayfromotherelectronicdevices
(TV, sound system, PC, etc.).
Wall mounting
Table stand
assembly
NOTE: This symbol will flash on the screen when battery
power is low. Remove cover as shown at left and replace
batteries with two fresh AA alkaline batteries.
