


5 69-1081—3
STEP 1. PREPARE FOR INSTALLATION
❑ This thermostat is designed to work with multistage heat pumps (heat pumps with Auxiliary and/or Emergency
Heat). Check Table 1 in Step 4 to make sure the CT3611 is compatible with your system. If you have
compatibility questions, contact Honeywell at www.honeywell.com/yourhome or call the Customer Relations
Center at 1-800-468-1502.
Package Contents
• Thermostat • Wiring labels
• Screws and anchors • Owners manual
• Wallplate
Tools Required
• Screwdriver
• Drill
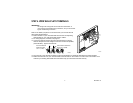
STEP 2. REMOVE OLD THERMOSTAT
❑ Test your heating and cooling systems to make sure they work properly. If either system does not work, contact
your local heating/air-conditioning dealer. To avoid compressor damage, do not operate the cooling system when
outdoor temperature is below 50°F (10°C).
❑ Turn off power to the system at the furnace or the fuse/circuit breaker panel.
❑ Carefully unpack your new thermostat and wallplate. Save package of screws, instructions, and receipt.
❑ Remove the cover from the old thermostat. If the cover does not snap off when pulled firmly from the bottom, check
for a screw or screws used to lock on the cover.
❑ Loosen the screw or screws holding the thermostat to the wallplate and lift the thermostat away.
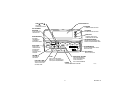
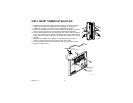
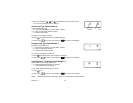
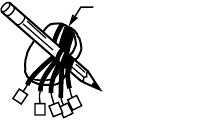
❑ Disconnect the wires from the old thermostat. As you disconnect each wire, attach
the enclosed labels with the old terminal designation. Wrap the wires around a
pencil as shown to keep them from falling back into the wall.
WIRES THROUGH
WALL OPENING
M5136