AT20, AT40, AT72D, AT87, AT88 AT TRANSFORMERS
3 69-1641EF
Mounting the AT72D Transformer.
Mount the transformer to meet the application. Use one
of the methods illustrated. The transformer can be
mounted in any position.
Foot Mounting.
1. Discard mounting plate.
2. Use screws or bolts through slots in mounting feet
to fasten transformer to mounting surface.
Plate Mounting.
The mounting plate allows the transformer to be mounted
on a 4 in. by 4 in. square or 4 in. octagonal junction box.
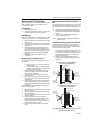
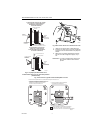
1. Remove the large center knockout in the mounting
plate (Fig. 19).
2. Take transformer in one hand and mounting plate
in the other hand. Keyhole slots on mounting plate
should be up.
3. Place large knockout in mounting plate over pri-
mary leadwires and end bell of transformer. The
small tab on the bottom center of the plate fits into
the slot in the transformer mounting feet (Fig. 20).
4. Insert the mounting screw through the holes as
illustrated.
5. Secure the plate to the transformer. Do not
overtighten.
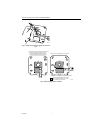
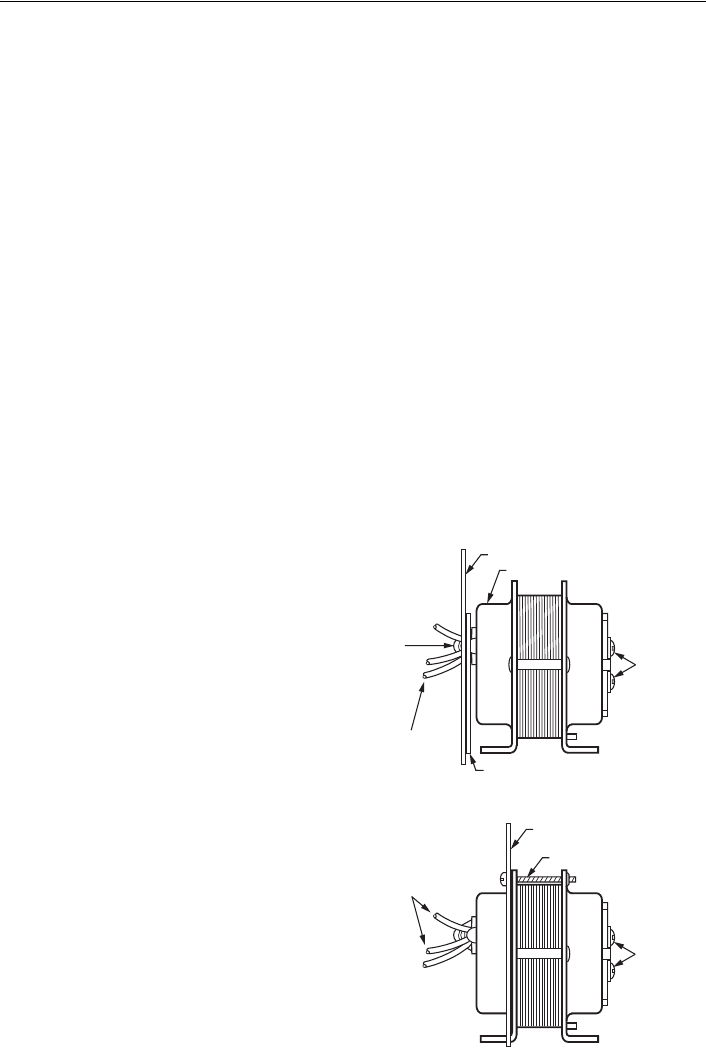
Mounting plate to transformer (Fig. 17).
The plate can be mounted to the transformer in one of
two positions:
a. at the clamp on primary end bell (transformer
all above plate);
b. at the laminations (transformer 3/4 above plate.
To mount the plate at clamp on primary end bell
(transformer all above plate):
1. Take mounting plate in one hand. Keep the key-
hole slots up and the raised portion of the large
center knockout toward you.
2. Insert the primary leadwires through the center
hole in the plate.
3. Fit the hole in the plate over the clamp attached to
the end bell. Clamp screw must be turned almost
completely out.
4. With the plate in place over the clamp, tighten the
screw securely against the rim of the round hold
See Fig. 18. Avoid damaging the leadwires with the
screwdriver.
To mount the plate at the laminations (transformer 3/4
above the mounting plate:
1. Remove the large center knockout in the mounting
plate (see Fig. 19).
2. Take the transformer in one hand. Clamp on end
bell should face you.
3. Take the mounting plate in the other hand. Keyhole
slots should be up.
4. Place large knockout in mounting plate over
primary leadwires and end bell. Small tab at the
bottom of the center of the plate fits into the
transformer mounting foot. Insert mounting screw
through holes as shown in Fig. 20.
5. Secure plate to transformer. Do not overtighten
screw.
Mounting Transformer and Plate to Electrical
Box
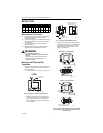
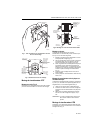
The mounting plate can be mounted to 4 in. x 4 in. boxes
with regular and irregular spaced mounting holes, to 2 in
by 4 in. boxes and to 4 in. octagonal boxes. See Fig. 21.
1. Use the screws supplied with the electrical box.
2. Place them through the proper mounting holes in
the plate and secure the transformer and plate to
the box.
3. Punch out appropriate knockouts for plate
mounting holes, if necessary.
NOTE: Transformer feet should always be outside of
the junction box.
Clamp Mounting Using Junction Box Knockout
The transformer can also be clamp mounted using a
junction box knockout, if desired. This mounting option
does not require the use of the mounting plate. To mount
the transformer within the knockout:
1. Insert the primary leadwires and clamp and screw
on transformer end bell through suitable 1/2 in. (13
mm) knockout in junction box. Clamp screw must
be turned almost completely out in order to get
clamp through knockout.
2. Tighten clamp screw securely against rim of
knockout. Avoid damaging the leadwires with the
screwdriver.
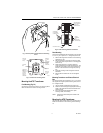
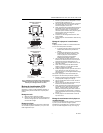
Fig. 4. Plate may be mounted to transformer in one of
two positions (AT72D shown).
PLATE MOUNTED AT CLAMP ON END BELL
(ALL ABOVE PLATE MOUNTING)
PLATE MOUNTED AT THE LAMINATIONS
(3/4 ABOVE PLATE MOUNTING)
END BELL
MOUNTING PLATE
RAISED PORTION OF LARGE CENTER KNOCKOUT
C
LAMP
S
CREW
A
ND
C
LAMP
MOUNTING SCREW
MOUNTING PLATE
SCREW
TERMINALS
FOR
SECONDARY
CONNECTION
S
SCREW
TERMINALS
FOR
SECONDARY
CONNECTION
S
L
EADWIRES
F
OR PRIMARY
C
ONNECTIONS
L
EADWIRES
F
OR PRIMARY
C
ONNECTIONS
M2065
6


