


Page 32
August 1, 2008
Heat & Glo · Tiara I B & Tiara II B · 7010-149M
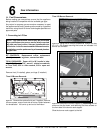
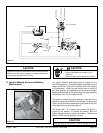
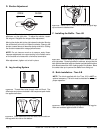
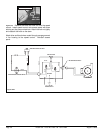
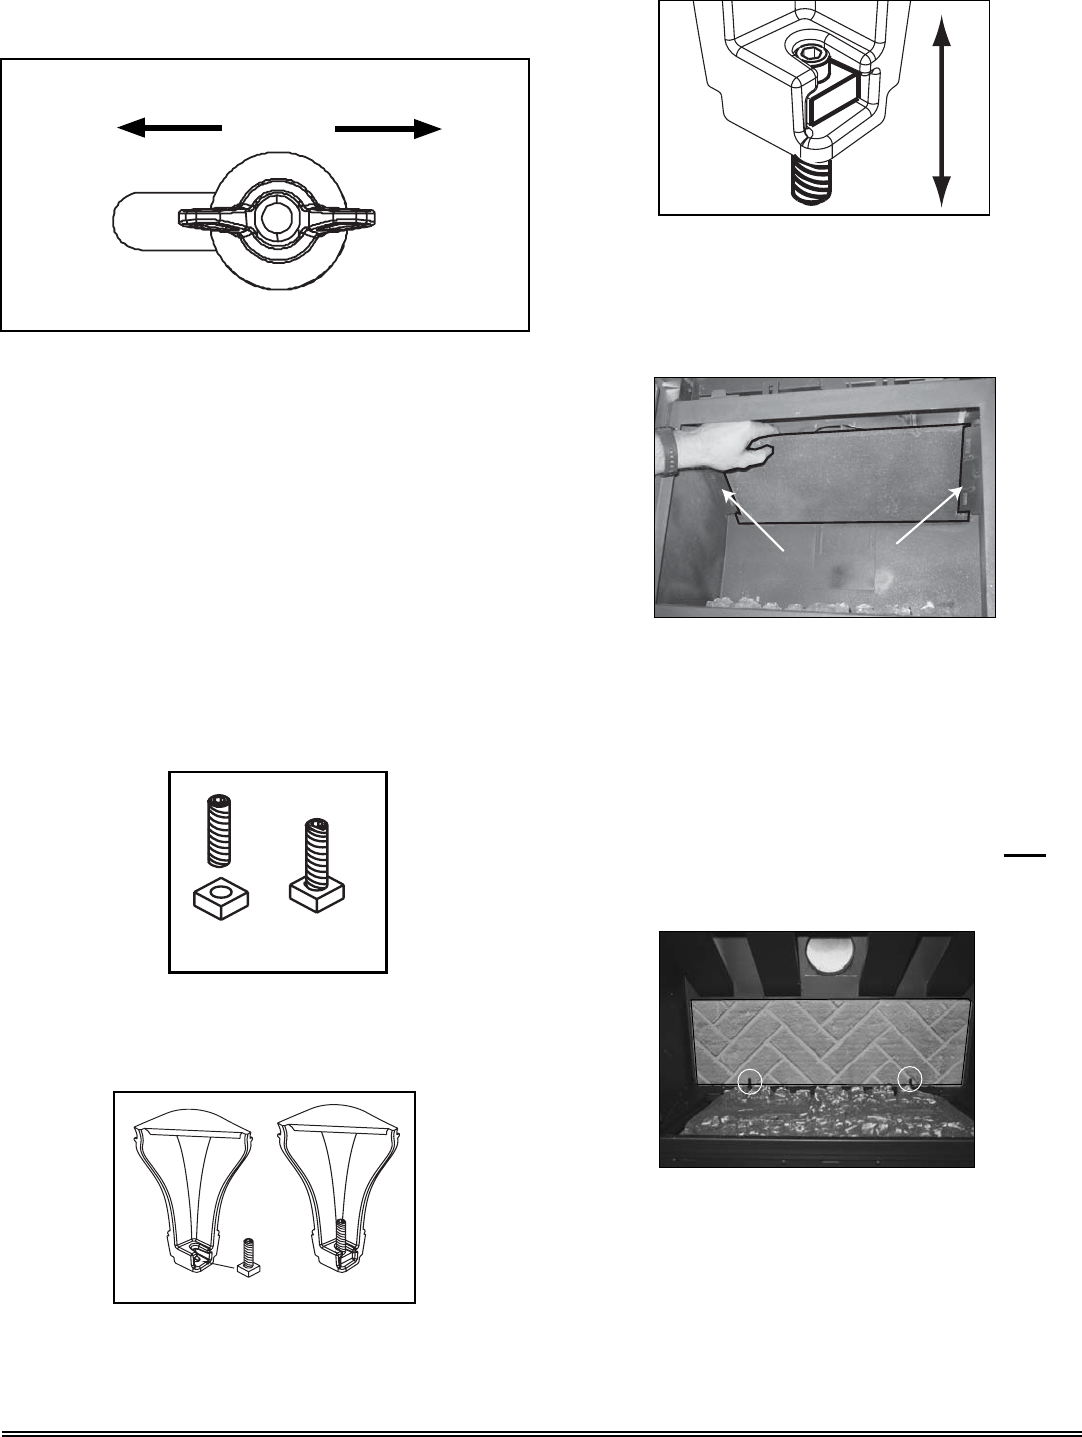
D. Shutter Adjustment
Figure 8.11 The shutter is located on the underside of the
appliance, on the right side. To adjust the shutter, loosen
the wingnut. Retighten the wingnut after adjustment.
Moving the shutter bolt to the right closes the shutter. Moving
the shutter bolt to the left, will open the shutter. Opening the
shutter causes flames to become shorter and blue. Closing
the shutter creates taller orange/yellow flames.
NOTE: Do not close so much as to cause a sooty flame.
Improper adjustment can cause sooting in the firebox and/or
on the outside of a house with a horizontal termination.
After adjustment, tighten nut to lock in place.
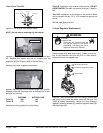
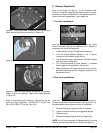
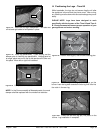
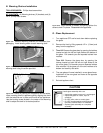
F. Installing the Baffl e - Tiara I-B
BAFFLE RETAINERS
BAFFLE
Figure 8.15 Position baffl e on top of baffl e retainers on left
and right sides. Centering baffl e on retainers, ensure that the
dark painted bevelled edge and darker painted baffl e bottom
side faces toward the front viewing area of the fi rebox. Bend
the center tabs up to prevent the baffl e from sliding out.
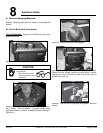
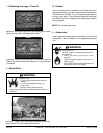
E. Leg Leveling System
Figure 8.12 Thread Allen bolts through nuts until fl ush. The
Allen bolts and nuts are included in the component pack inside
the appliance fi rebox.
Figure 8.13 Slide assembled nuts and bolts into the slots on
the legs with the nuts on the bottom.
Figure 8.14 Use a 5/32 in. (4mm) Allen wrench to adjust legs
up and down to desired level.
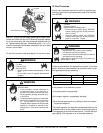
NOTE: The brick supplied with the Tiara II-B is NOT an
optional accessory. The brick must be installed for safe and
proper operation.
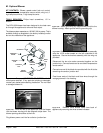
G. Brick Installation - Tiara II-B
REAR PANEL
Figure 8.16 Install rear panel by placing it behind the log pins
fl ush and centered against back of fi rebox.
OPEN
CLOSE