Hearth & Home Technologies Inc. 800 W.
Jefferson, Lake City, MN 55041.
CRESTFIRE SERIES ELECTRIC FIREPLACE
14
10/03
4030-239 Rev G
J. MAINTENANCE INSTRUCTIONS
1. Cleaning the Firebox and Control Compartment
Keep the firebox, control compartment and heater system clean. Clean by brushing and vacuuming at least once a year. To access
the control compartment, follow the instructions for replacing the light bulbs. Follow the heater maintenance instructions to access
the heater system. Failure to do this may shorten the fans life. Always disconnect power before performing any cleaning or
maintenance.
2. Cleaning the Glass Doors and Back Glass
The glass is cleaned in the factory during the assembly process. During shipment, installation, handling, etc., the glass surface
may collect dust particles. These can be removed by buffing lightly with a clean dry cloth.
To remove fingerprints or other marks, the glass can be cleaned with a damp cloth using a good quality household glass cleaner.
The glass should be completely dried with a lint free cloth or paper towel.
In the event of glass breakage, vacuum all remaining glass pieces with a shop vac. DO NOT VACUUM IF PIECES ARE HOT!
Replace glass with only a glass panel ordered direct or through your local distributor. Never use substitute material. Only fully
tempered soda lime safety glass may be used on this appliance.
WARNING!
To avoid accidental burning of the skin, allow at
least five minutes for the light bulbs to cool before
touching them.
3. Replacing the Light Bulbs
The light bulbs will need to be replaced when the flame
and/or ember bed is dark on one side. Replace the
bulbs with 75 watt halogen bulbs with mini-
candelabra base. Do not exceed 75 watts per bulb.
Light bulbs can be purchased at local hardware, lighting
stores, online or by phone. To order online, log onto
www.lite-house.com or call 1-800-838-0977. Sylvania
model 75Q/CL/MC/RP or Satco model S3157 are
recommended.
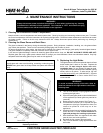
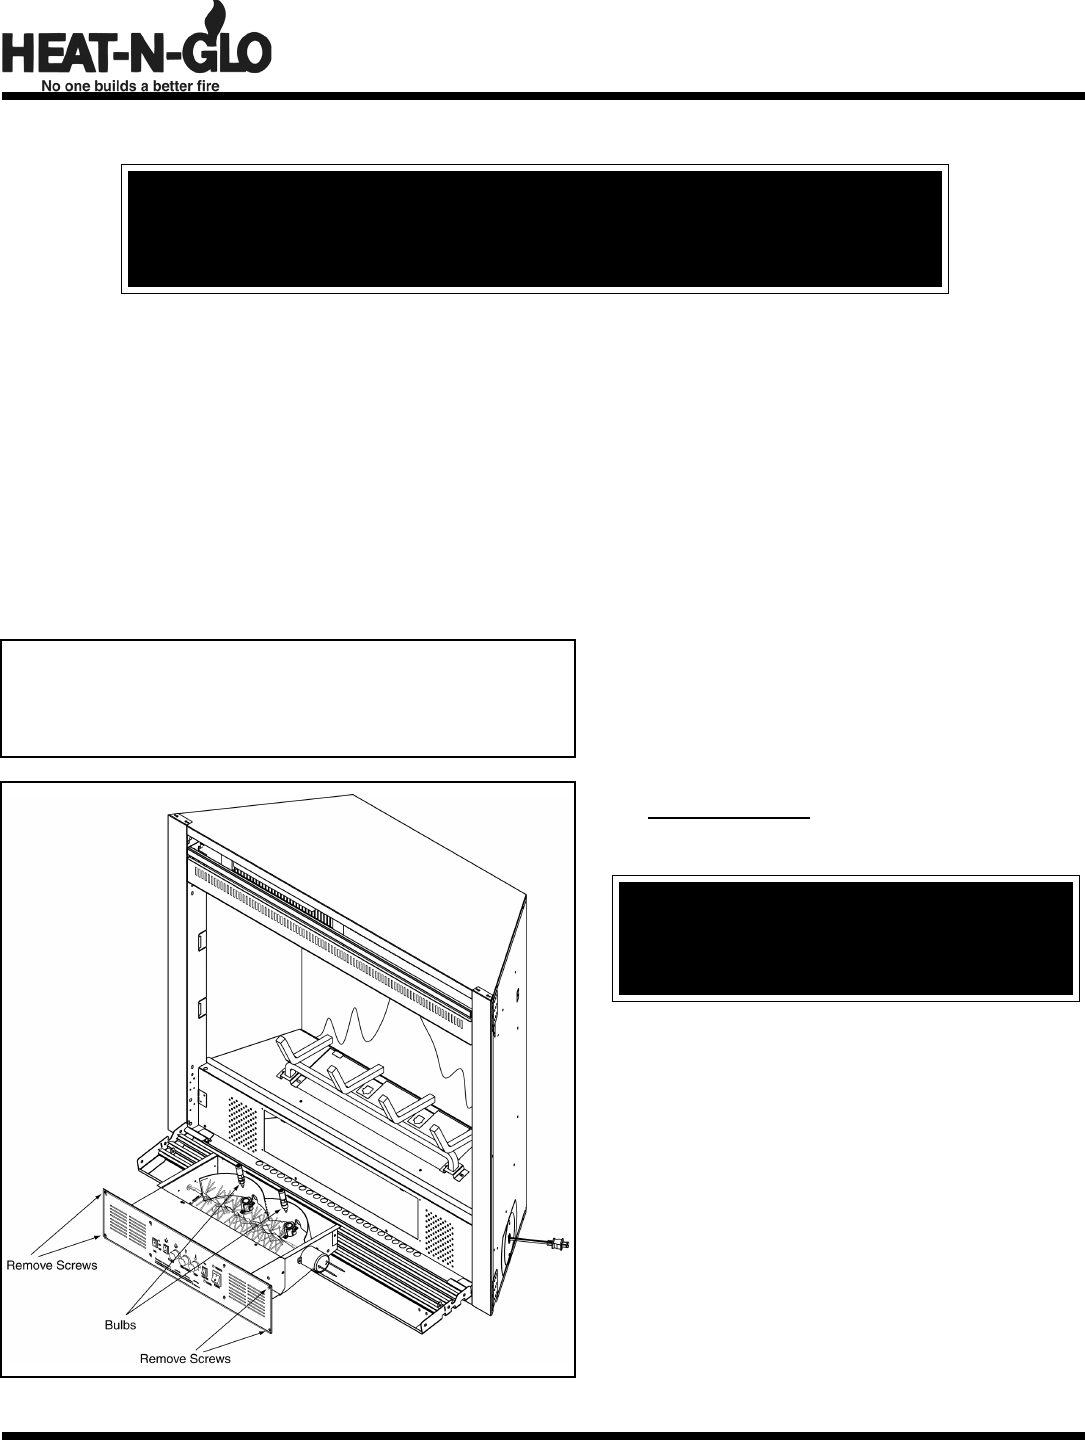
Figure 12
Replacing the Bulbs
Safety Note:
Handle glass with care to avoid striking, scratching or slamming shut.
NEVER clean glass when hot. Keep children and pets a safe distance
away.
WARNING!
Always disconnect power and allow the appliance to cool before performing any cleaning,
maintenance or relocation of this appliance. Turn controls to OFF and remove the plug
from the outlet or turn off the circuit breaker to the appliance.
a. Turn off circuit breaker or unplug appliance before
replacing the light bulbs.
b. Open the lower grille panel to view the dashboard
on the appliance (the lower grille may need to be
removed).
c. Remove the four outer screws. See Figure 12.
d. Pull dashboard towards you to expose the light
compartment (the light compartment does not
need to be pulled all of the way out of the
appliance).
e. Carefully remove burned out bulb from light socket.
Place new bulb in socket. Follow directions on
light bulb package for handling requirements.
f. Slide dashboard back into appliance and make
sure all wires are inside appliance.
g. Reinstall the four screws removed earlier.
h. Turn on circuit breaker or plug appliance back into
wall outlet.


