Page 5SKU 47906 For technical questions, please call 1-800-444-3353.
Operation
1. Make sure the intake pipe is fully submerged before operating the pump.
2. Gently insert a screwdriver into the motor shaft and make sure the shaft turns freely.
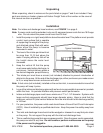
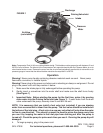
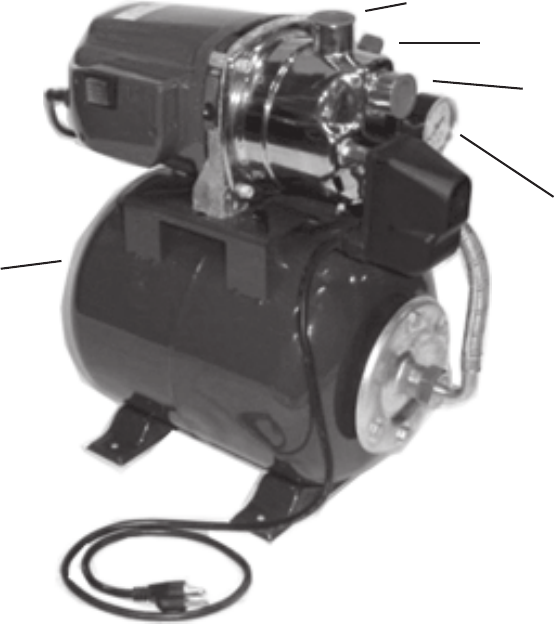
(See Figure 1)
3. Important Note: Before starting the pump for the first time, prime it by pouring
clean water into the Priming Valve Inlet (see Figure 1). If water leaks from the drain
valve underneath the pump, securely close it and refill the unit.
FIGURE 1
Discharge
Intake
Pressure
Meter
Warning! Never pump liquids containing abrasive materials such as sand. Never pump
flammable, corrosive, or volatile liquids.
Warning! Never plug in the power cord when wet or standing on damp or wet ground. Do not
plug in the power cord until step number 4 below.
Priming Valve Inlet
Note: Compression Tank (#1A) has a rubber bladder inside. This bladder must be pumped up with between 21 and
29 PSI of air at all times. On the end of the Compression Tank opposite the side with the Pressure Meter, is an air
valve located under a cover. Remove the cover over the air valve and periodically monitor this air valve with an air
pressure gauge to insure that the rubber bladder maintains the required 21 to 29 PSI.
Air Valve
(not visible)
4. To begin pumping, plug in the power cord.
NOTE: It is necessary that you install a foot valve (not included), if you are drawing
water from a source that is lower than the pump. The foot valve should be installed on
the bottom of the inlet pipe. A foot valve is a one way valve that will only allow the water
to flow in one direction. This should prevent the need to prime the pump every time
you use it by keeping the water in the inlet pipe from draining out after the pump is
turned off. Check the pump for prime each time you use it. Running the pump dry will
damage it.
REV 11/05, 09/06


