


SKU 08825 For technical questions, please call 1-800-444-3353. PAGE 4
CAR ADAPTER
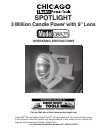
1. Your Spotlight comes with a Car Adapter (20, 21). To operate your Car Adapter, remove the
Rubber Cover (5) and insert the narrow end of the Car Adapter (21) into the 12 V Inlet (17)
underneath.
Figure A
. The other end (20) will fit into your car’s cigarette lighter socket.
See
Figure C.
2. The Spotlight is ready to be used while plugged into the Car Adapter. The Car Adapter will not
charge the Spotlight’s battery, however. While using the Car Adapter, take care so that the
car’s battery does not get discharged.
OPERATION
To assist you with operating your Spotlight, please refer to the Operational Figures as well as
the Parts List and Assembly Diagram.
CHARGING INSTRUCTIONS
Actual charging of the Spotlight Battery is required before using the Spotlight.
To
recharge
the Battery follow the directions below.
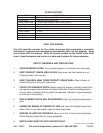
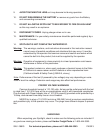
1. To charge the Battery (3), your Spotlight comes with an AC/DC Adapter (19). Lift the Waterproof
Stopper (7) on top of Spotlight. Insert the round end of the AC/DC Adapter (19) into the AC/DC
Socket (13).
Plug the prong end of the AC/DC Adapter (19) into an electrical outlet. The red
charging light will turn on while the battery is being recharged.
See Figure A
, B.
2. Charging time will take from 10 to approximately 12 hours. The red light will shut off automatically
when the battery is fully charged. After the battery is charged for the required time, unplug the
AC/DC Adapter from the wall socket and the AC/DC Socket on the Spotlight. Never attempt to
turn on the Spotlight while it is being recharged. Once recharged, with the AC/DC Adapter
removed, the Spotlight is ready to be used. A fully charged Spotlight will provide approximately
a 20 minute strong beam or 50 minute weaker beam.
REV 06/03; 09/03; 08/04; 10/04; 01/07
20
21
Figure C
19
Figure A
7, 13
6, 14
19
Figure B
5
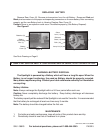
Note: This unit is equipped with an automatic shutoff. If the
Battery’s power is running low, the unit will automati-
cally stop operating to protect the battery. Charge the
battery immediately.
Note: After each use of the spotlight,
always fully recharge the battery.
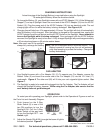
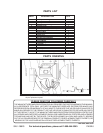
Figure D
22a
22b
Switch
2. Adjust the Stands (22a & 22b) to angle the beam of light to
the desired position.
Figure D.
1. Push forward on the 3-Way
Slider Switch (6) to one of the
two ON positions to turn the
Spotlight ON. Pull the 3-Way
Slider Switch all the way back
to turn the Spotlight OFF - see
Switch
, right.