


21
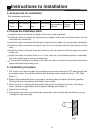
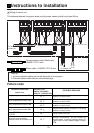
1. Indoor unit communication addresses setting
CAUTION! FAIL TO DO THIS, THE UNIT WILL NOT WORK.
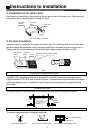
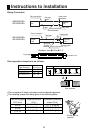
(2). Address setting procedure when using the DIP switches SW01 and SW03.
A. The DIP switches SW01 and SW03 are on the indoor unit PCB.
B. Change the position of DIP 7 of SW01 from OFF to ON, if fail to do this, the addresses set by
SW03 will not work.
C. Use SW03 to set the addresses as following (DO NOT CHANGE OTHER DIP SWITCHES):
(1).Please note that the address must be set as following:
1 2 3 4 5 6 7 8
ON
OFF
SW01 SW03
1 2 3 4 5 6 7 8
ON
OFF
ON
OFF
1 2 3 4 5 6 7 8
ON
OFF
1 2 3 4 5 6 7 8
ON
OFF
1 2 3 4 5 6 7 8
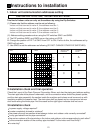
INDOOR UNIT
ADDRESS
1
2
3
4
OUTDOOR
VALVE
A
B
C
D
This kind of indoor units can only set the address by using the Dip Switches.
Indoor unit that connect to valve A, the address must be 1;
Indoor unit that connect to valve B, the address must be 2;
Indoor unit that connect to valve C, the address must be 3;
Indoor unit that connect to valve D, the address must be 4;
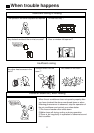
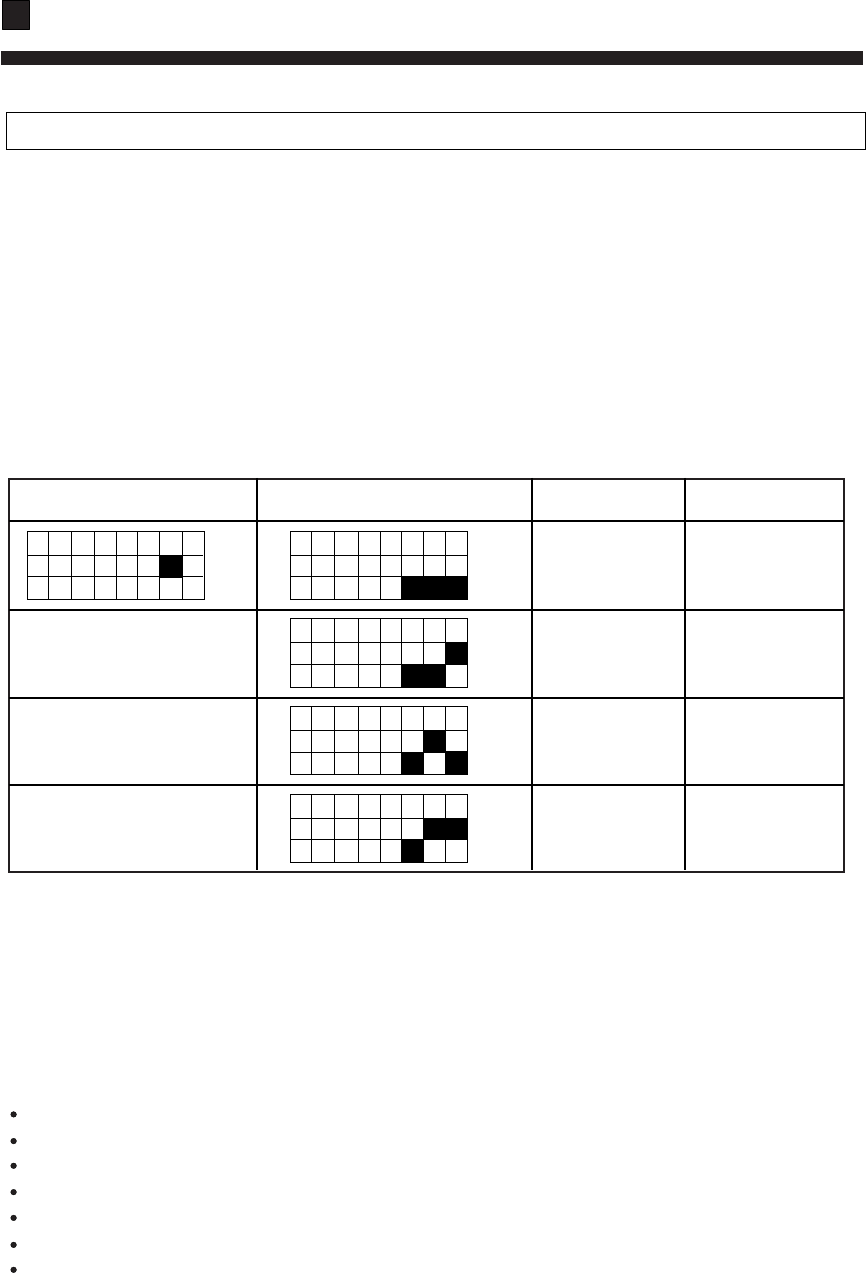
2.Installation check and trial operation
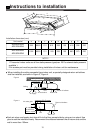
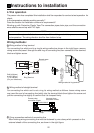
Check the Layout of the Drain Pipe and Connection Wires, and also the piping and address setting.
The drain pipe should be placed underneath, and the connection wires should be placed upside;
and the drain pipe especially the section inside the machine and indoors must be wound up with
insulating material to preserve heat. The drain pipe shall be sloped and no concave and convex
shall occur along the whole pipe. And the cases as the right figure indicates shall not occur.
3.Installation check
Is power supply voltage required?
Is water completely drained to outdoors?
Are power wire and connection wires between indoor and outdoor units correctly connected?
Is any gas leaked from the pipe connectors?
Are series numbers of the terminals on the indoor and outdoor units corresponding to each other?
Is the connection section of the auxiliary pipe insulated? Is the indoor unit fixed firmly?
Is noise big?
Instructions to installation