4
7
10
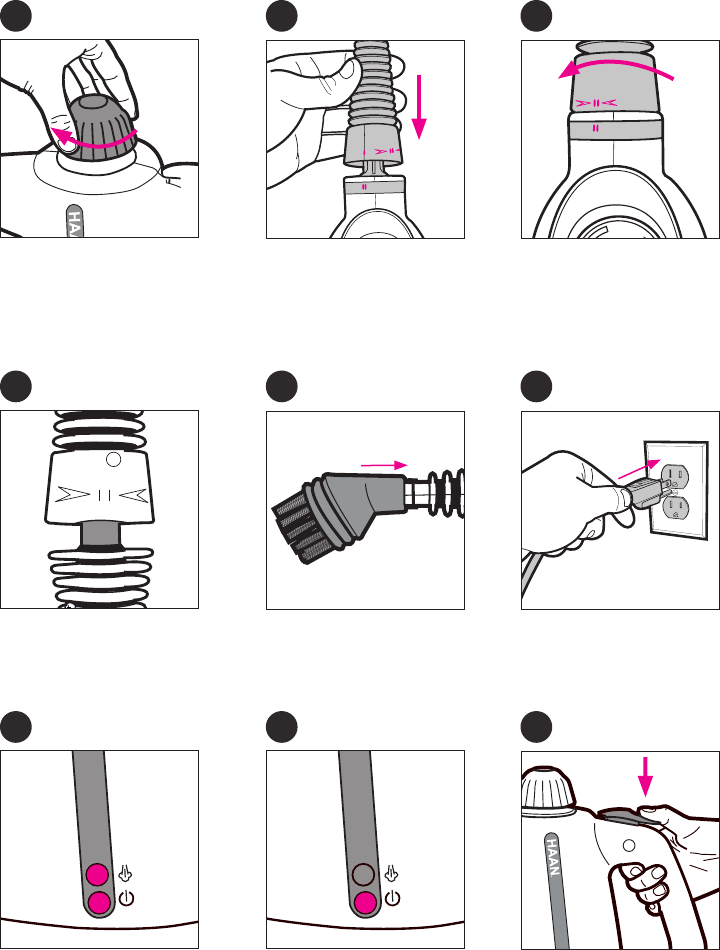
Turn the Pressure Locking
Safety Cap clockwise to
tighten. You will need to press
all the way down and turn to
lock. The cap will spin freely
when properly tightened.
Steps 5-6 can be repeated to
add the Concentrator Nozzle
or Garment/Surface Attach-
ment onto the end of the
Flexible Extension Hose.
When plugged in, both the
Power Indicator and Steam
Indicator will light up. Wait 2-3
minutes for unit to heat up.
5
8
11
NOTE: During extended periods of constant steaming the unit will need to occasion-
ally re-pressurize. While building up pressure, the Steam Indicator will turn on. When
the unit has re-pressurized the Steam Indicator will turn off.
NOTE: A slight odor may occur when using the unit for the first time.
To attach the Concentrator Noz-
zle, Flexible Extension Hose or
Garment/Surface Attachment,
line up the indicator line “I” on
the accessory attachment with
the double indicator line “II” on
the handheld unit.
To attach the brushes and
angled nozzle, just push
onto the end of the handheld
unit, Concentrator Nozzle or
Extended Flexible Hose.
The Steam Indicator will turn off
when the unit is ready to use.
6
9
12
Press accessory onto the
Steam Nozzle and rotate
so the two double lines “II”
match. This is the locked
position.
With the desired acces-
sory secured to the unit, turn
unit on by plugging into a
grounded electrical outlet.
Press the Easy Control Trigger
2-3 times before steam clean-
ing to release any residual
water built up in the nozzle.


