


308655J 9
Air Motor and Throat Service
Before You Start
D Be sure you have all necessary parts on hand.
Repair Kit 238751 includes repair parts for the air
motor and pump. Use all parts in the kit for the
best results. Parts included in the kit are marked
with one asterisk, for example (19*), in the text and
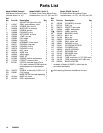
drawings. See the Parts List on page 14.
D Two accessory tools should be used: Padded
Pliers, 207579, are used to grip the trip rod without
damaging its surface, and a 0.125-in. (3.18 mm)
Gauge, 171818, is used to assure the proper
clearance between the poppets and seat of the
piston.
Disassembly
1. Flush the pump.
WARNING
To reduce the risk of serious injury whenever you
are instructed to relieve pressure, always follow the
Pressure Relief Procedure on page 7.
2. Relieve the pressure.
3. Disconnect the hoses, remove the pump from its
mounting, and clamp the air motor base (28) in a
vise horizontally by closing the vise jaws on the
flange.
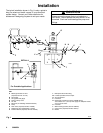
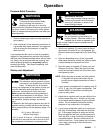
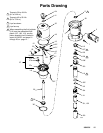
4. Use a strap wrench on the displacement pump
cylinder (110) to screw it out of the air motor base
(28). See Fig. 3.
5. Remove the piston/valve seat (109) from the
displacement rod (29) with wrenches or with the
vise and a wrench.
6. Remove the piston ball (103), seal (107*), and
seal retainer washer (113).
7. Remove the air motor base from the vise, and
place the displacement rod (29) flats in the vise
with the air motor up.
8. Loosen the lift ring (24). Pull up the lift ring, grip
the trip rod (31) with the padded pliers, and screw
the lift ring off of the rod.
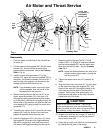
CAUTION
Do not damage the plated surface of the trip rod
(31). Damaging the surface of the trip rod can
result in erratic air motor operation. Use the
special padded pliers, 207579, to grasp the rod.
9. Remove the eight screws (3) that hold the cylinder
(30) to the base (28). Carefully pull the cylinder
straight up off of the piston assembly (27).
CAUTION
To avoid damaging the cylinder wall, lift the cylinder
straight up off of the piston. Never tilt the cylinder
as it is being removed.
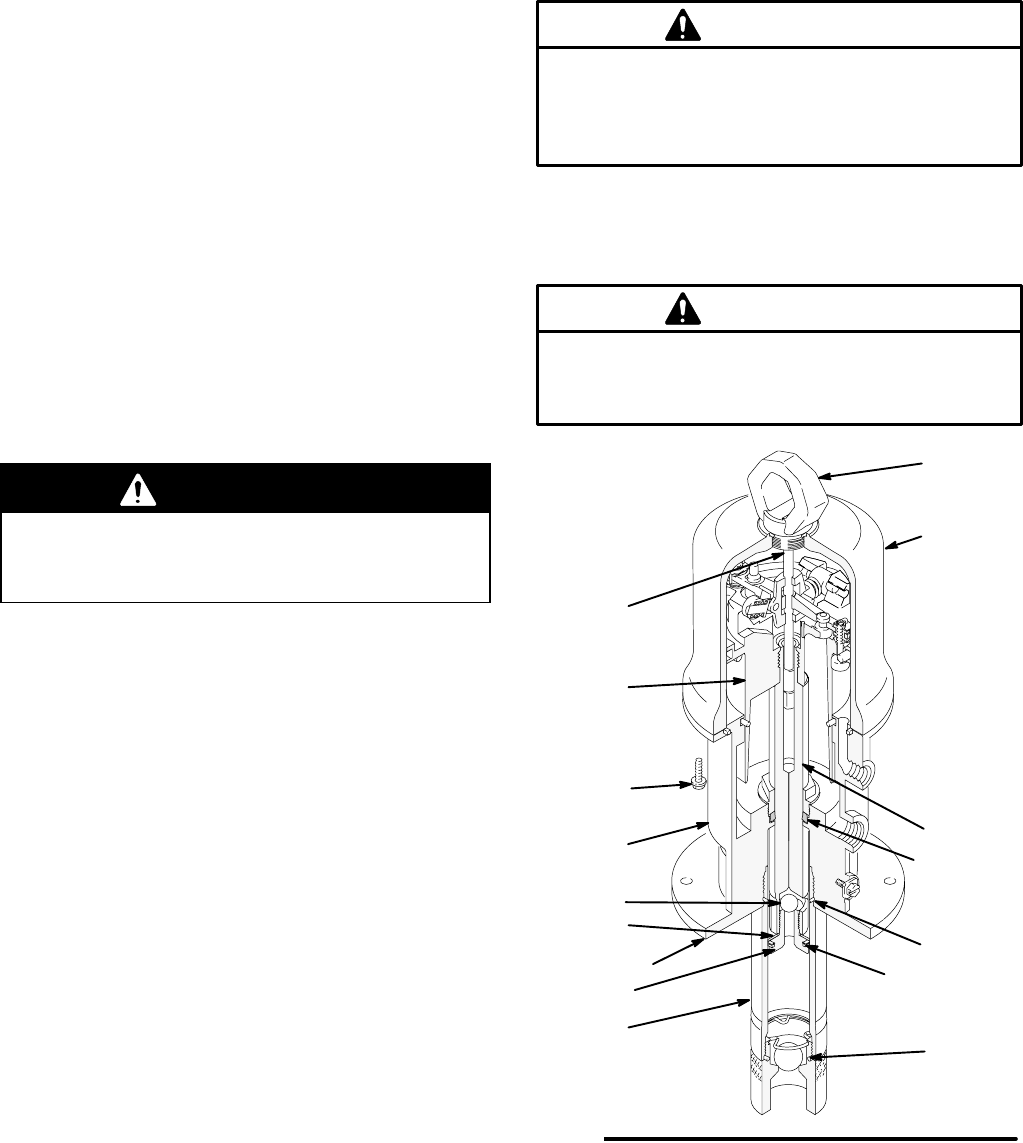
TI1072
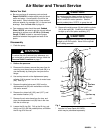
Fig. 3
28
110
29
31
27
24
30
3
113
107*
lips face up
109
103
flange
2*
lips face
down
108*
105*
* Included in Pump Repair Kit 238751,
which may be purchased separately.