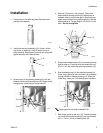
Installation
6 309911C
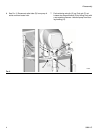
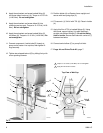
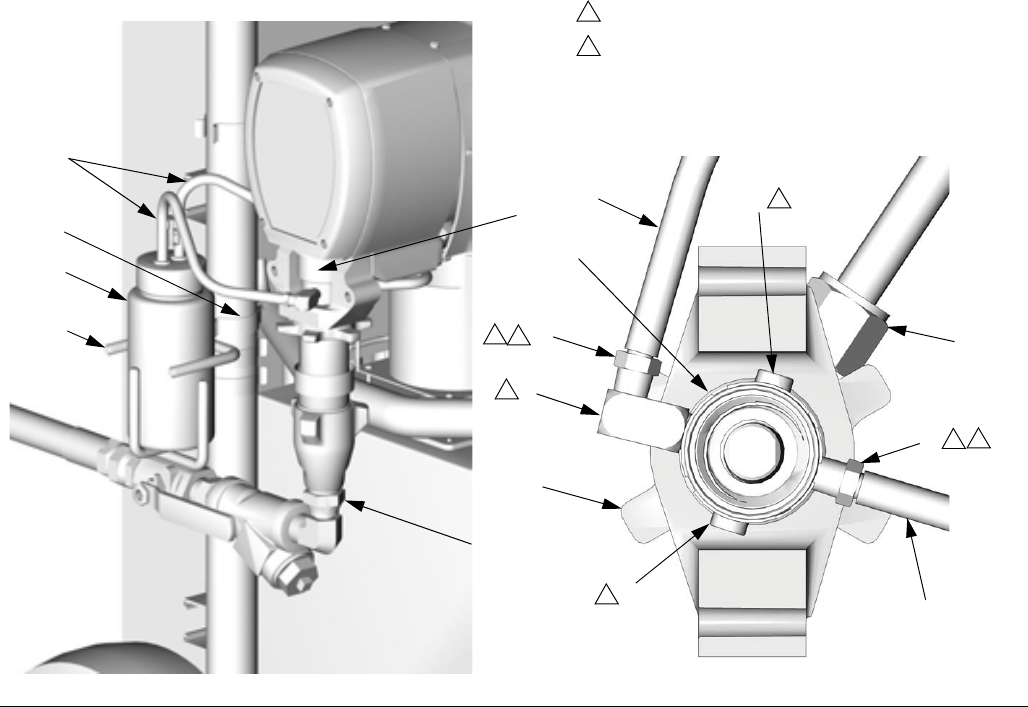
8. Apply thread sealant and screw barbed fitting (2)
into motor side of wet-cup (10). Torque to 10-15 ft-lb
(14-20 N•m). Do not overtighten.
9. Apply thread sealant and screw elbow (8) into
remaining wet-cup port. Torque to 10-15 ft-lb (14-20
N•m). Do not overtighten.
10. Apply thread sealant and screw barbed fitting (2)
into elbow (8). Torque to 10-15 ft-lb (14-20 N•m). Do
not overtighten.
11. Connect component A outlet tube (D) loosely at
pump and at heater. Line up tube, then tighten fit-
tings securely.
12. Tighten star-shaped locknut (G) by hitting firmly with
a non-sparking hammer.
13. Position holder (4) on Reactor frame upright and
secure with two spring clips (5).
14. Fill reservoir (1) 3/4 full with TSL (6). Place in holder
(4).
15. Apply thin film of TSL to barbed fittings (2). Using
two hands, support tubing (1a) while pushing it
straight onto barbed fittings (2). Do not let tubing
kink or buckle. Secure each tube with a wire tie (7)
between two barbs.
16. Connect swivel elbow (C) to pump fluid inlet.
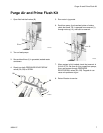
17. Purge Air and Prime Flush Kit, page 7.
F
IG. 3
TI4331aTI4173a
Top View of Wet-Cup
10
1a
3
D
3
G
2
Torque to 10-15 ft-lb (14-20 N•m). Do not overtighten.
Apply thin film of TSL to barbs.
1
2
1a
2
8
1a
9
C
5
1
4
2
1
1
1
1
1
2


