Page 13
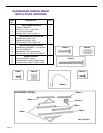
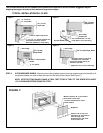
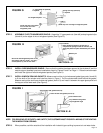
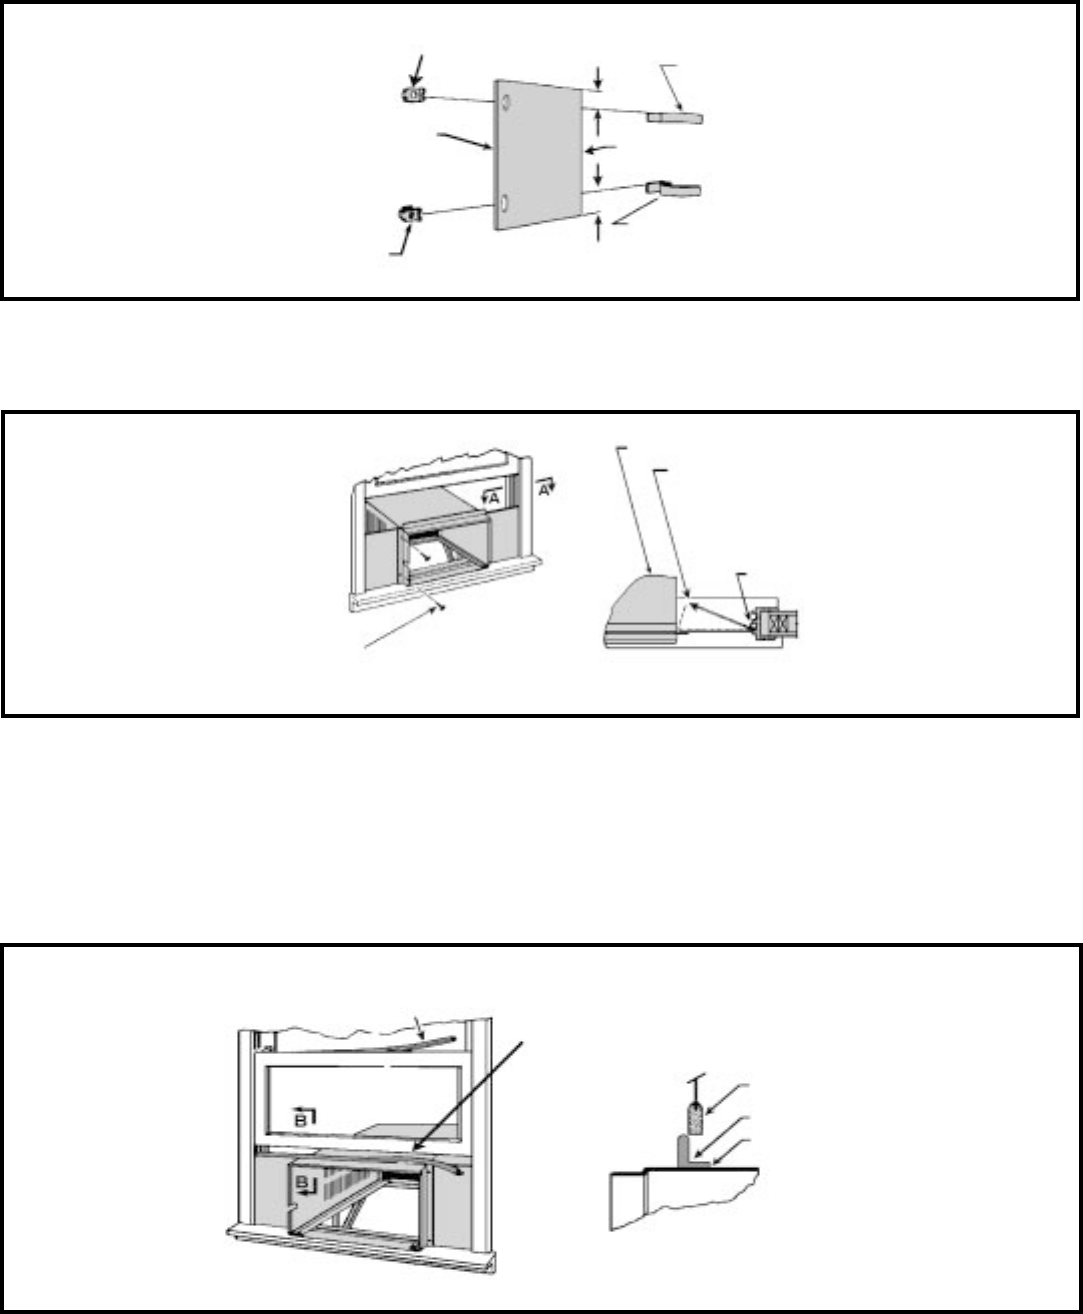
FIGURE G
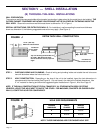
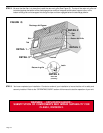
FIGURE H
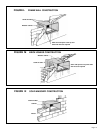
FIGURE I
STEP 6. INSTALL SIDE WINGBOARD PANELS: Be sure that the cabinet has been secured to the window sill and the
outside support brackets have been installed as shown in Figures D and E on Page 11. Raise the window sash
and install the right and left side wingboard panels (See Figure H).
STEP 7. INSTALL WINDOW SEALING GASKETS: Measure and cut the vinyl window seal gasket (grey color, Item #12)
to fit the width of the window and install as shown in Figure I. Pull the window sash down behind the gasket.
Measure and cut the dark foam window seal gasket (Item #13) and install it between the upper glass panel and
the top part of the lower sash (See Figure I).
STEP 5. ASSEMBLE CLIPS TO WINGBOARD PANELS: Assemble "J" type speed nuts (Item #9) and spring steel clips
(Item #10) to the edges of the cut wingboard panels (See Figure G).
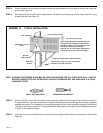
NOTE: FOR REASONS OF SECURITY AND SAFETY, THE CUSTOMER MUST PROVIDE A MEANS OF PREVENTING
THE WINDOW FROM OPENING.
STEP 8. When possible, caulk the outside of the installation with industrial type caulking to prevent air and water leaks.
"J" type speed nut (item #9)
2 required
Spring steel clip (item #10)
2 required
Cut edge
Slide clip over cut edge of wingboard panel.
Center the hole in the speed
nut over the slot in the
wingboard panel
Cut wingboard panel
Top of cabinet
Place wingboard panel in window jam to
compress the springs inside the runners, and
swing the panel into place indicated by the dotted
line.
Window jam
Secure the side wingboard panels to the
side angles with four (4) #8 x 1/2" long
screws (Item #11), two on each side.
SECTION A - A
SECTION B - B
Lower window sash
Vinyl window seal gasket
Top wingboard angle
Vinyl window seal gasket Item #12)
Foam window seal gasket (Item # 13)


