


53
Ensure that the circuit breaker(s) or fuse(s) and supply circuit wire
size have been sized correctly. If the unit was supplied with a power
supply cord, insure that it is stored properly.
Ensure that the entire installation is in compliance with all applicable
national and local codes and ordinances having jurisdiction.
Secure components and accessories, such as a decorative front
cover.
Start the unit and check for proper operation of all components in
each mode of operation.
Instruct the owner or operator of the units operation, and the
manufacturer's Routine Maintenance.
NOTE: A log for recording the dates of maintenance and/or service is
recommended.
Present the owner or operator of the equipment with the name,
address and telephone number of the Authorized Friedrich Warranty
Service Company in the area for future reference if necessary.
NOTE: This is a warm weather appliance
The air conditioner is designed to cool in warm weather when the outside
temperature is above 60° F (15.6° C) and below 115° F (46.1° C), so it won't
cool a room if it is already cool outside. If you want to cool a room in the
spring or fall, select the FAN ONLY
mode and set the Fresh Air/Exhaust
air control to Fresh Air. This will bring in a supply of cooler outside air.
Condensation is normal
Air conditioners actually pump the heat and humidity from your room to the
outside. Humidity becomes water, and your air conditioner will use most of
the water to keep the outside coil cool. If there is excessive humidity, there
may be excess water that will drip outside. This is normal operation.
Frosting
This usually occurs because of insuffi cient airfl ow across the coils, a dirty
fi lter, cool damp weather, or all of these. Set the SYSTEM mode to FAN
ONLY
and the frost will disappear. Setting the thermostat a little warmer
will probably prevent the frosting from recurring.
Noises
All air conditioners make some noise. Friedrich units are designed to operate
as quietly as possible. An air conditioner mounted in a wall is quieter than
one mounted in a window. It is important to ensure that the chassis seal
gasket is properly installed (refer to installation instructions).
Heat pumps operate differently
If your unit is a "Y", or heat pump model, there are some things that you
will want to be aware of. Some functions of a heat pump differ from your
unit when it is used for heating:
It is normal for ice to form on the outdoor coil of the heat pump. 1.
Moisture in the outside air, passing over the coil when very cold,
will form ice.
If the outdoor temperature drops below 37° F (3° C), your heat 2.
pump will automatically turn on the electric resistance heat. When
the temperature rises to 40° F (4° C), the compressor will resume
the heat pump operation. If your unit is a 115 volt model (YS10),
it is designed for use in warmer climates and does not have an
electrical heat feature, and will not provide adequate heat below
37° F (2.8° C).
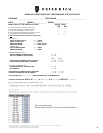
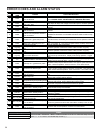
After Maintenance/Repair
Start-up Checklist and Notes
Inspect and ensure that all components and accessories have been
installed properly and that they have not been damaged during the
installation progress.
Check the condensate water drain(s) to ensure that they are adequate
for the removal of condensate water, and that they meet the approval
of the end user.
Ensure that all installation instructions concerning clearances around
the unit have been adhered to. Check to ensure that the unit air fi lter,
indoor coil, and outdoor coil are free from any obstructions.
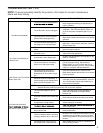
ROUTINE MAINTENANCE (Continued)
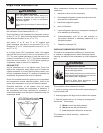
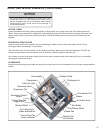
FRR010
1. USE HAND TOOLS WHEN INSTALLING AND
REMOVING FRONT PANEL.
DO NOT OVERTIGHTEN SCREWS.
2. DISCONNECT POWER AND FOLLOW ALL
LABELED WARNINGS WHEN FRONT PANEL
IS REMOVED.
USE HAND TOOLS
DO NOT OVER TIGHTEN
Figure
Figure
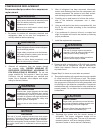
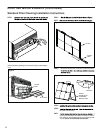
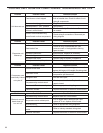
CONTROL PANEL BATTERY CHANGE
PROCEDURE
Remove the grille, by loosening four (4) captive screws (See Figure 1).
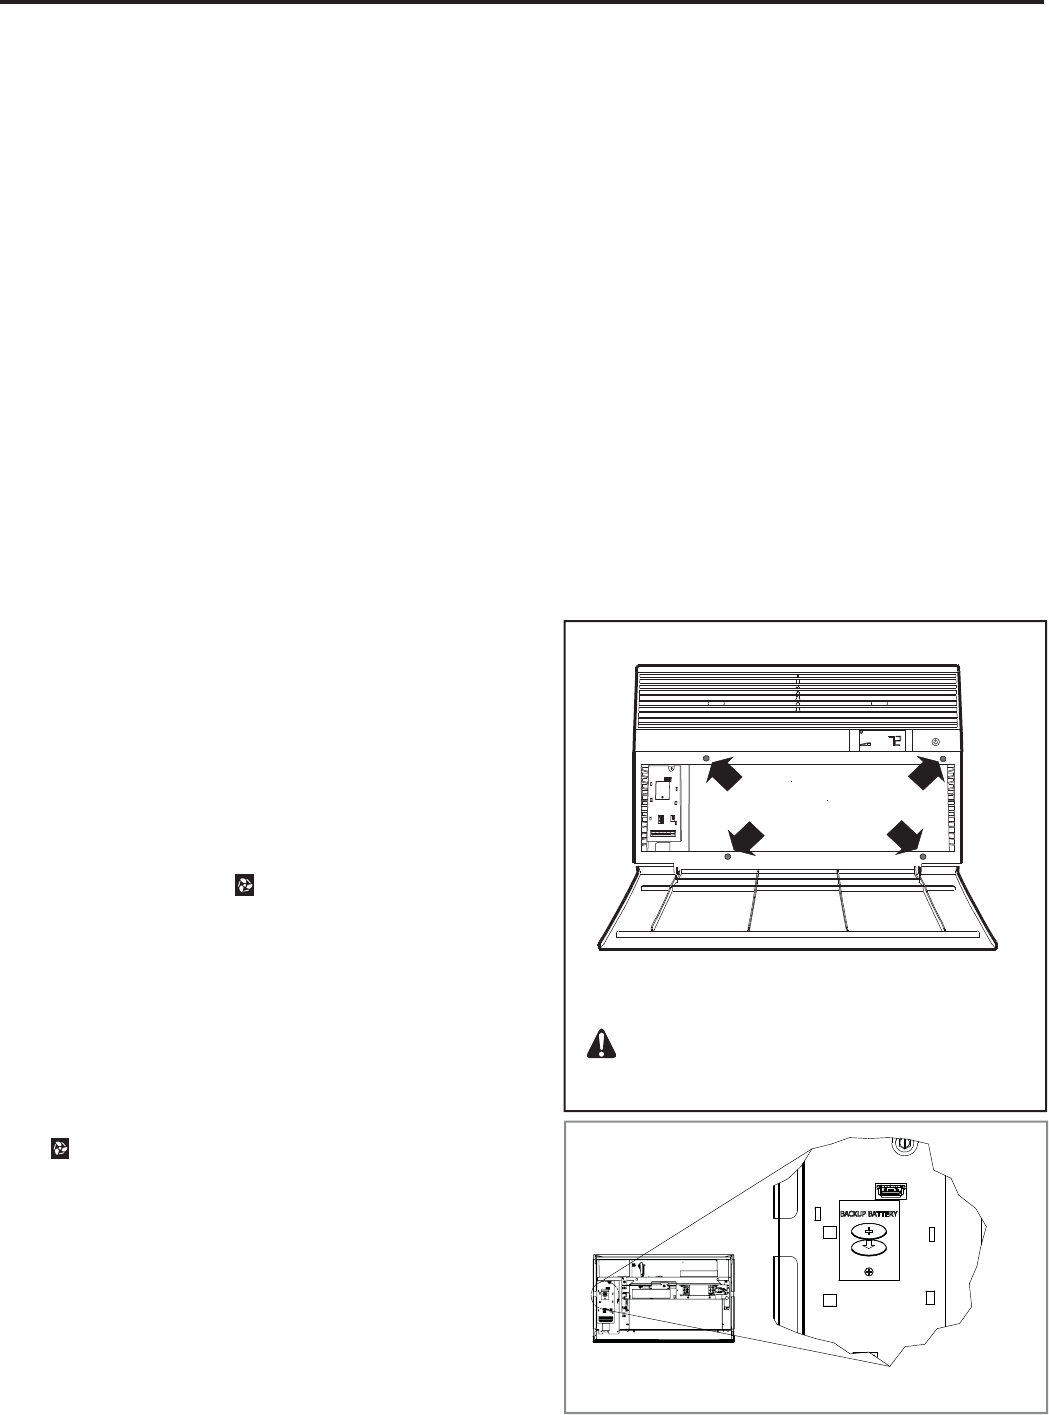
Remove one (1) screw on the battery retaining door (See Figure 2). Remove
and replace the battery (CR2450). Reinstall the battery retaining door. Align
the grille guide pins then tighten the four (4) captive screws. Before closing
the grille panel door, check the fi lter. Clean or replace it as necessary.
Battery type: Lithium, 3 Volts, #CR2450
Figure 1
Figure 2