


20
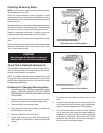
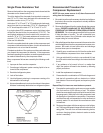
Touch Test in Heating/Cooling Cycle
The only defi nite indications that the slide is in the mid-po-
sition is if all three tubes on the suction side of the valve are
hot after a few minutes of running time.
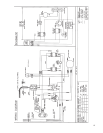
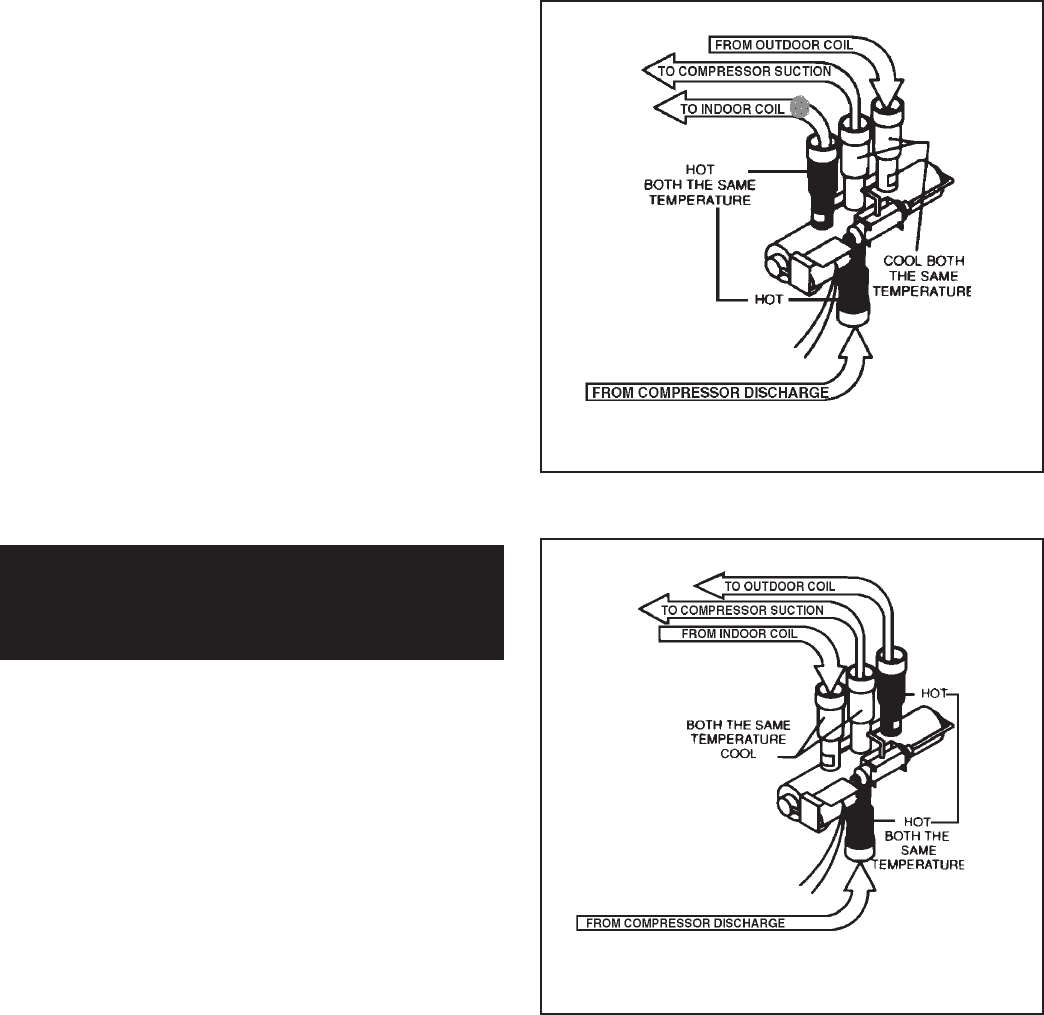
NOTE: A condition other than those illustrated above, and
on page 19, indicate that the reversing valve is not shifting
properly. Both tubes shown as hot or cool must be the same
corresponding tempera ture.
Procedure For Changing Reversing Valve
1. Install Process Tubes. Recover refrigerant from sealed
system. PROPER HANDLING OF RECOVERED
REFRIGERANT ACCORDING TO EPA REGULATIONS
IS REQUIRED.
2. Remove solenoid coil from reversing valve. If coil is to
be reused, protect from heat while changing valve.
3. Unbraze all lines from reversing valve.
4. Clean all excess braze from all tubing so that they will
slip into fi ttings on new valve.
5. Remove solenoid coil from new valve.
6. Protect new valve body from heat while brazing with
plastic heat sink (Thermo Trap) or wrap valve body with
wet rag.
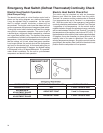
Checking Reversing Valve
NOTE: You must have normal operating pressures before
the reversing valve can shift.
Check for proper refrigerant charge. Sluggish or sticky
reversing valves can sometimes be remedied by reversing
the valve several time with the airfl ow restricted to increase
system pressure.
To raise head pressure during the cooling season the airfl ow
through the outdoor coil can be restricted . During heating
the indoor air can be restricted by blocking the return air.
Dented or damaged valve body or capillary tubes can
prevent the main slide in the valve body from shifting.
If you determine this is the problem, replace the reversing
valve.
After all of the previous inspections and checks have been
made and determined correct, then perform the “Touch
Test” on the reversing valve.
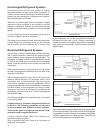
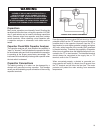
Reversing Valve in Heating Mode
CAUTION
Never energize the coil when it is removed
from the valve, as a coil burnout will result.
7. Fit all lines into new valve and braze lines into new
valve.
8. Pressurize sealed system with a combina tion of R-22
and nitrogen and check for leaks, using a suitable leak
detector. Recover refrigerant per EPA guidelines.
9. Once the sealed system is leak free, install solenoid
coil on new valve and charge the sealed system by
weighing in the proper amount and type of refrigerant
as shown on rating plate. Crimp the process tubes
and solder the ends shut. Do not leave schrader or
piercing valves in the sealed system.
Reversing Valve in Cooling Mode