


1
The motors on “DD” Series pumps are designed to be
used with either 115 or 230 volt supply by changing
connections as shown on the diagram.
Connecting the motor to the wrong
voltage can cause serious damage.
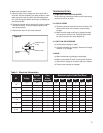
“Table 2” lists branch fuse size ratings and
recommended supply wire for each pump.
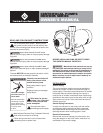
Grounding the motor
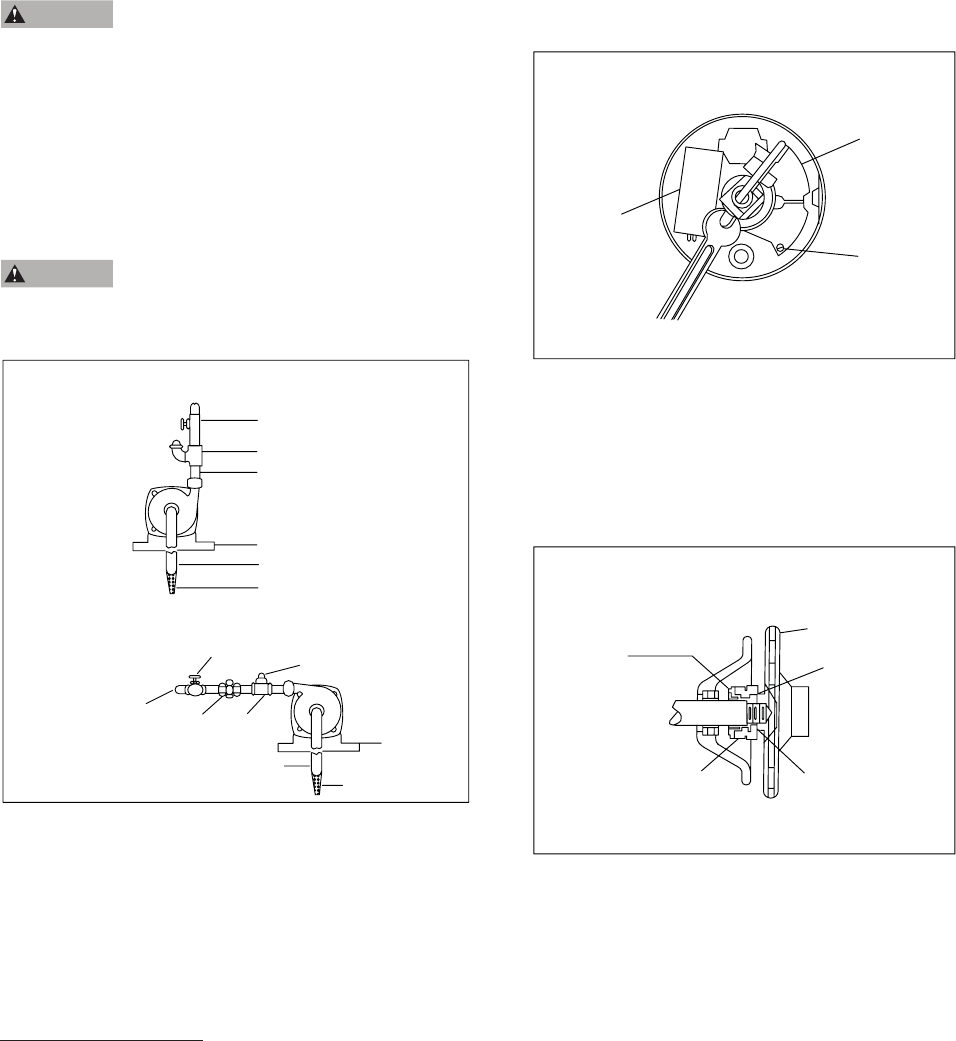
Make sure that the green lead wire is securely
connected to the green ground terminal screw on
the motor terminal board, “Fig. 1”. This wire must be
connected to the electrical system ground (provided by
the power company) or to another adequate ground.
Failure to ground the pump properly
can result in serious or fatal injury.
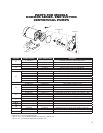
Typical Discharge Plumbing Options
Priming the Pump
Fill the pump and suction piping completely with water
before starting. Never operate the pump without water
in it. The mechanical shaft seal and impeller can be
damaged if run dry. If the pump does not deliver water
in 20 - 30 seconds, some air may be trapped. Stop the
pump, refi ll with water, and start again.
SERVICE THE PUMP
1. Remove the motor from the pump case.
2. Take off the motor end cover (canopy).
3. Remove the impeller from the motor. To keep the
motor shaft from turning while unscrewing the
impeller, hold shaft by inserting a 7/16” (11.1 mm)
open-end wrench at the 7 o’clock position of the
switch end of the motor, as shown in Figure1. The
motor shaft has fl at surfaces at that point.
Vertical Discharge
Horizontal Discharge
Gate Valve
Tee
Discharge Pipe
Base
Suction Pipe
Foot Valve
Gate Valve
Tee
Discharge Pipe
Base
Suction Pipe
Foot Valve
Priming Plug
Union
If any type of wrench must be used on the impeller, be
sure to protect the impeller surfaces by putting a shop
cloth or other protection between the wrench and the
impeller.
4. Remove the rotating part of the seal by fi rst removing
the square rubber drive ring (Figure 2) with a small
screwdriver or knife blade. The remainder of the
rotating portion is then loose and may be removed
easily.
5. Remove the seal plate, which is now free. Push
the seal seat out of the seal plate from the back
side. Clean the cavity, from which the seal seat was
removed. Also clean the motor shaft.
6. Replace the seal plate on the motor.
7. Dip the seal seat in a soap solution or clear water for
lubrication and install in the seal cavity. Press fi rmly in
place with fi ngers, If it cannot be positioned with the
fi ngers, put the cardboard washer (furnished with the
seal) on the seal face and press the seat in place with
a piece of pipe or other tool, as shown in (Figure 3).
Remove the cardboard washer and clean the polished
seal surface with a soft cloth. Be very careful not to
damage or scratch the surface.
CAUTION
CAUTION
Figure 1
Capacitor
Terminal
Board
Ground
Screw
Figure 2
Impeller
Impeller Hub
Rubber
Drive Ring
Face of
Sealing Washer
Shaft Shoulder