


www.fmiproducts.com
121082-01K
23
OPERATION
Continued
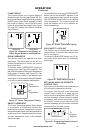
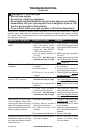
FLAME HEIGHT
This function allows you to control height of
ames through 5 levels (see Figure 36). Se-
lect manual ame height function by pressing
MODE button until a ame is shown in lower
left corner of display. Use UP/DOWN arrow
button to set desired ame height (see Figure
35, page 22). A beep from receiver conrms
the command.
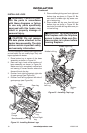
SMART THERMOSTAT
The Smart Thermostat adjusts ame height
in accordance to differences between set
temperature and room temperature. As room
temperature gets closer to set temperature the
smart function will modulate the ame lower.
As room temperature cools, it will modulate
the ame higher.
ON ON
MAX
Figure 36 - Remote Control Display of
Flame Height Minimum and Maximum
MINIMUM MAXIMUM
ON
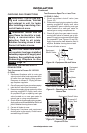
Figure 37 - Room Temperature Setting
Room
Temperature
Set
Temperature
ROOM THERMOSTAT
The remote control can operate as a room
thermostat. The thermostat can be set to a
desired temperature to control the comfort
level in the room.
To activate, press THERMOSTAT button on
remote control (see Figure 35, page 22). The
word ON will appear to the right of temperature
bulb graphic on display (see Figure 37). Use
UP/DOWN arrow button to set desired room
temperature. Control system will cycle replace
on or off to maintain selected temperature.
To activate this function, press THERMOSTAT
button until the word SMART appears to the
right of temperature bulb graphic on display.
Use UP/DOWN arrow button to set desired
room temperature. The control system will
cycle the replace on or off to maintain se-
lected temperature.
SMART
MAX
Figure 38 - Smart Thermostat Setting
ON
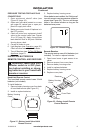
Figure 39 - Child Safety Lock-Out
CHILD SAFETY LOCK-OUT
This function lets you deactivate the remote
control buttons. It is active when the lock icon
is lit on the display.
To activate, press MODE button and UP ar-
row button at the same time. To deactivate,
press again.
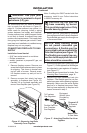
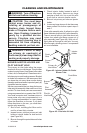
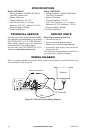
REPLACING HAND-HELD REMOTE
CONTROL ONLY
If your remote ever needs to be replaced you
will not need to replace the receiver.
To program receiver with a new hand-held
remote, insert a small pin or paper clip into
hole on receiver face plate marked PRG. The
receiver will beep 3 times to indicate it is ready
to accept a new remote transmitter. Press
the ON/OFF button on your remote and the
receiver will beep 4 times to conrm it receives
commands from the new remote.
ON REMOTE OFF
PRG
To
Program
Receiver
Figure 40 - Programing Remote Control
to Receiver