www.fmiproducts.com
125078-01B 19
FIREPLACE INSTALLATION
Continued
3. Make sure control knob of replace is in
the OFF position.
4. Check all joints from equipment shutoff
valve to gas valve (see Figure 22 or
Figure 23, page 18). Apply noncorrosive
leak detection uid to all joints. Bubbles
forming show a leak. Correct all leaks at
once.
5. Light replace (see Operation, page 22).
Check all other internal joints for leaks.
6. Turn off replace (see To Turn Off Gas to
Appliance, page 23).
REMOVING/REPLACING GLASS
DOOR
CAUTION: Do not operate
this replace with a broken glass
door panel or without the glass
door panel securely in place.
For replacement part informa-
tion see Replacement Parts,
page 36.
CAUTION: Wear gloves and
safety glasses while handling
or removing broken glass.
Do not remove if glass is hot.
Keep children and pets away
from glass.
WARNING: If replace has
been running, turn off replace.
Let cool before removing glass
doors.
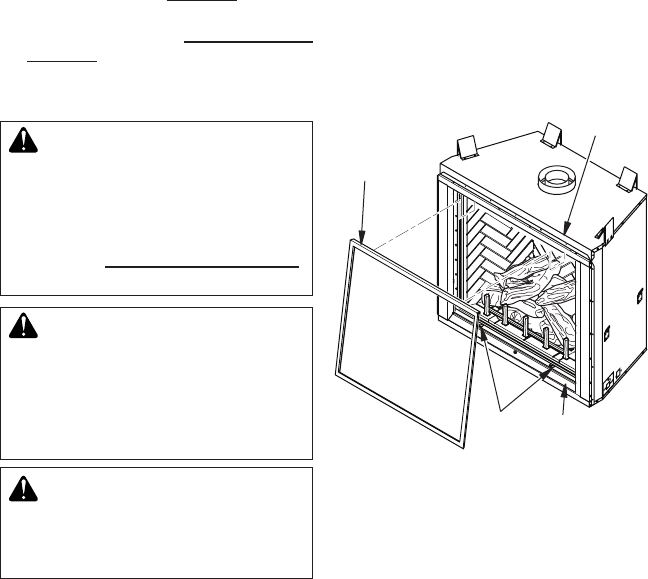
Figure 24 - Removing/Replacing Door
Removing Glass Door
If replacement of glass is necessary, the entire
frame assembly must be replaced. Gloves
must be worn when removing/replacing glass
door. If glass is broken tape remaining glass
onto frame before removing.
1. Remove screens if installed.
2. Open bottom access panel.
3. Unlock 2 door latches on bottom of
rebox.
4. Tilt open glass door 45° from the bottom
of rebox and lift up to release door from
rebox top retainer (see Figure 24).
Replacing Glass Door
1. Position door frame in front of rebox
opening with bottom of door tilted away
from rebox (see Figure 24).
2. Hook top ange of door frame over top of
rebox frame.
3. Secure 2 bottom door latches.
Door
Retainer
Glass
Door
Bottom
Access Panel
Door
Latches


