Page 4
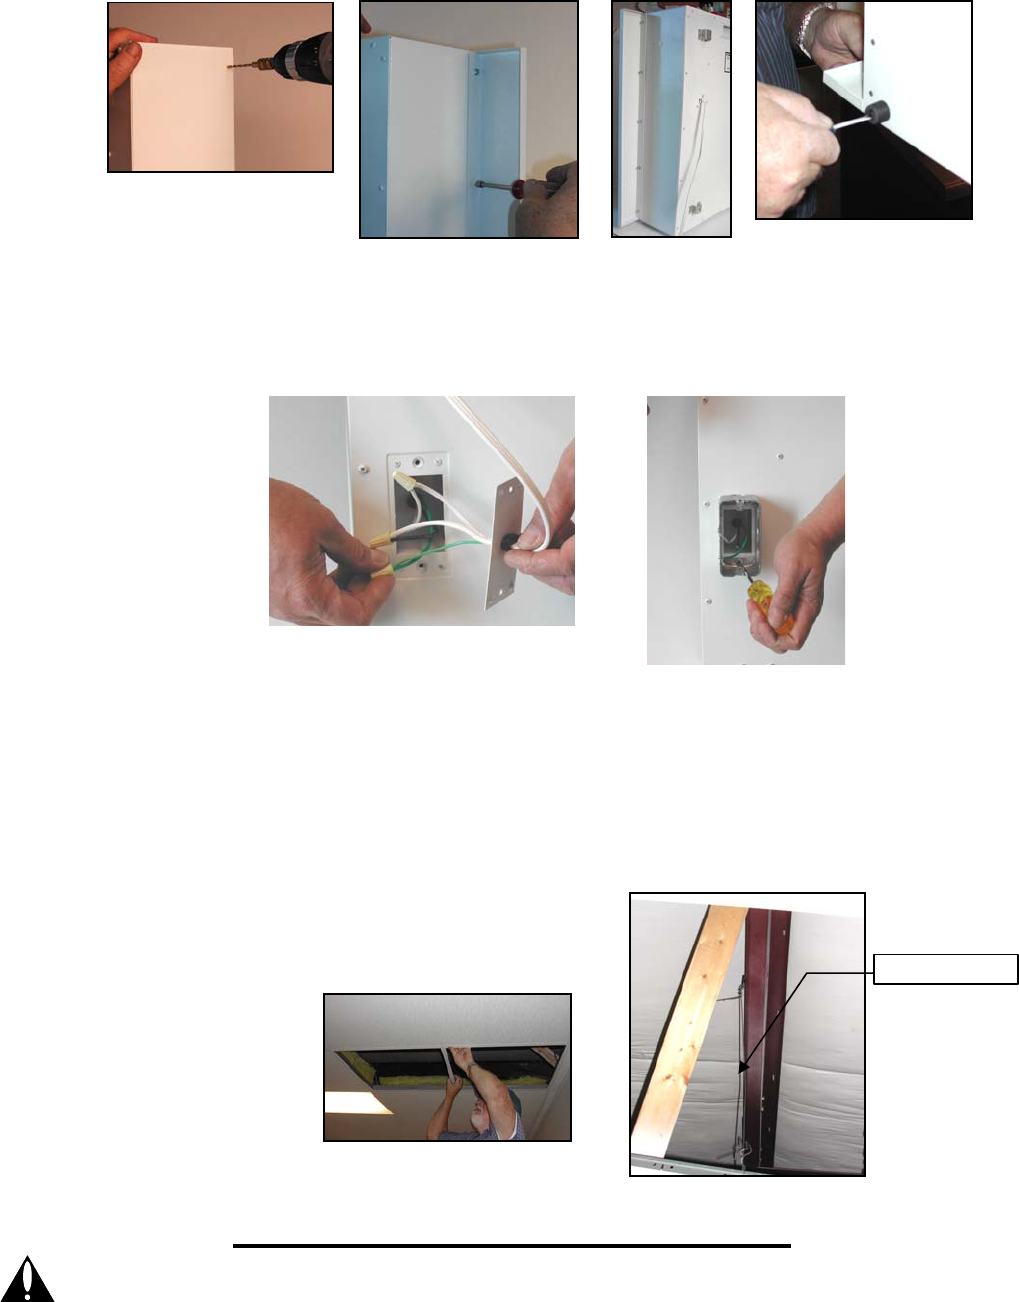
3. Drill a 1/8” hole into the body of the UV-1500C at the marked locations. (See Figure 8)
4. Secure the extension covers the UV-1500C body with the supplied metal screws (See Figure 9 & 10).
5. Remove the two rubber feet on the side of the extension cover from bottom of unit to give necessary clearance for
ceiling mount. (See Figure 11)
6. Before hard wiring the UV-1500C, an electrical conduit box must be installed. Remove the wire cover in the back
of the unit. Uninstall the wire nuts and discard the power cord. (See Figure 12).
7. Mount the supplied electrical conduit box over the power wires and secure with the supplied mounting screws.
(See Figure 13)
8. Locate and remove the ceiling tile where the UV-1500C will be mounted.
9. Install eyelet screws or other appropriate anchors into the ceiling joists above the location where the will be
installed. If installing the UV-1500C into 4-foot by 2-foot title grid, install an additional suspended ceiling tee
bracket into the ceiling grid to form a 2-foot by 2-foot title location. (See Figure 14)
10. Install the UV-1500C into the suspended ceiling grid then install support wires (16 gauge wire) or other
suspended ceiling support method between the installed ceiling anchors and the four mounting brackets on the
back of the UV-1500C. (See Figure 15)
WARNING: Never expose eyes or skin to UVC light from any source. Looking directly at the UVC light may cause permanent eye damage o
r
blindness. Never operate the UV-Aire™ Air Purifying System with the UV chamber door open. Avoid touching the glass portion of the
lamp with your hands.
Figure 8
Figure 9
Figure 10
Figure 12
Figure 13
Figure 14
Fi
g
ure 15
Figure 11
Support Wire


