


2
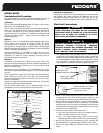
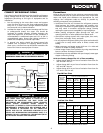
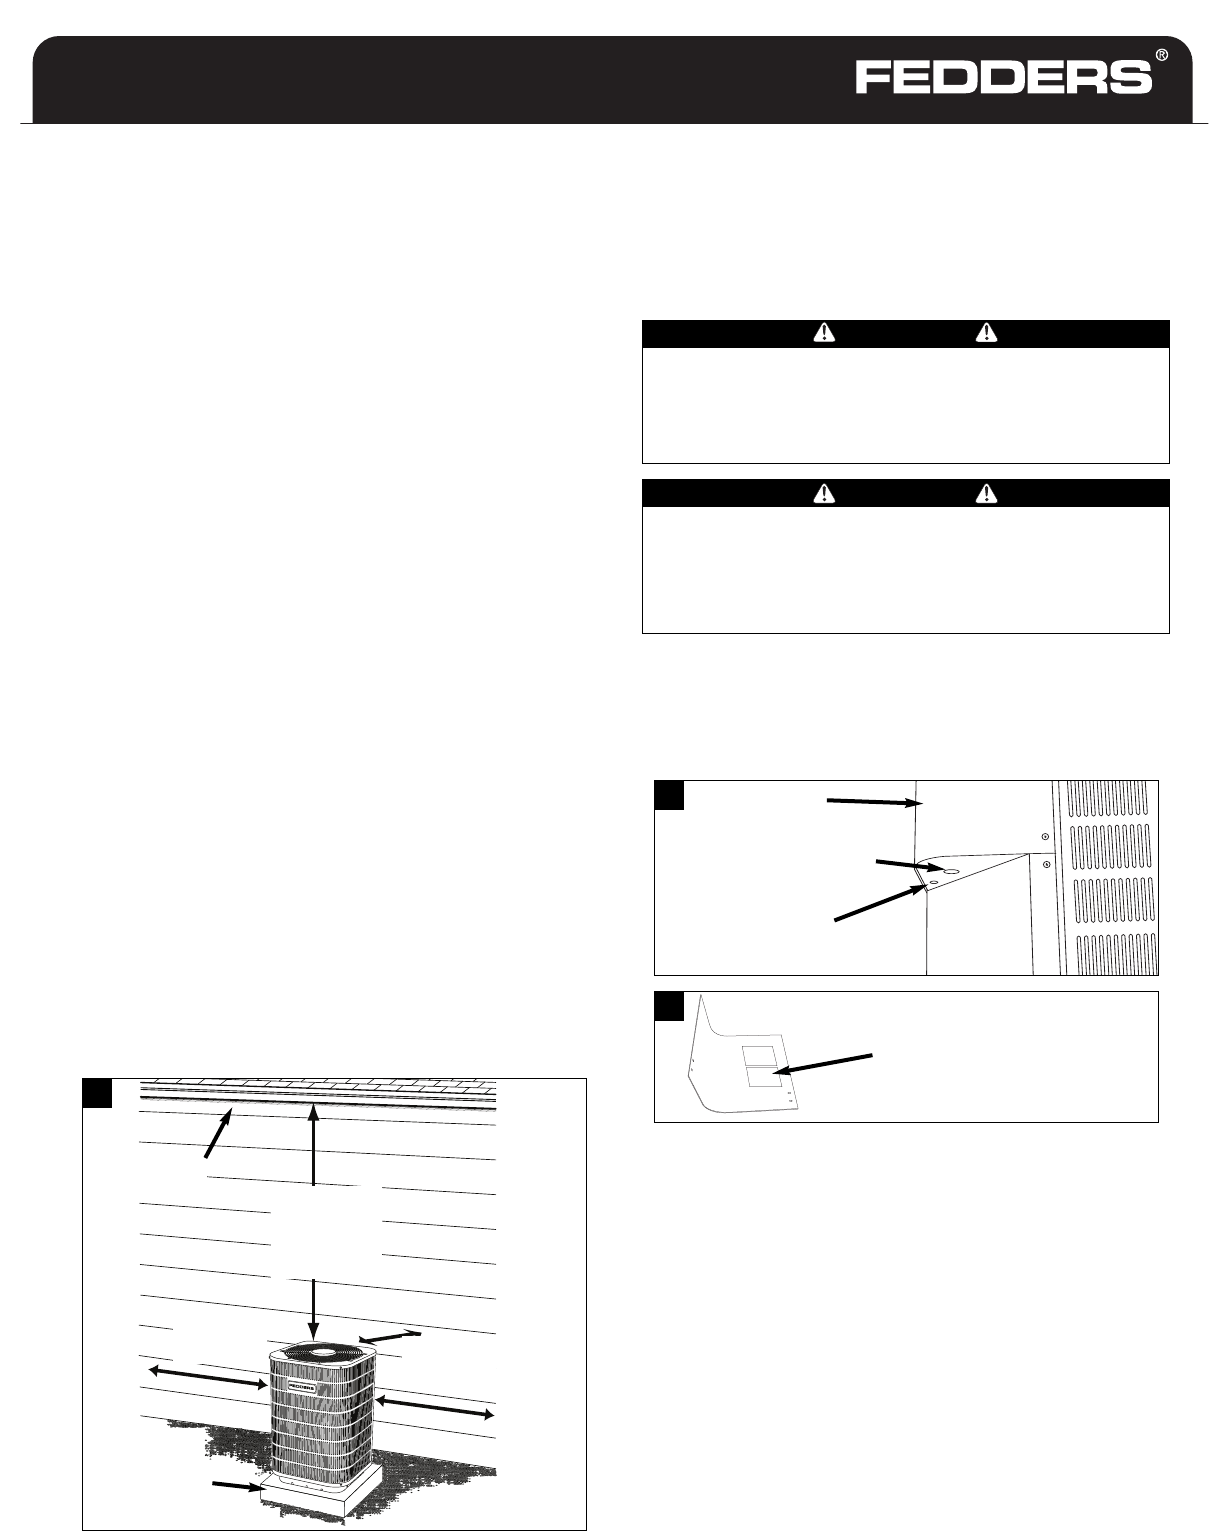
Six feet
clearance
above the
unit
Three feet
clearance
Rain Gutters
Concrete slab
Three feet
clearance
INSTALLATION
Condensing Unit Location
The condensing unit should be located outdoors as close as
possible to the evaporator. Consider the following factors:
Clearances
The air inlet should be located at least 12" from a wall or other
o
bstruction for unrestricted air flow.
The air outlet should be located so as to direct discharged air
away from the building. Three feet of clearance around the
unit and a minimum of six feet clearance above the unit is
required to avoid recirculation of condenser discharge air on
vertical discharge models. Avoid locating unit under low
overhanging roofs.
Support
Mount the unit on a sturdy base approximately four to six
inches above the ground. In areas known for snow
accumulation, the unit should be elevated at least 18" above
the ground. A concrete slab is recommended. Concrete slab
should not contact the building foundation to prevent possible
sound or vibration transmission.
Rooftop installation is acceptable in areas of low snow
accumulations, provided the roof will support the unit and
provisions are made for water drainage and the noise or
vibration through the structure.
Exposure
If practical, unit should be located on the south side of the
structure away from northerly winds to minimize the effects of
blowing snowdrifts and freezing rain. A wind screen or wind
block can also be used.
Placement of the unit should be in a well-drained area, or the
unit must be supported high enough so run-off will not enter
the unit.
Avoid installations under roof overhangs without guttering.
Water draining from the roof onto the unit could produce
excessive noise and may cause ice to build up on the coil or fan
during cold weather.
Locate unit away from windows, patios, decks, etc. where unit
operation sound may disturb customer.
Do not locate where heat, lint or exhaust fumes will be
discharged on the unit (as from dryer or furnace vent).
Proximity to Evaporator
Locating the condenser as close as possible to the evaporator
will increase the system capacities by reducing the line set
refrigerant pressure drop, and will make the system less
s
usceptible to liquid migrations due to less refrigerant charge.
1. The installer shall check available power to make certain it
matches the unit rating plate (located inside control box
cover) and that constant voltage can be maintained to the
unit. Unsatisfactory performance would otherwise result.
The local power company should be contacted regarding
any problems or questions concerning power supply.
Electrical Connections
ELECTRICAL EQUIPMENT SHOULD BE INSTALLED BY A
QUALIFIED, LICENSED ELECTRICIAN. IMPROPER
ELECTRICAL HOOK-UP MAY DAMAGE EQUIPMENT, CAN
CREATE A HAZARD, CAUSE PERSONAL INJURY OR
DEATH, AND WILL VOID THE WARRANTY.
BEFORE PERFORMING ANY WORK ON THIS EQUIPMENT,
POWER SUPPLY MUST BE TURNED OFF AT THE HOUSEHOLD
SERVICE BOX TO AVOID THE POSSIBILITY OF SHOCK,
INJURY, DEATH OR DAMAGE TO EQUIPMENT.
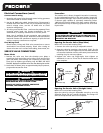
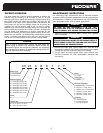
Control box
cover
Wiring diagram and rating
plate are located inside
control box cover
Opening for
low-voltage wiring
Opening for line
voltage conduit or cable
2. Install a line service disconnect switch within sight of the
condensing unit. The line voltage service wiring for the
condensing unit should include a fused disconnect switch.
3. Use correct wire size and fuse size. To ensure that adequate
voltage will be available at the condensing unit, the line
voltage service wiring must be of adequate size. Minimum
recommended wire ampacities and maximum fuse sizes are
listed on the unit name plate.
4. Two holes are provided in the control box.
a.
One is for the connection of the line voltage conduit or
cable. The hole is sized for 3/4" conduit.
b. One is for low-voltage wiring. (Refer to the wiring
diagram attached to electrical box cover for connection.)
5. Be sure to ground the condensing unit by securing the
ground wire to the grounding lug inside the control box.
6.
Be sure to follow National Electrical Code and all local
codes.
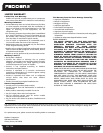
112
113
114
WARNING
WARNING