


ENGLISH
HOW TO ASSEMBLE
(continued)
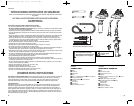
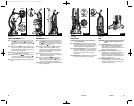
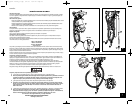
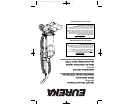
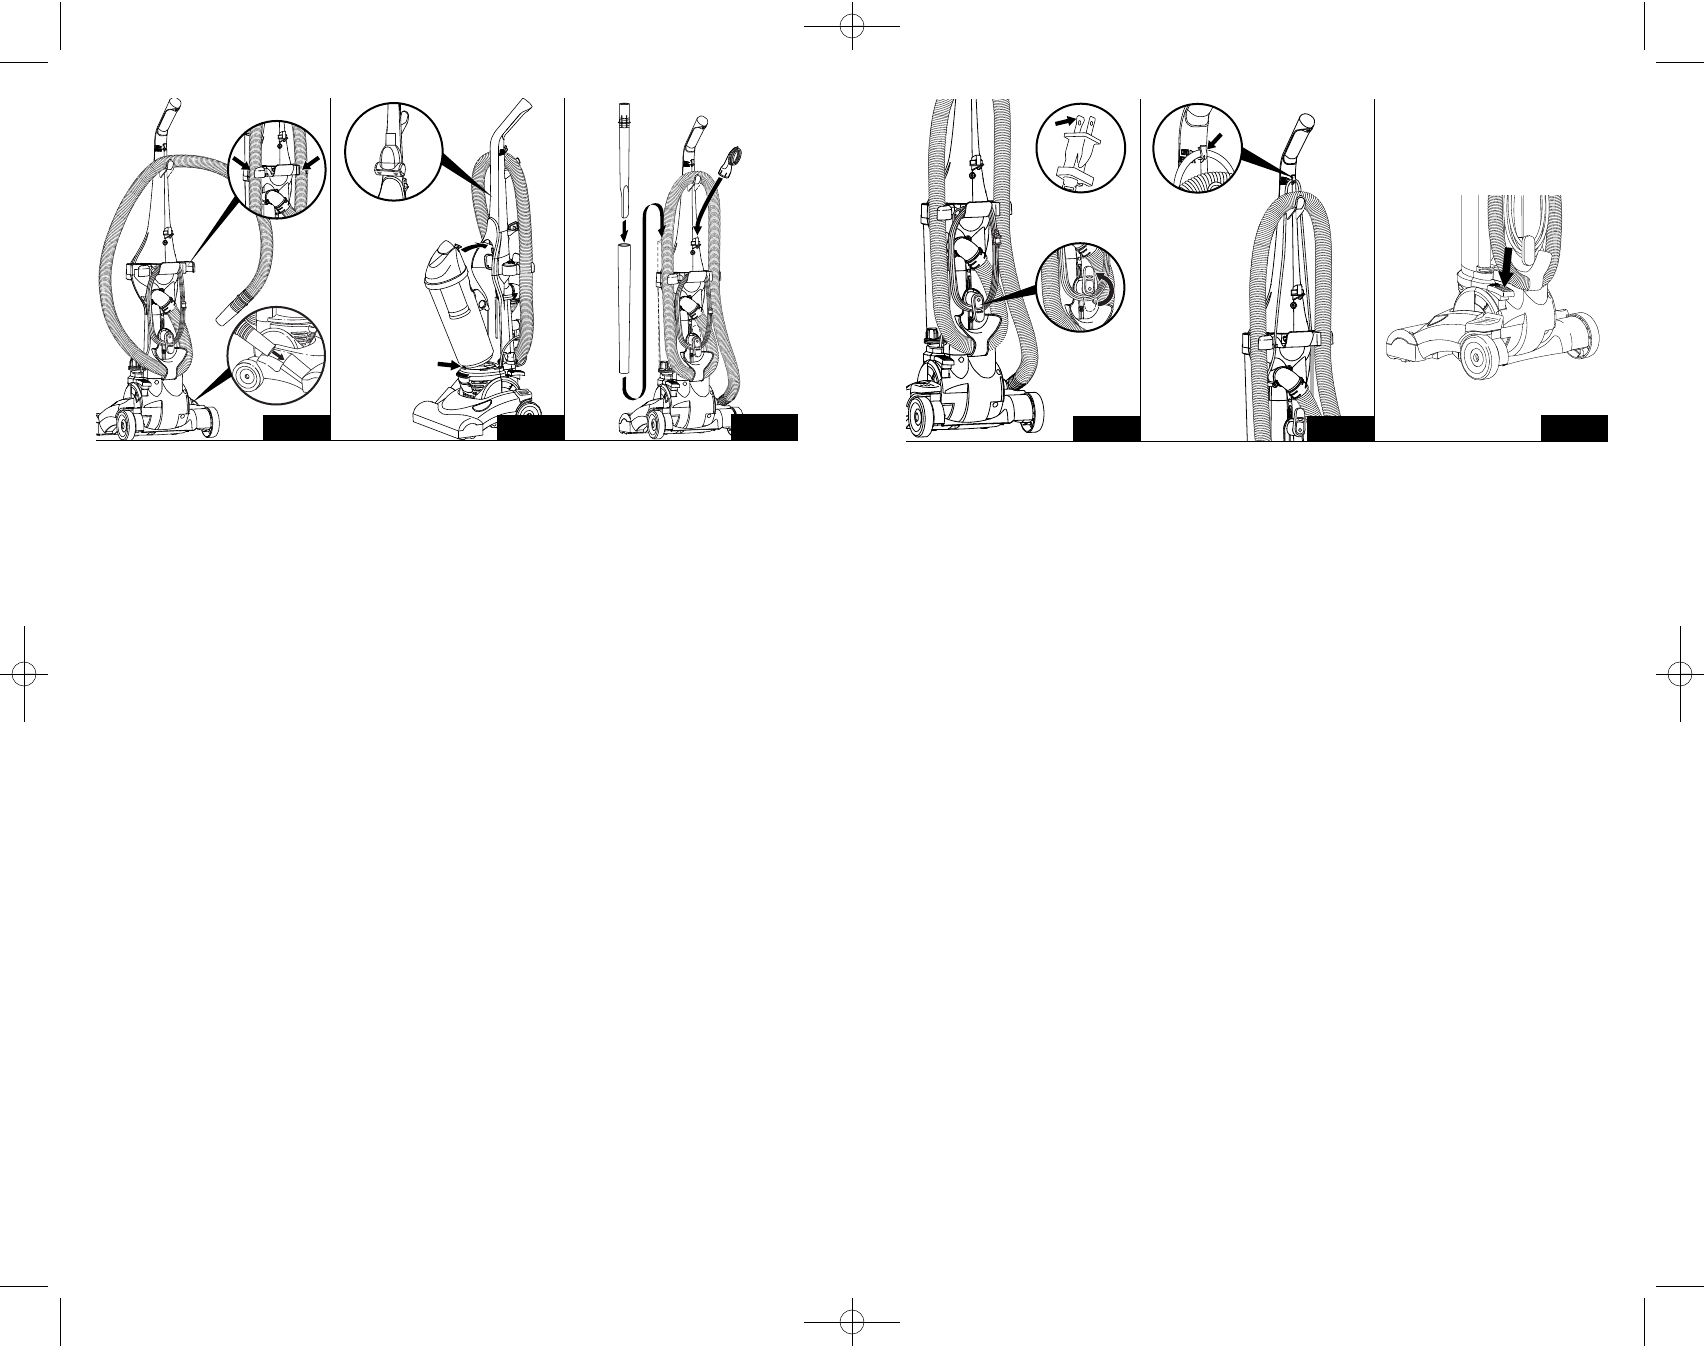
Step 7: Then wrap the hose up and over the hose hook on the
handle
●
G
as shown. Plug the end of the hose into the
hose retainer hole on the base
●
E
(FIG. 7a) and then
snap the hose into the hose holder on the tool caddy
●
H
(FIG. 7b).
Step 8: Place the dust cup
●
F
on the vacuum by aligning the
bottom groove of the dust cup against the tab on cleaner
base. Pivot the dust cup up against cleaner and push to
secure as it snaps into place (FIG. 8).
Step 8A: (in some models only).Place Power Paw™ stair brush
in slot in the special handle holder (FIG. 8).
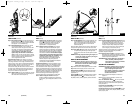
Step 9: Place the wand/crevice
●
A
/
●
B
tool in the wand holder
on the side of the vacuum. Store the dusting brush
●
C
on the brush holder on the back of the handle (FIG. 9).
Note: Screws must be installed to properly secure the parts of the
vacuum.
ESPAÑOL
ENSAMBLAJE
(continué)
Paso 7: Luego enrolle la manguera por encima del gancho de la
manguera
●
G
como se muestra.Conecte el extremo de
la manguera al agujero de soporte de la manguera en la
base
●
E
(FIG. 7a) y encaje la manguera en el soporte en
el portaaccesorios
●
H
(FIG. 7b).
Paso 8: Coloque el depósito para el polvo
●
F
en la aspiradora
alineando la ranura inferior del depósito contra la
lengüeta de la base de la aspiradora. Gire el depósito
para el polvo contra la aspiradora y empuje para fijarlo
encajándolo en su lugar (FIG. 8).
Paso 8A: (sólo en algunos modelos) Coloque el cepillo para
escaleras Power Paw™ en su ranura en el receptáculo
especial de la empuñadura (FIG. 8).
Paso 9: Coloque la vara/accesorio
●
A
/
●
B
para rendijas en el
soporte de la vara en el costado de la aspiradora.
Guarde el cepillo para sacudir el polvo
●
C
en el soporte
del cepillo en la parte trasera de la manija (FIG. 9).
Nota: Los tornillos debe ser instalados para fijar adecuadamente
las piezas de la aspiradora.
FIG. 7 FIG. 8
FIG. 9
9
8
FIG. 7b
FIG. 7a
FIG. 8a
●
G
●
B
●
A
●
C
●
H
●
F
●
E
ENGLISH
HOW TO USE
CAUTION: Do not plug in cleaner until you understand all
controls and features.
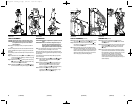
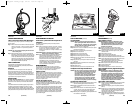
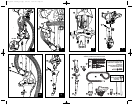
Step 1: Plug in Vacuum. (FIG.10) Unwrap the cord by turning the
quick release cord hook (FIG.10a), unwind the cord and
plug into an appropriate outlet.The plug has a wider prong
that will only fit one way into the receptacle (FIG.10b).
Step 2: Put Cord on Cord Retainer.To use,push electrical cord
down into cord retainer (FIG. 11a).You will find your cord
retainer on the handle above the upper cord hook.This
will place the cord out of the way the next time you
vacuum (FIG. 11).
Step 3: ON/OFF Switch.The ON/OFF Switch is on the base. Press
once to turn on and press again to turn off (FIG. 12).
ESPAÑOL
USO
PRECAUCIÓN: No enchufe la aspiradora hasta que entienda
todos los controles y características de la
misma.
Paso 1: Enchufe la aspiradora (FIG.10). Desenrolle el cordón
girando el gancho de liberación rápida del (FIG.10a)
cordón y enchúfelo a un tomacorriente adecuado.El
enchufe tiene una clavija más ancha y calzará de una sola
manera en el tomacorriente (FIG.10b).
Paso 2: Coloque el cordón en su retenedor.Para usar el
retenedor,oprima el cordón hacia abajo y hacia adentro
del retenedor (FIG 11a).El retenedor del cordón se
encuentra en la manija por encima del gancho superior
del cordón. Esto mantendrá el cordón fuera del paso la
próxima vez que aspire (FIG. 11).
Paso 3: Interruptor “ON/OFF”.El interruptor “ON/OFF”
(encendido/apagado) se encuentra en la base. Oprima el
interruptor una vez para encender la aspiradora y una
vez más para apagarla (FIG. 12).
FIG. 10 FIG. 11
FIG. 12
(CONTINUED) (CONTINUÉ)
FIG. 11a
FIG. 10b
FIG. 10a
77418_Rev2 4700OG_r1.qxp 8/1/08 1:04 PM Page 8