


5
FLUE SYSTEM
1. Existing Flue System
If you have chosen a freestanding unit, this stove is designed to connect to an existing flue system,
such as masonry or a pre-manufactured Class A flue system. If you have a masonry flue system, the
inner liner should be inspected carefully for cracks; if there is no liner in your chimney, we recommend
you install a steel liner or have one installed. If you have an existing pre-manufactured system the
inner liner should be inspected for warping or buckling. Either type chimney system should be
thoroughly cleaned before installing your new stove. We strongly recommend you have a qualified
chimney sweep clean and inspect your entire system, as the sweep can spot problems you might
overlook. The sweep in most cases can make any necessary repairs or recommend a qualified
person to do so. It is not permissible to connect this unit to a chimney that is servicing another
unit.
2. Flue Size
The proper flue size is determined by measuring the inside diameter of the flue collar on the unit.
This stove is equipped with a six inch (6”) TOP EXHAUST FLUE COLLAR.
Therefore, the connector pipe should be six inches (6”) and never less in diameter than the collar on
the stove. The area of the chimney liner must also be equal to or greater than the area of the flue
collar on the stove. If the area of the flue is greater than the collar, it should never be more than three
(3) times greater.
The black connector pipe should be 24 gauge steel and 10.5” from a combustible wall or ceiling.
This clearance can be reduced to 10.0” if you are using a double wall or shielded pipe. (See “C” in
the clearances diagrams on the following page)
3. Installation of a New Flue System
Note: Flue systems and flue pipe are not furnished with the unit.
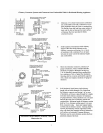
Masonry Flue: In the event that you plan to install or have a system installed, there are several
approaches that you can take. In the middle and late seventies masonry flue systems became very
popular, and today this type system is satisfactory. If you are considering a masonry system, you
should consult with your local building officials for the proper procedures on this type chimney. We
recommend you consult with and have your flue built by a licensed, bonded contractor. Most masonry
chimney systems are placed against an outside wall and extend upward beside the house. The flue
thimble is then inserted through the wall, making the connection with the stovepipe and the vertical
flue. Exercise extreme caution when drilling through the wall -- you must maintain proper clearance
between the connecting liner and any combustible material in the wall.
We also recommend you have a flue clean-out door located at least two feet (2’) below your
thimble for easy cleaning of the system. This door should be made as airtight as possible. It is the
consumer’s responsibility to ensure the chimney system is safe and in good operating condition.
The manufacturer will not be held responsible for an accident attributed to a unit connected to a faulty
chimney system.
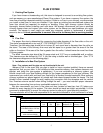
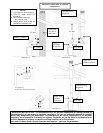
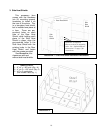
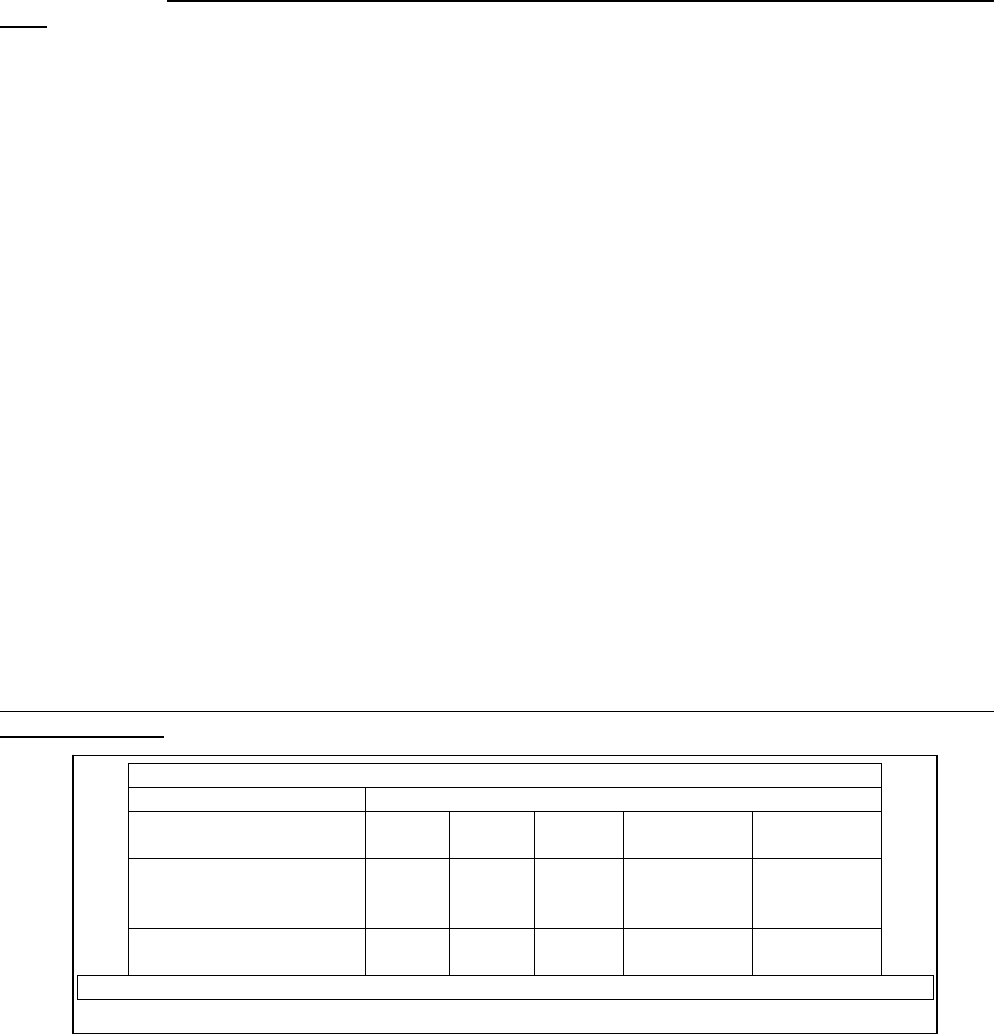
CLEARANCE TO COMBUSTIBLES (See Illustration 1)
Appliance Clearances Unprotected Surfaces
Side
(A)
Rear
(B)
Corner
(D)
Flue to
backwall (C)
Flue to wall
(corner) (E)
Single wall connector,
with and without side heat
shields
6 in 6 ½ in 5 in 10 ½ in 14 in
Double wall connector,
with side heat shields
6 in 6 ½ in 5 in 10 in 13 ½ in
NOTE: Minimum alcove or ceiling height = 77 in