


Page 10 12426-4-0104
IMPORTANT — Avoid securing too tightly and disturbing the
inner casing. Do not try to force furnace into a wall opening which
is smaller than speciÞ ed dimension.
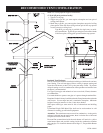
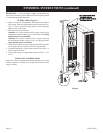
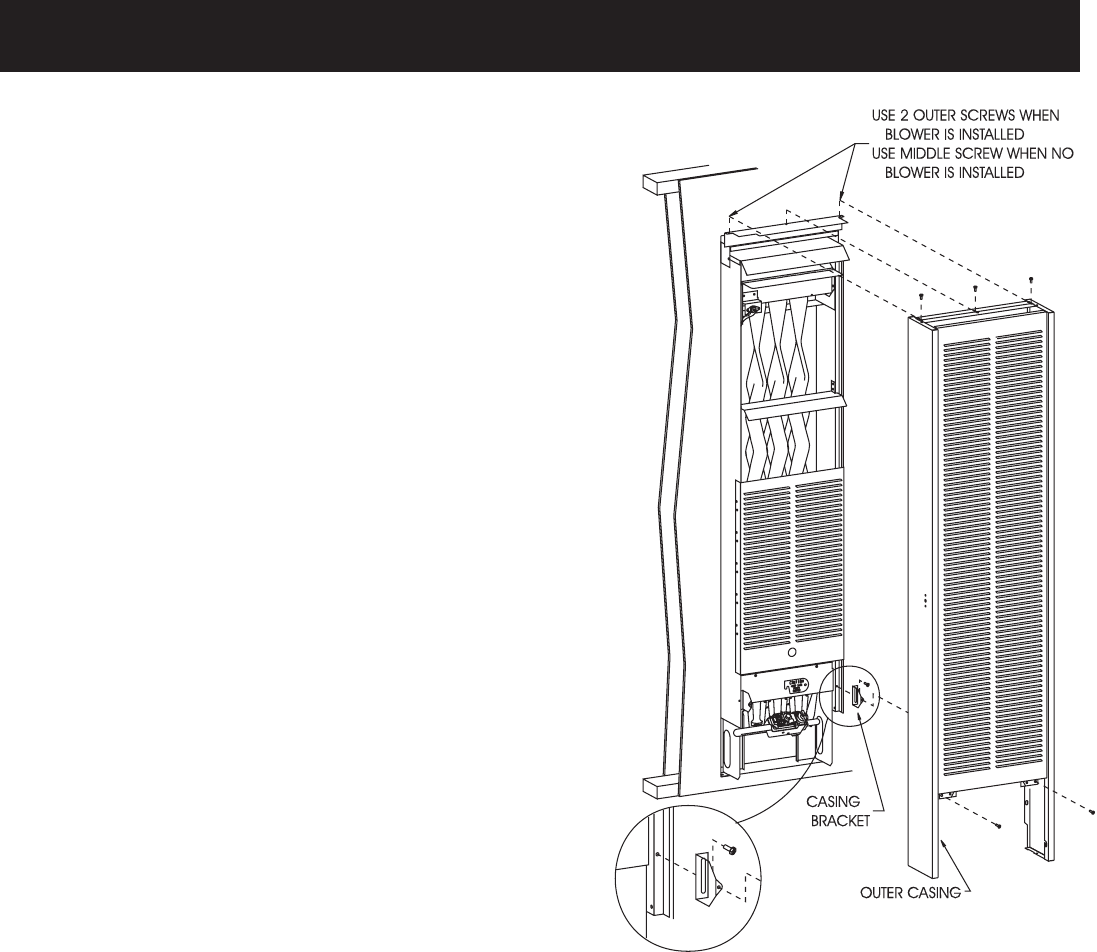
OUTER CASING (Figure 6)
1. Align 1 3/4" slot on casing bracket with bottom screw hole on
inner casing. Attach casing bracket to inner casing with one (1)
10 x 1/2" screws for each casing bracket. Do not completely
tighten screws at this time.
2. Place outer casing onto header.
Attention: Use center clearance hole on outer casing top for
attachment to header with one (1) 8 x 3/8" Phillips screw when
optional blower is not installed.
Attention: Use outside clearance holes on outer casing top
for attachment to header with two (2) 8 x 3/8" Phillips screws
when optional blower is installed.
3. Align clearance holes on outer casing bottom with screw holes
on casing brackets by adjusting slots on casing brackets.
4. Complete tightening casing bracket screws from Step 1 to
inner casing at this time.
5. Attach outer casing to casing brackets with two (2) 10 x 1-1/2"
screws.
INSTALLING CONTROL DOOR
Attach two washers supplied in hardware package to pivot pins
located at bottom of control door. Install control door to outer
casing assembly.
FINISHING INSTRUCTIONS (continued)
Figure 6