9
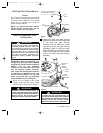
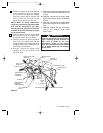
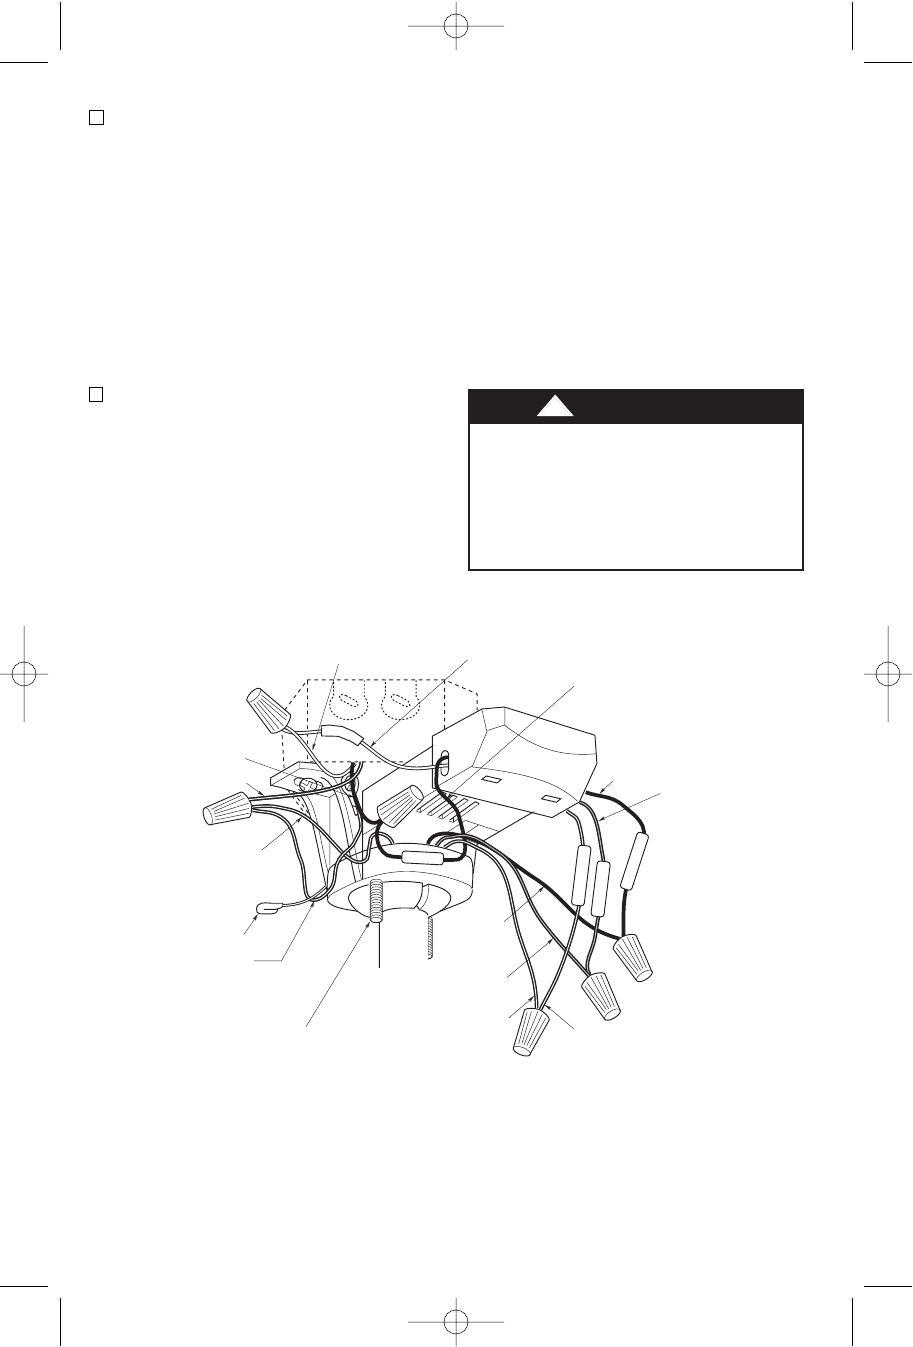
1. Position the supply wires to the left side
of the outlet box (Figure 10); position
the fan wires to the right side. Partially
insert the remote control receiver (flat
side up) until one end rests on the
hanger ball as shown in Figure 10.
NOTE: Make all wiring connections
using wire connectors (supplied). Make
sure that all connections are tight,
including ground, and that no bare wire
is visible at the wire connectors, except
for the ground wire.
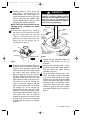
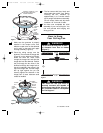
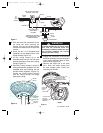
2. Refer to Figures 10 and 11 and connect
the receiver wires to the supply wires
and the fan motor wires as follows:
a. Securely connect the green grounding
wires from the hanger ball and the
hanger bracket to the supply grounding
conductor (this may be a bare wire or a
wire with green insulation).
b. Securely connect the supply white
(neutral) wire to the receiver white
(AC IN N) wire.
Check to see that all connections are
tight, including ground, and that no
bare wire is visible at the wire
connectors, except for the ground
wire. Do not operate fan until blades
are in place. Noise and fan damage
could result.
!
WARNING
c. Securely connect the supply black wire
(hot) wire to the receiver black (AC IN
L) wire.
d. Securely connect the fan motor white
wire to the receiver white (TO MOTOR
N) wire.
e. Securely connect the fan motor black
wire to the receiver red (TO MOTOR L)
wire.
f. Securely connect the fan motor blue
wire to the receiver blue (FOR
LIGHT) wire.
GREEN GROUND
WIRE FROM
HANGER BRACKET
RECEIVER RED WIRE
RECEIVER WHITE WIRE
FAN WHITE WIRE
FAN
BLACK
WIRE
ANTENNA
A
C
I
N
N
AC IN L
FOR LIGHT
TO MOTOR N
RECEIVER BLUE
WIRE
RECEIVER
BLACK WIRE
RECEIVER WHITE
WIRE
SUPPLY WHITE WIRE
(NEUTRAL)
SUPPLY BLACK
WIRE (HOT)
GROUND WIRE
GREEN GROUND
WIRE FROM
HANGER BALL
FAN BLUE WIRE
1-1/4" THREADED
STUD (2)
TO MOTOR L
Figure 10
U.L. Model No.: CF725
BP7369 Vienne 12/7/08 5:21 PM Page 9


