


11
ROUTINE MAINTENANCE
NOTE: Turn off the switch and unplug the electrical cord
before routine maintenance. Never operate the
vacuum cleaner without the dust cup lter in place.
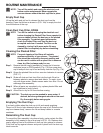
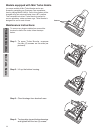
Empty Dust Cup
Lift up the latch and pull out to release the dust cup from the
housing. Press the button as shown in (FIG. 16a) to empty the dust
from the bottom of the cup.
Clean Dust Cup Filter, EF86b
NOTE: Turn off the switch and unplug the electrical cord
before changing the Pleated Filter. Never operate the
vacuum cleaner without the dust cup or the pleated
lter assembly. To maintain good performance,
check the Pleated Filter each time the dust cup
is emptied and clean if needed. The lter can be
cleaned by rinsing it with warm water. Be sure
pleated lter is completely dry before reinstalling.
Cleaning the Pleated Filter:
NOTE: Frequent cleaning of the lters will maintain
maximum efciency of your cleaner. The pleated
lter should be removed for frequent washing and
can be used in rotation with a spare lter to ensure a
clean, dry lter is always ready for use.
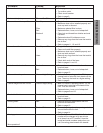
Step 1: Remove the dust cup lid assembly by turning the lid counter
clockwise (move to OPEN position) (Fig. 17a) then grasp dust
cup lid and pull dust cup lid out and away from the cup (Fig. 17b).
Step 2: Grasp the pleated lter and turn counter clockwise to remove.
(FIG. 17)
Step 3: Shake off dust and hair from lter into the trash. Brush in-
between pleats to remove dust and debris. To wash, rinse
only with warm water. Shake excess water from lter. Do not
submerge lter assembly.
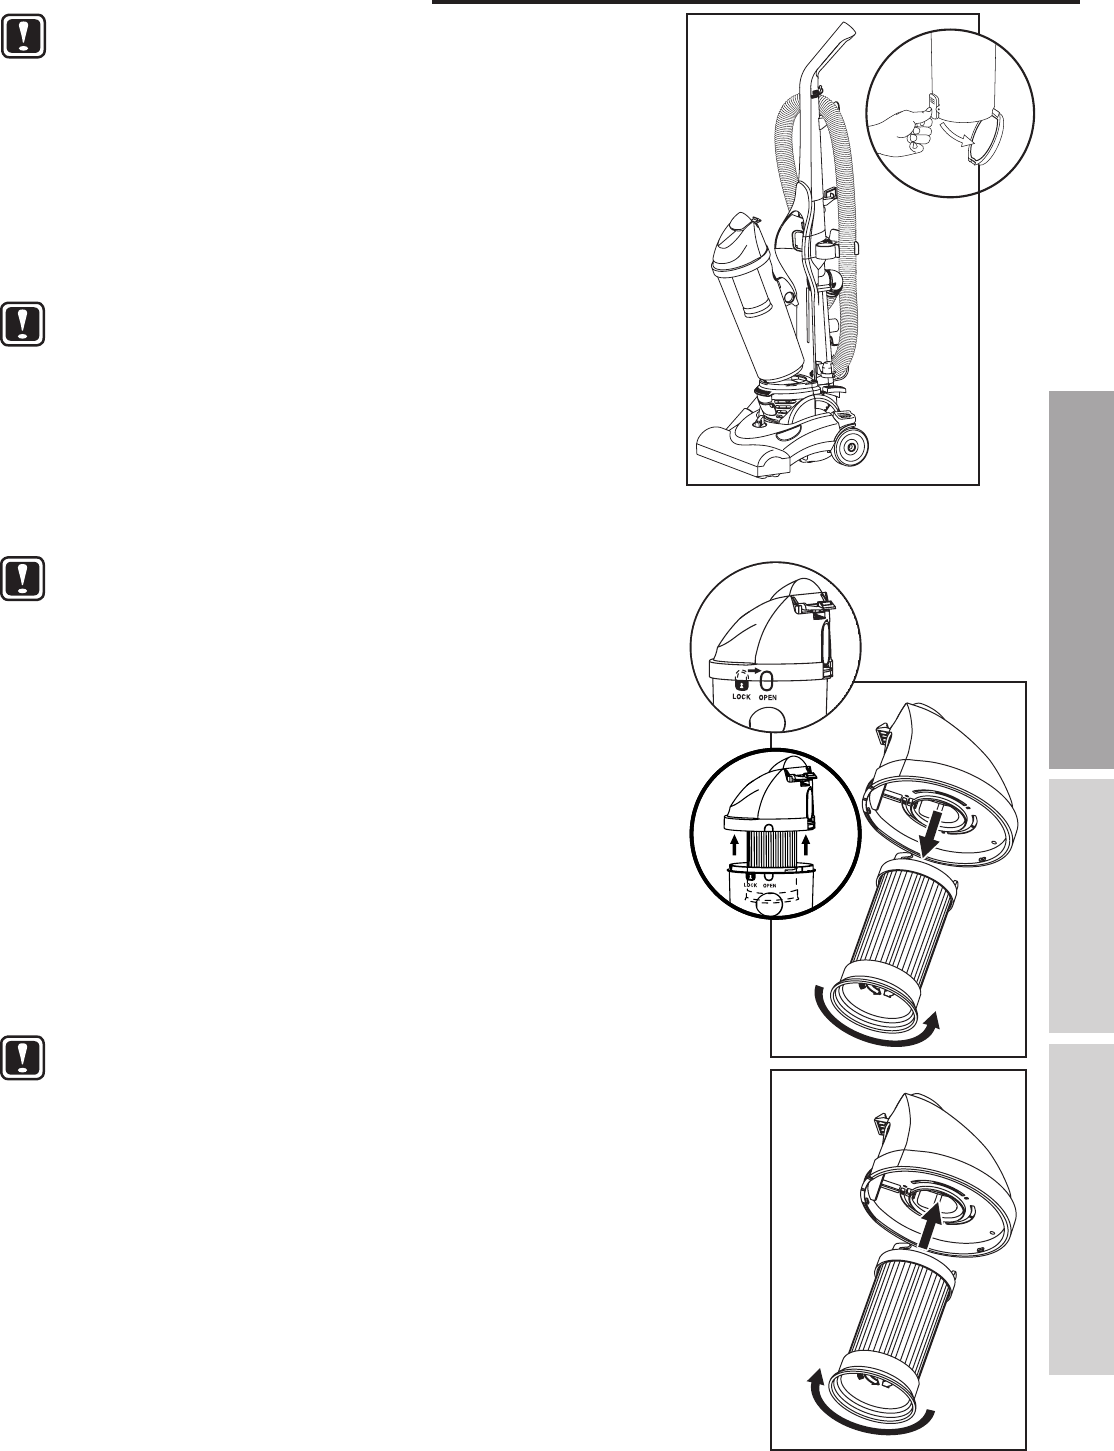
Step 4: When all parts are completely dry, replace pleated lter and
turn clockwise to lock in place.
Step 5: Allow lter to dry for 24 hours before reusing.
CAUTION: The dust cup can be washed in warm water, if
desired, but strong detergents should not be used.
Dry thoroughly before using again.
Emptying The Dust Cup:
It is clearly visible when the dust cup is full and needs emptying.
There is a ll line to help determine when the cup is full. Remove dust
cup from cleaner body, remove the lid and dump debris in a waste
container.
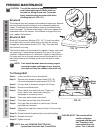
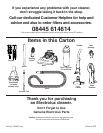
Reinstalling The Dust Cup:
To mount the lter assembly into cleaner body, make certain the lter
assembly is fully seated in top of dust cup lid (FIG. 18). Replace dust
cup by aligning front of the bottom of dust cup into groove on cleaner.
Pivot dust cup up against cleaner and push in place until the dust cup
latch is secure.
ROUTINE MAINTENANCE
FIG. 16
Empty Dust Cup Clean Dust Cup Filter
FIG. 18
FIG. 17
17a
16a
17b