


8
3308120.XXX GENESIS AIR FILTRATION SYSTEM
OPERATING
INSTRUCTIONS
1. GENERAL INSTRUCTIONS
A. Read your Control Systems Operating Instructions care-
fully before attempting to start your air conditioner.
B. The 3308120.XXX Genesis Air Filtration System is
designed to allow the unit to direct the air flow through the
RV’s duct system; or, by opening a slide control the air
will be discharged directly out from the return air cover.
1. Slide the slide handle towards the front of the RV to
divert the air into the duct system.
2. Slide the slide handle to the rear of the RV and the air
will discharge out the return air cover.
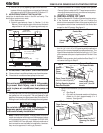
G. Use Aluminum foil tape (not provided) to seal the ends of
the foam divider to the sides of the opening. Make sure
the area behind the flange on the ceiling template is
sealed. See Figure 9.
FIG. 9
Use Aluminum Foil Tape To Seal the
Foam Divider To The Sides of 14-1/4"
x 14-1/4" (±1/8") Ceiling Opening
Make Sure To Seal
Behind Flange
Route wires
through Slot
Catch Flange In Groove Of
Return Air Cover
H. Install the slider in the return air cover and raise it to the
ceiling template. Route the wires from the return air
cover through the template slot leaving about 3” of wire
in between. Place the front of the return air cover against
the ceiling and slide towards the rear. The flange on the
ceiling template will catch in the groove on the return
cover. Adjust the position (right to left) and install the
front two screws. Start and tighten the remaining screws
to hold it in place. Connect together the DC wires (3
Black - negative and 3 Red - positive) from the supply,
control box and filter indicator. See figure 9.
Note: Number 10 cabinet screw can be used to replace
the two front screws, and pull the plastic return air cover
to the ceiling when the ceiling material is hard.
1. If solar panel is installed see instructions pack
aged with solar panel option.
I. Tighten the screws holding the return air cover. Slide the
filter from the right side (looking toward the RV front) over
the wires. Make sure the wires are above the filter and are
out of its way.
J. Place grill on return air cover and snap in place. Decal is
on end over circuit board.
K. Place slide handle through slots in grill into the slide
posts. Handle will fit in either direction. See Figure 10.
C. The “CLEAN FILTER” bulb will blink as a reminder to
clean/change the air filter every 60 days. If in dusty
conditions, the filter should be checked bi-weekly and
clean/changed if needed.
1. To clean the filter, remove the dust using a vacuum
cleaner. Wash filter with a mild detergent, rinse with
clean water and allow to dry.
NOTE: Replace filter annually. See your Duo Therm
Dealer for replacement filter. Filter part numbers are
stamped on filter frame.
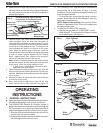
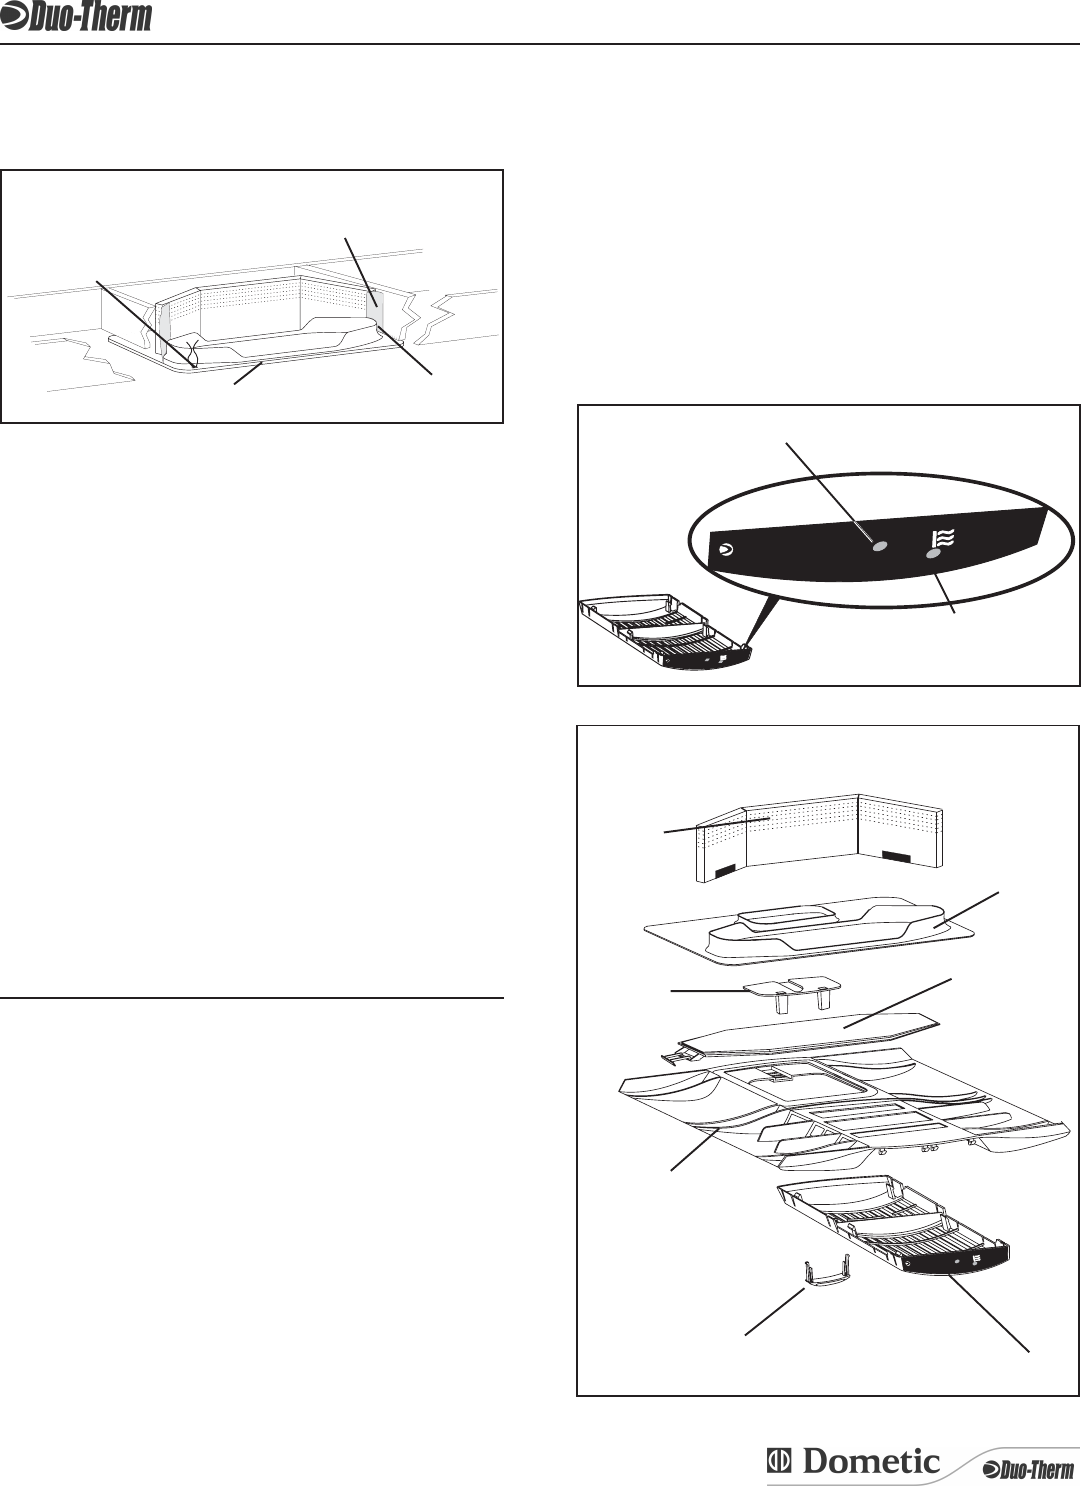
2. To reset the “CLEAN FILTER” reminder:
a. Depress the gray button “FILTER RESET” on the
decal of the grill. The Light will blink 3 times to indicate
a successful reset. See Figure 11.
M
i
c
r
o
-
T
h
e
r
m
F
i
l
t
e
r
S
y
s
t
e
m
Micro-Therm
Filter
System
F
I
L
T
E
R
R
E
S
E
T
FILTER
RESET
C
L
E
A
N
F
I
L
T
E
R
CLEAN
FILTER
M
icro
-T
h
erm
F
ilter
S
ystem
Micro-Therm
Filter
System
F
IL
T
E
R
R
E
S
E
T
FILTER
RESET
C
L
E
A
N
F
IL
T
E
R
CLEAN
FILTER
FIG.11
Push To Reset
Light
M
i
c
r
o
-
T
h
e
r
m
F
i
l
t
e
r
S
y
s
t
e
m
Micro-Therm
Filter
System
F
I
L
T
E
R
R
E
S
E
T
FILTER
RESET
C
L
E
A
N
F
I
L
T
E
R
CLEAN
FILTER
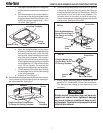
Ceiling
Template
Foam
Divider
Slide
Filter
Return
Air
Cover
FIG. 10
Grill
Slide
Handle