


MAINTENANCE
WARNING
Disconnect power before attempting any maintenance or cleaning to reduce the risk of fire,
electric shock or damage to persons.
LIGHT BULB REPLACEMENT
Allow at least 5 minutes for light bulbs to cool before touching bulbs to avoid accidental burning
of skin.
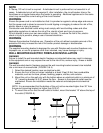
Light bulbs need to be replaced when you notice a dark section of the flame or when the clarity
and detail of the log exterior disappears. There are two bulbs under the log set which generate
the flames and embers.
TOOL REQUIREMENTS
Slot screw driver
HELPFUL HINTS
It is a good idea to replace all light bulbs at one time if they are close to the end of their rated
life. Group replacement will reduce the number of times you need to open the unit to replace
light bulbs.
LOWER LIGHT BULB REQUIREMENTS
Quantity of 3 – 35 Watt Clear Halogen Lamps, 120 Volt, G9 base. DO NOT EXCEED 35
WATTS PER BULB.
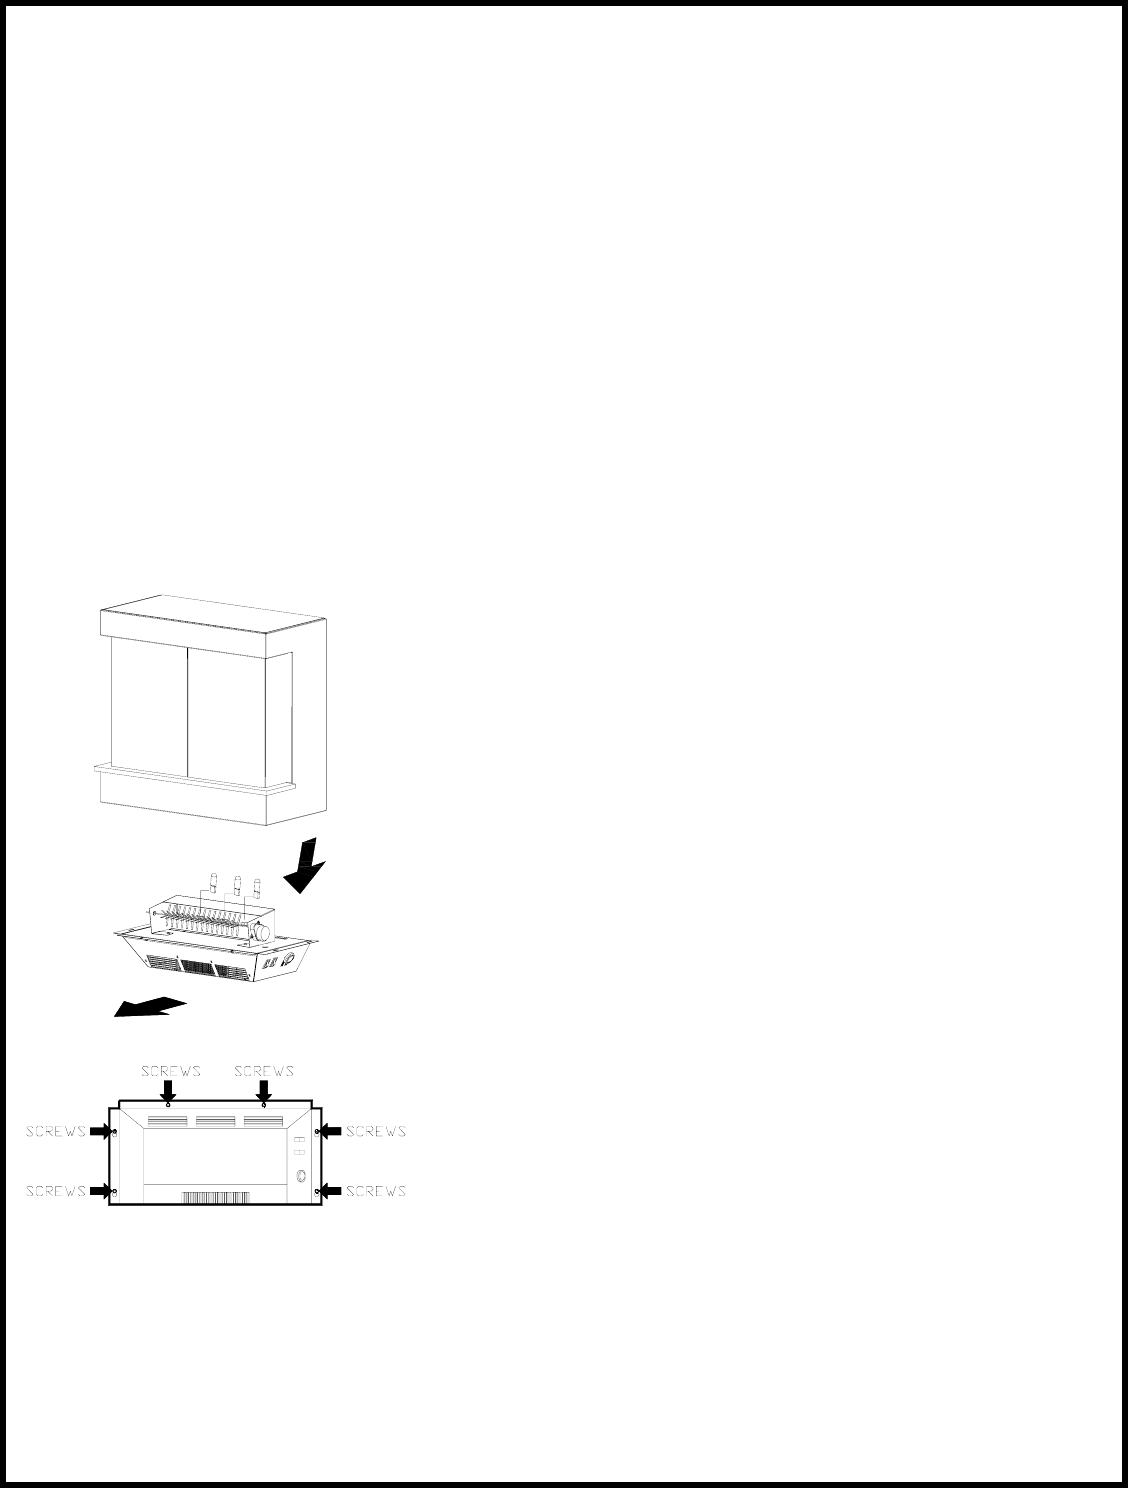
LOWER BULB REPLACEMENT
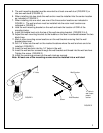
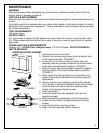
1. Unplug the unit from the outlet.
2. Remove the two mounting screws from the bottom front
of the heater assembly. (FIGURE 2)
3. Loosen but do not remove the four heater and light
assembly mounting screws located on the bottom sides
of the wall mounted electric fireplace.
(FIGURE 2)
4. Slide the heater and light assembly forward to release it
from the bottom of the wall mounted electric fireplace
(FIGURE 1).
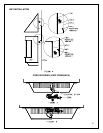
5. Place heater and light assembly on a flat surface and
examine the bulbs to determine which bulb(s) required
replacement
6. Remove the burnt out bulb(s) by gently pulling straight
out of socket. If bulbs are difficult to remove from socket
move the bulb from side to side while pulling being
careful not to damage the light socket.
7. Insert new bulb(s).
8. Install the heater and light assembly onto the four
mounting screws.
9. Slide the assembly backwards to lock it into position.
10. Tighten the four heater and light assembly mounting
screws.
11. Install the two front mounting screws.
12. Plug in the wall mounted electric fireplace.
8
FIGURE 1
FIGURE 2