


5
MAINTENANCE
WARNING: Disconnect power before attempting any
maintenance or cleaning to reduce the risk of re,
electric shock or damage to persons.
Light Bulb Replacement
Allow at least ve (5) minutes for light bulbs to cool off
before touching bulbs to avoid accidental burning of skin.
Light bulbs need to be replaced when you notice a dark
section of the ame or when the clarity and detail of the log
exterior disappears.
There are three (3) bulbs under the Log Set Assembly,
which generate the ames and embers, and one (1) bulb
above that illuminate the log exterior.
Tool Requirements: Phillips screw driver
Helpful Hints: It is a good idea to replace all light bulbs
at one time if they are close to the end of their rated life.
Group replacement will reduce the number of times you
need to open the unit to replace light bulbs.
Upper Bulb Requirement: Quantity of one (1) 7 Watt
candelabra E12 small base 120 Volt.
Do not exceed 7 Watts per bulb.
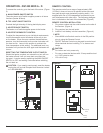
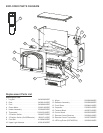
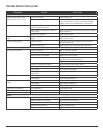
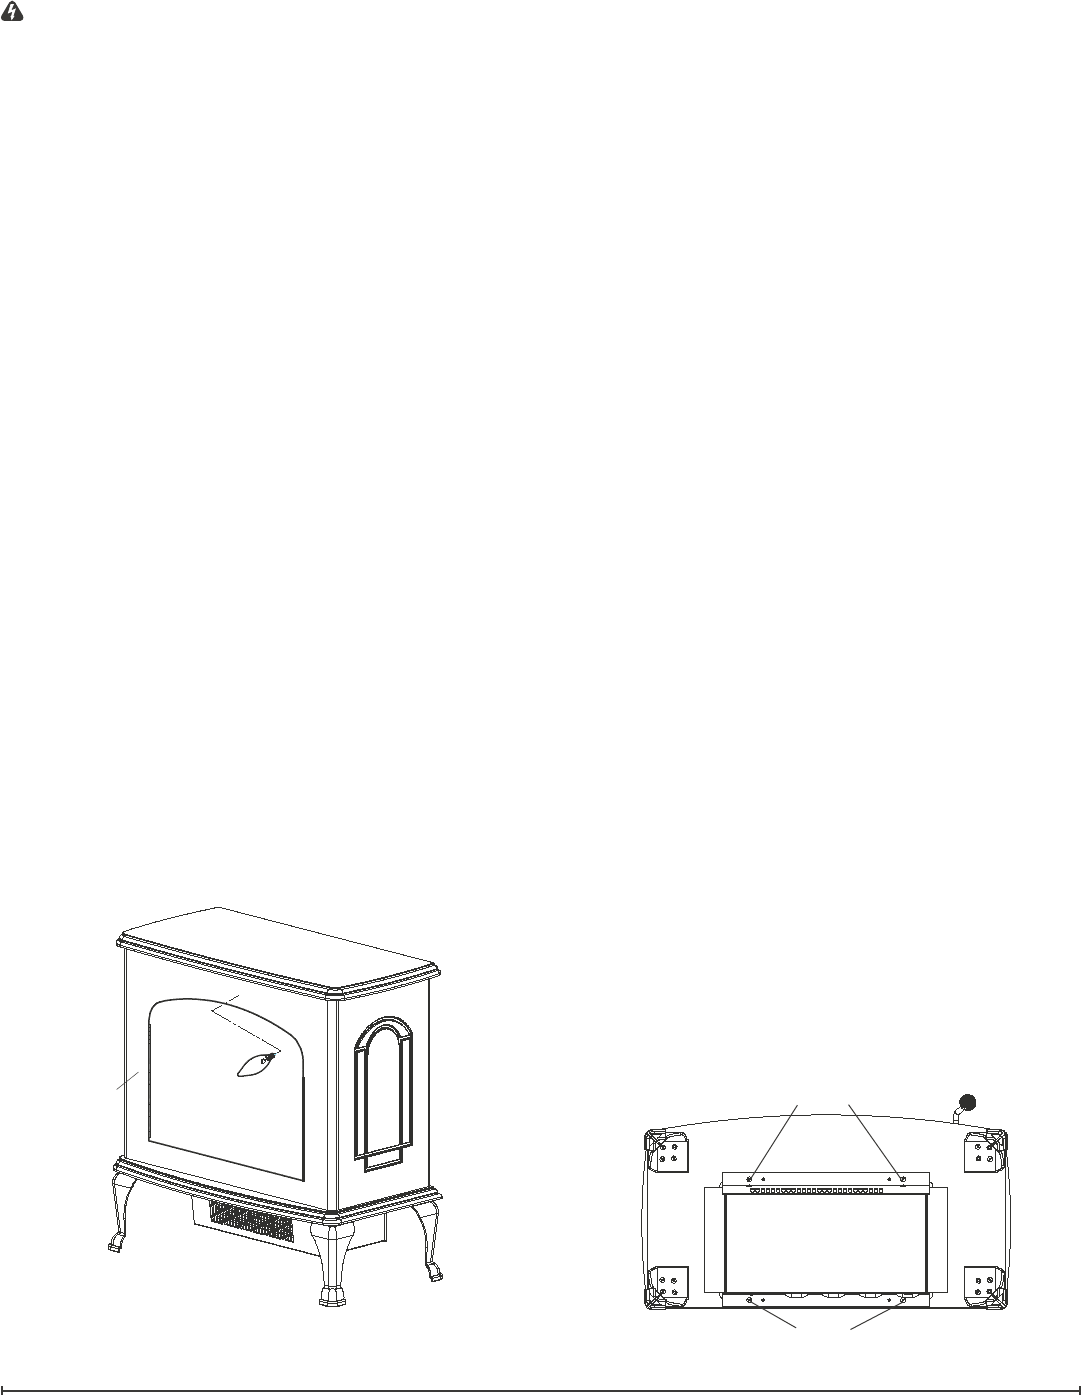
Upper Bulb Replacement (Figure 5)
Open door by pulling the handle.1.
Locate the upper bulb bracket.2.
Bend light retainer bracket down.3.
Locate and remove light bulb.4.
Insert and install new bulb.5.
Bend light retainer bracket back into its original 6.
position.
Close the door.7.
Lower Bulbs Requirement: Quantity of three (3) 35 Watt
Halogen Quartz lamps, 120 Volt, G9 Base.
Do not exceed 35 Watts per bulb.
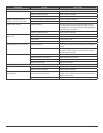
Lower Bulb Replacement
Remove the stove pipe kit (if equipped).1.
Gently place stove on its back on a at surface.2.
Remove the heater cover retaining screws located on 3.
the bottom of the stove (Figure 6) and lower heater and
light assembly out onto the oor.
Remove the burnt out bulb(s) by pulling straight out 4.
of socket. If bulbs are difcult to remove form socket
move the bulb from side to side while pulling being
careful not to damage the light socket.
Replace the lower light bulbs.5.
Reassemble in the reverse order as above.6.
Glass Cleaning
The clear door is cleaned in the factory during the
assembly operation. During shipment, installation, handling,
etc., the clear door may collect dust particles. These can be
removed by dusting lightly with a clean, dry cloth.
To remove ngerprints or other marks, the clear doors
can be cleaned with a damp cloth. The clear door should
be completely dried with a lint free cloth to prevent water
spots. To prevent scratching, do not use abrasive cleaners
or spray liquids on the clear door surface.
Plastic Door Cleaning
To remove ngerprints or other marks, the clear doors
can be cleaned with a damp cloth. The clear door should
be completely dried with a lint free cloth to prevent water
spots. To prevent scratching, do not use abrasive cleaners
or spray liquids on the clear door surface.
Stove Surface Cleaning
Use warm water only to clean painted surfaces of the
Stove. Do not use abrasive cleaners.
Servicing
Except for light bulb replacement and cleaning described
above, an authorized service representative should perform
any other servicing.
Figure 6
Figure 5
Screws
Screws