Digital Video Recorder User Manual
STEP4 Select alarm out and recording channels. It can trigger any alarm
out and cameras to record once motion is detected.
STEP5 Enable or disable Buzzer on board. Select speed dome and
enable preset or auto cruise (if you are using a PTZ camera). Press OK to
save
STEP6 Set Hold time This is the length of time between two consecutive
motion alarms. If a second motion is detected during Hold time, it is
recognized as a continuous part of the first motion event. If a second motion
is detected after hold time, this motion and the previous are recognized as
two different motion events.
STEP7 Click OK to save settings
STEP8 Enter SCHEDULE configuration. Select Motion and relative
cameras to set, refer to 3.3.3 Schedule Recording.
Notice: About preset and auto cruise (for PTZ cameras), users can only select one at
a time.
The actual post- alarm record time equals Hold time in RECORD and Hold time in MOTION
3.3.5 Alarm Recording
This unit supports recording channels and PTZ linking after alarm.
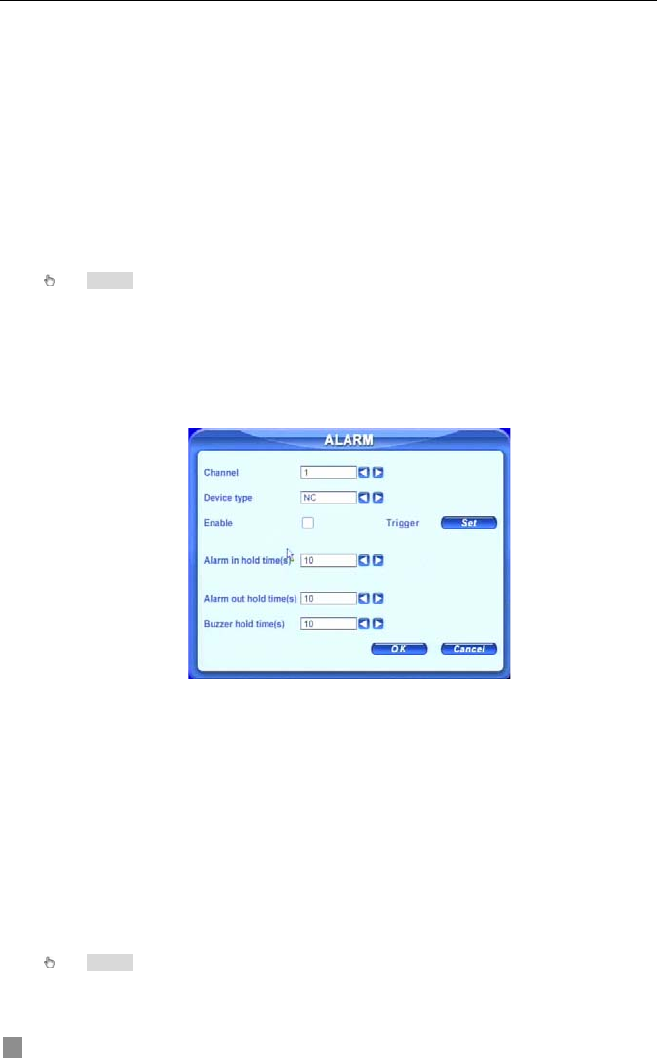
STEP1 Enter ALARM configuration, see Fig 3.12 Sensor Alarm Setup.
Select cameras
Fig 3.12 Sensor Alarm Setup
STEP2 Enable Detection first (put checkmark in Enable box). Set Device
type.
STEP3 Enter Trigger configuration. Set alarm out, recording cameras and
linked PTZ (if using PTZ cameras), refer to 3.3.4 Motion Detection Recording
STEP4-5
STEP4 Set Alarm in hold time. This is the length of time between two
consecutive alarms. This is similar to Hold time in MOTION configuration
(3.3.4 Step6).
STEP5 Set Alarm out hold time and Buzzer hold time. Click OK to save
settings.
STEP6 Enter SCHEDULE configuration. Select Sensor and relative
cameras to set, refer to 3.3.3 Scheduled Recording.
Notice: Regarding preset and auto cruise (for PTZ cameras), users can only select
one at a time.
The actual post alarm record time equals Hold time in RECORD and Hold time in ALARM
18


