


®
12
901272
VENTED GAS LOGS
INSTALLATION
Continued
O
F
F
P
I
L
O
T
O
N
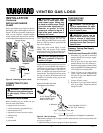
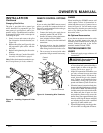
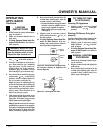
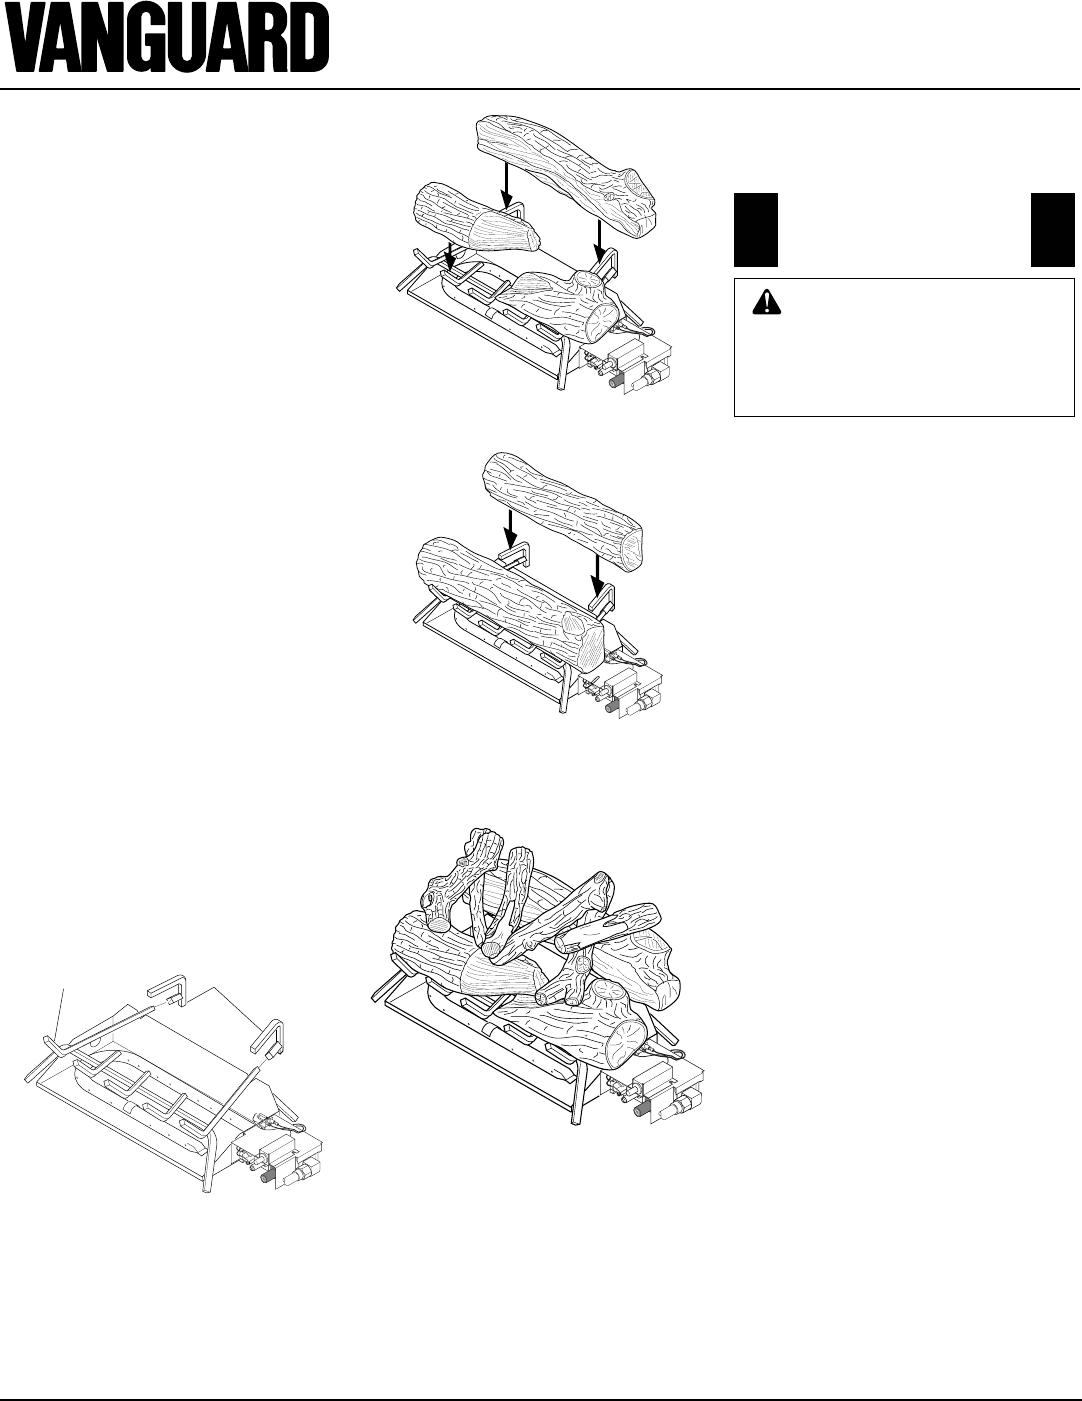
Figure 20 - Installing Grate (Pan Material
Not Shown)
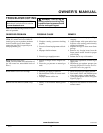
Figure 21 - Installing Front and Back Logs
(Number and style of your logs may vary)
Figure 22 - Placement of Top Logs
(Manchester Split Oak Logs Shown)
Grate
Grate Steps
O
F
F
P
I
L
O
T
O
N
O
F
F
P
I
L
O
T
O
N
O
F
F
P
I
L
O
T
O
N
Arlington Round Oak Logs
Manchester Split Oak Logs
OPERATING
APPLIANCE
FOR YOUR SAFETY
READ BEFORE
LIGHTING
WARNING: If you do not fol-
low these instructions exactly, a
fire or explosion may result caus-
ing property damage, personal
injury or loss of life.
A. This appliance has a pilot which must
be lighted by hand. When lighting the
pilot, follow these instructions exactly.
B. BEFORE LIGHTING smell all
around the appliance area for gas. Be
sure to smell next to the floor because
some gas is heavier than air and will
settle on the floor.
WHAT TO DO IF YOU SMELL
GAS
• Do not try to light any appliance.
• Do not touch any electric switch;
do not use any phone in your building.
• Immediately call your gas supplier
from a neighbor’s phone. Follow
the gas supplier’s instructions.
• If you cannot reach your gas sup-
plier, call the fire department.
C. Use only your hand to push in or turn
the gas control knob. Never use tools.
If the knob will not push in or turn
by hand, don’t try to repair it, call a
qualified service technician or gas
supplier. Force or attempted repair
may result in a fire or explosion.
D. Do not use this appliance if any part
has been under water. Immediately
call a qualified service technician to
inspect the appliance and to replace
any part of the control system and
any gas control which has been un-
der water.
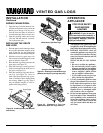
ADDING PAN MATERIAL
1. Open the bag of ash bed material (ver-
miculite) and spread it evenly across the
burner pan to the top. You may over-
flow the front and sides of the pan to
cover the entire pan. Do not cover valve.
2. Open the glowing embers and evenly
cover the ash bed material (vermicu-
lite) in the burner pan.
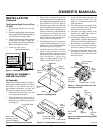
INSTALLING THE GRATE
AND LOGS
1. Place the grate over the burner pan where
the two outer horizontal supports on the
grate fit into the two pan positioning
notches in the rear vertical edge of the pan.
2. Slide the two rear log grate steps over
the two outer horizontal supports on the
grate as shown in Figure 20.
3. Place the back log on the grate onto the
grate steps (see Figure 21).
4. Place the front log(s) on the grate and
slide forward against the front bars on
the grate (see Figure 22).
5. Place the smaller top logs onto the bot-
tom logs (see Figure 22). Leave as
much open space between logs as pos-
sible to minimize flame impingement
and sooting.
Note:
Logs may chip if
they are handled roughly or if hit to-
gether while being placed.