


111640-01B
15
15
For more information, visit www.desatech.com
For more information, visit www.desatech.com
INSTALLATION
Installing Logs (Cont.)
OPERATING HEATER
For Your Safety Read Before Lighting
Log #2
INSTALLATION
Continued
WARNING: If you do not follow these instructions
exactly, a fire or explosion may result causing prop-
erty damage, personal injury or loss of life.
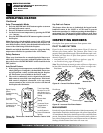
A. This appliance has a pilot which must be lighted by hand.
When lighting the pilot, follow these instructions exactly.
B. BEFORE LIGHTING smell all around the appliance area
for gas. Be sure to smell next to the floor because some gas
is heavier than air and will settle on the floor.
WHAT TO DO IF YOU SMELL GAS
• Do not try to light any appliance.
• Do not touch any electric switch; do not use any phone
in your building.
• Immediately call your gas supplier from a neighbor’s
phone. Follow the gas supplier’s instructions.
• If you cannot reach your gas supplier, call the fire
department.
C. Use only your hand to push in or turn the gas control knob.
Never use tools. If the knob will not push in or turn by
hand, don’t try to repair it, call a qualified service techni-
cian or gas supplier. Force or attempted repair may result
in a fire or explosion.
D. Do not use this appliance if any part has been under water.
Immediately call a qualified service technician to inspect
the appliance and to replace any part of the control system
and any gas control which has been under water.
OPERATING HEATER
FOR YOUR SAFETY READ
BEFORE LIGHTING
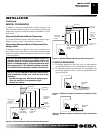
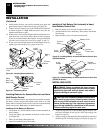
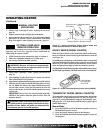
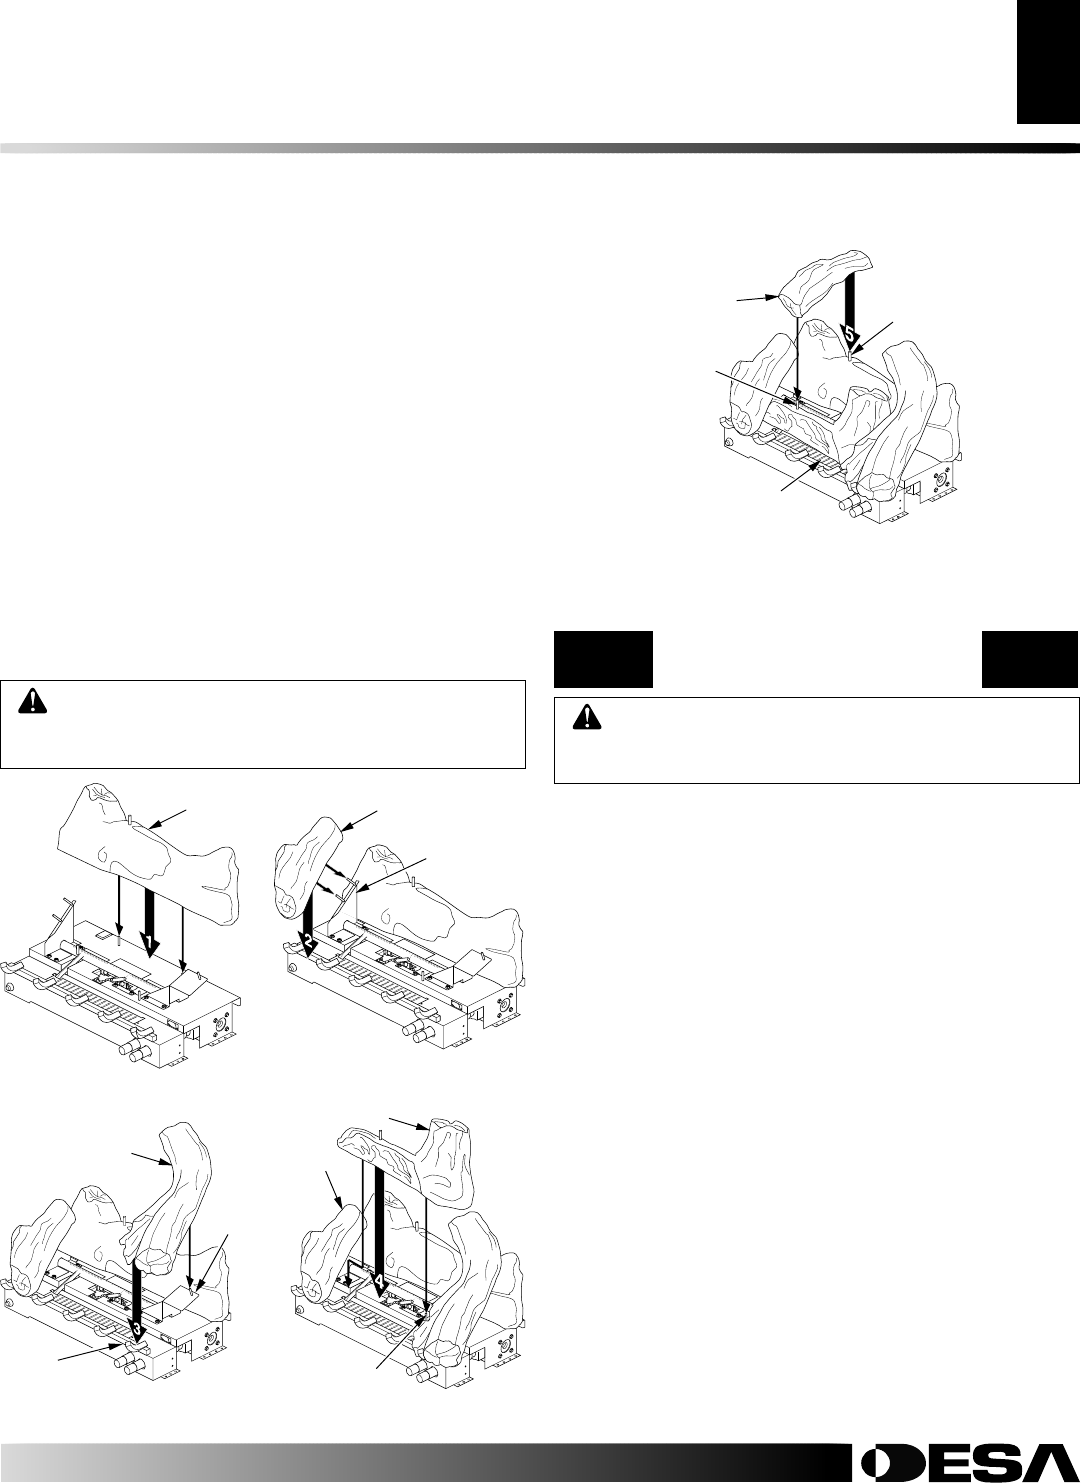
3. Align peg on right support bracket with hole in bottom of right
side log (#3). Place log over peg and over last grate finger on
right as shown in Figure 25.
4. Place left end of front log (#4) under left side log (#2). Align
hole in bottom of right end of log #4 with peg in front of right
support bracket (see Figure 26). Lower log onto peg.
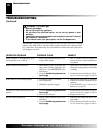
5. Align holes in bottom of crossover log #5 with pegs on top of
rear log (#1) and front log (#4) (see Figure 27). It may be nec-
essary to adjust log #4 to align holes with pegs. Place cross-
over log onto pegs (see Figure 28).
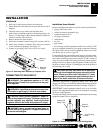
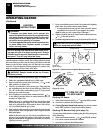
6. The effect of glowing embers can be created by placing rock
wool on front burner. For best effect, use only the smallest
amount necessary to create the glow. Tear rock wool into dime-
size pieces and place pieces on and around front burner. Do
NOT place rock wool in area of pilot or rear burner.
7. Add lava rock around base to heater if desired. Do not place
lava rock on logs or burner. Do NOT place lava rock on or
around front burner.
CAUTION: Placing lava rock on or around front
burner will cause severe sooting. Please keep ember
material (rock wool) separate from lava rock.
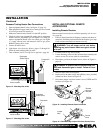
Figure 24 - Installing Rear
Log (#1)
Left Support
Bracket
Log #1
Figure 26 - Installing Right
Log (#3)
Log #3
Grate
Finger
Figure 25 - Installing Left
Log (#2)
Right
Support
Bracket
Figure 27 - Installing Front
Log (#4)
Log #4
Peg
Log #2
Figure 28 - Installing Crossover Log (#5)
Log #5
Peg on Log #1
Peg on Log #4
Place Rock Wool On
Front Burner For Glowing
Ember Effect