


110399-01B
For more information, visit www.desatech.com
For more information, visit www.desatech.com
12
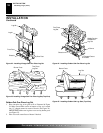
INSTALLATION
Continued
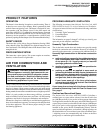
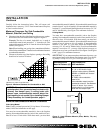
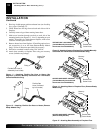
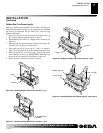
Heater Gas
Regulator
Flexible Gas Hose (if
allowed by local codes)
Figure 11 - Attaching Flexible Gas Hose to Heater Gas
Regulator (Variable Manually-Controlled and Thermostat-
Controlled Models Only)
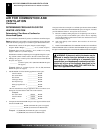
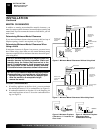
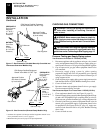
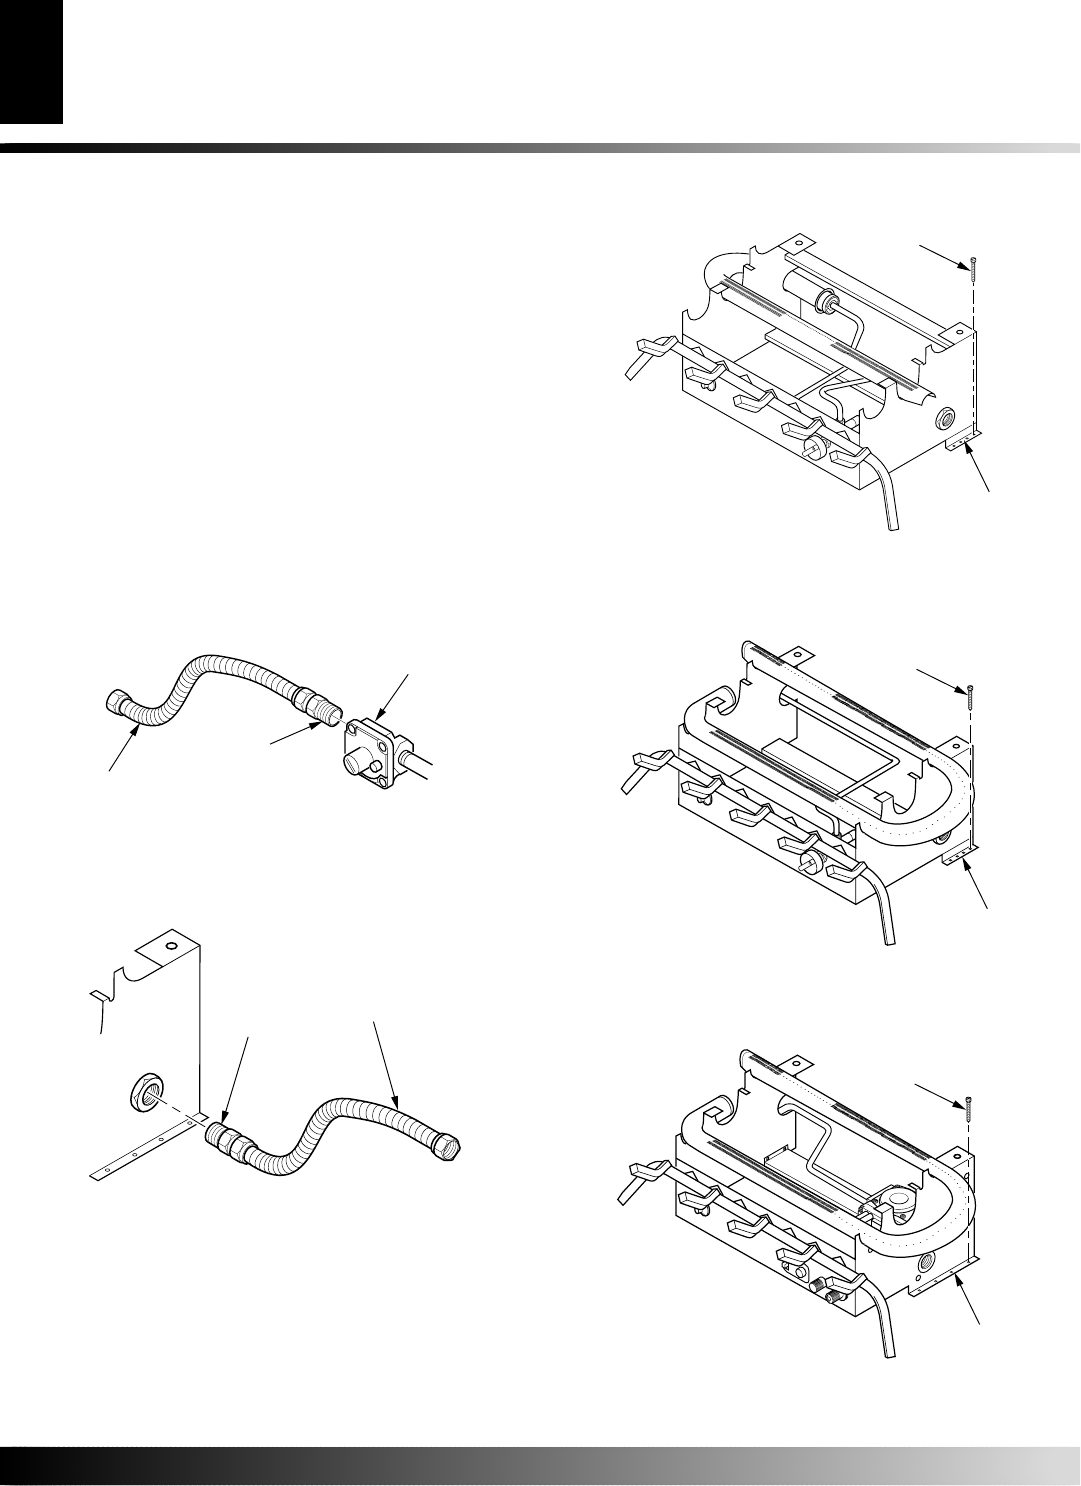
Figure 13 - Attaching Heater to Fireplace Floor (Variable Manually-
Controlled and Thermostat-Controlled Models Only)
Masonry
Screw
Bracket with
Screw Holes
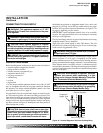
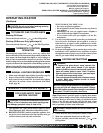
Figure 12 - Attaching Flexible Gas Hose to Heater (Remote-
Ready Models Only)
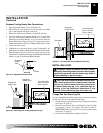
Figure 14 - Attaching Base to Fireplace Floor (Remote-Ready
Models Only)
4. Place logs in their proper position on heater base (see Installing
Logs, pages 15 through 17).
5. Center heater base and logs front-to-back and side-to-side in
fireplace.
6. Carefully remove logs without moving heater base.
7. Mark screw locations through one hole on each side of the
mounting bracket (see Figures 13, 14 or 15, depending on your
model). If installing in a brick-bottom fireplace, mark screw
locations in mortar joint of bricks.
8. Remove heater base from fireplace. If installing optional con-
trol accessories, do so at this time (Remote-Ready Models
Only). Follow all directions provided with accessory.
9. Drill holes at marked locations using 3/16" drill bit.
10. Attach base assembly to fireplace floor using two masonry
screws (in hardware package).
INSTALLATION
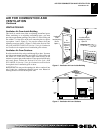
Installing Heater Base Assembly (Cont.)
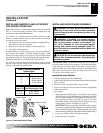
Fitting
Flexible Gas
Hose (if allowed
by local codes)
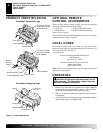
VINTAGE OAK LOG CHASSIS
(Variable Manually-Controlled and
Thermostat-Controlled Models)
Fitting
Figure 15 - Attaching Base Assembly to Fireplace Floor
Bracket with
Screw Holes
Bracket with
Screw Holes
Masonry
Screw
Masonry
Screw
GOLDEN OAK MODEL CHASSIS
(Variable Manually-Controlled and
Thermostat-Controlled Models)
GOLDEN OAK MODEL CHASSIS
(Remote-Ready Models)