


4
201839
DIRECT-VENT PROPANE/LP GAS HEATER
DYNAVENT
®
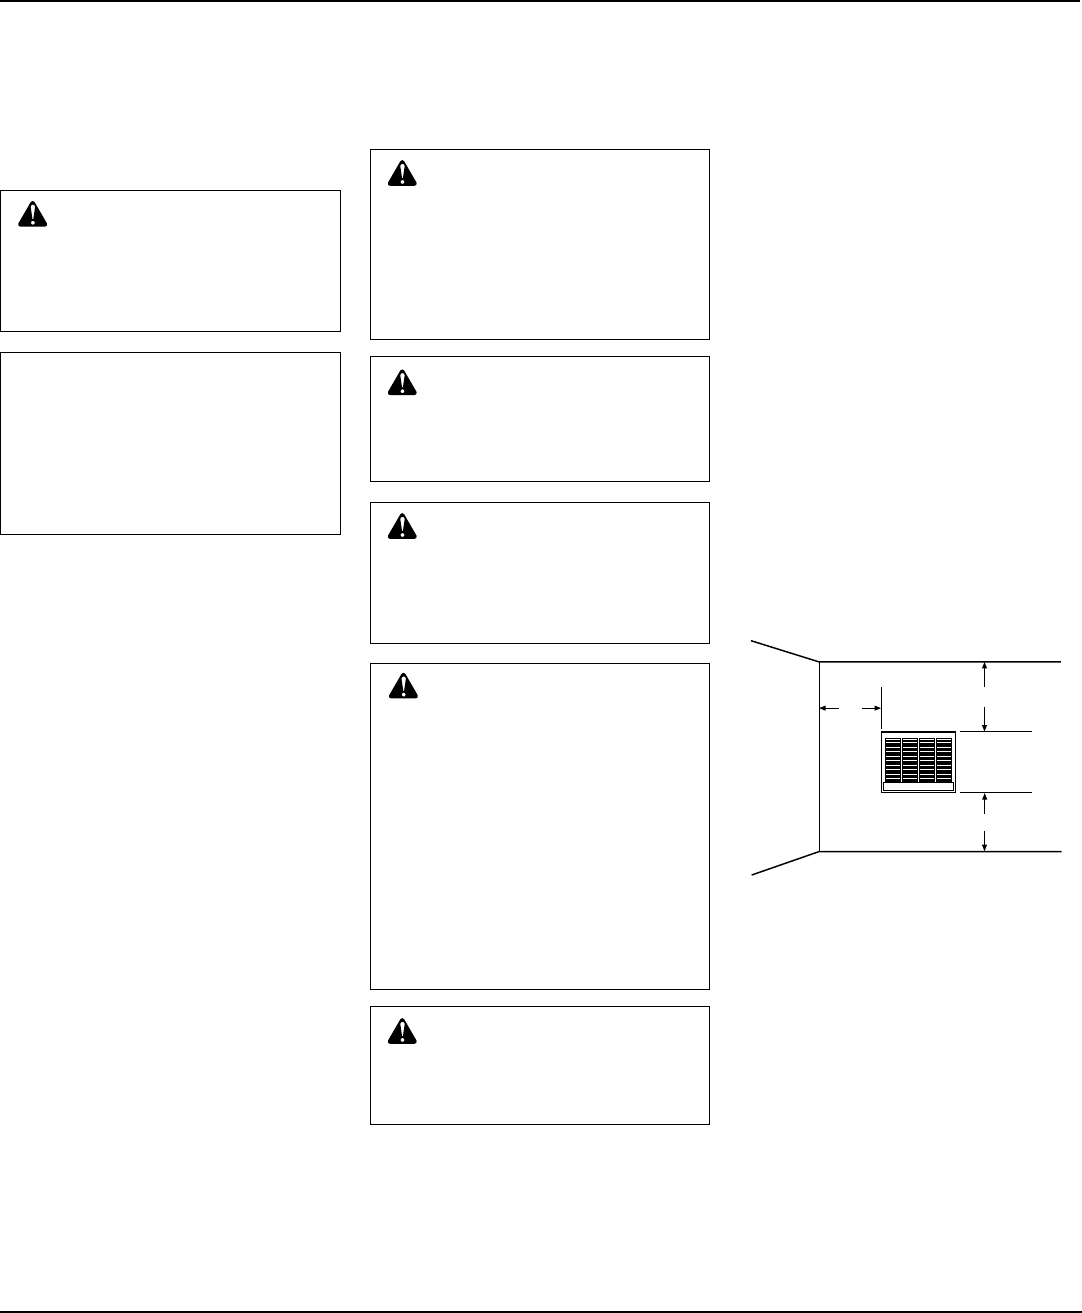
6" Minimum
Adjacent
Side
Wall
Ceiling
Finished Floor, Carpet, Tile, etc.
12"
Minimum
12" Minimum
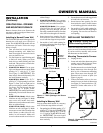
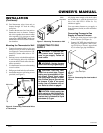
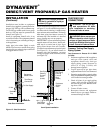
Figure 1 - Mounting Clearances as Viewed
from Front of Furnace
The clearance between the cabinet and the
wall it passes through is 0 inches.
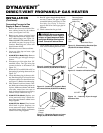
Provide the following minimum clearances
from furnace cabinet (portion of cabinet
extending into outside air, as viewed from
the rear of furnace) to obstructions:
Cabinet Back: 36 inches
Cabinet Sides: 6 inches
Cabinet Bottom: Must be high enough
off the ground to prevent snow, water,
leaves, or any other objects from block-
ing vents.
Minimum Clearances
Provide the following minimum clearances
from furnace front cover to combustibles
(as viewed from the front of furnace, see
Figure 1):
Below Front Cover: 6 inches
Above Front Cover: 12 inches
Adjoining Wall: 12 inches
Front: 8 feet
WARNING: Due to high tem-
peratures, never install the furnace:
• in an inside wall
• in a recreation vehicle
• in a window recessed in a thick
wall (creating an alcove)
• in an alcove
• behind a door or where an open
door would block normal air flow
• as a fireplace insert
• in high traffic areas
• near furniture or draperies
• in windy or drafty areas
CAUTION: If you install the
furnace in a home garage, locate
furnace where moving vehicle will
not hit it.
For convenience and efficiency, install furnace:
• where there is easy access for operation,
inspection, and service
• in a central location, near an electrical
outlet
• where there is adequate clearance around
vents outside
Before installing furnace, inspect the wall,
floor, and outside areas. Make sure there are
no pipes, wiring, or anything else that would
interfere with furnace installation. If you are
installing thermostat in a wall, make sure
there are no pipes or wiring in the hollow
wall above the furnace. The thermostat wires
will pass through this wall from the attic.
Mounting hardware needed to mount fur-
nace into wall is included with the furnace.
No venting material is needed. You must
furnish tools and all gas piping from the gas
source to the furnace inlet.
INSTALLATION
WARNING: A qualified ser-
vice person must install furnace.
Have service person inspect fur-
nace before use and at least an-
nually. Follow all local codes.
CHECK GAS TYPE
Use only propane/LP gas. If your gas sup-
ply is not propane/LP gas, do not install
furnace. Call dealer where you bought fur-
nace for proper type furnace.
INSTALLATION ITEMS
Before installing furnace, make sure you
have all items below:
• electric drill
• drill bits
• Phillips screwdriver
• hammer
• pipe wrench
• stud locator or small finishing nails
• equipment shutoff valve (supplied)
• test gauge connection (see Figure 15,
page 10)
• piping (check local codes)
• sealant (resistant to propane/LP gas)
• ground joint union
• sediment trap
• tee joint
LOCATING FURNACE
This furnace is designed to be mounted in a
wall that is 4 to 18 inches thick. You can also
mount furnace in a window.
WARNING: Do not install fur-
nace in interior wall of building. You
must install furnace in exterior wall
of building. Rear of furnace must
extend into open, outside air. This
lets poisonous exhaust gases ven-
tilate to the outdoors.
WARNING: Maintain the mini-
mum clearances shown in Figure
1. If you can, provide greater clear-
ances from floor, ceiling, and
joining wall.
WARNING: Turn off electrical
circuits that pass through the wall
where you are going to install the
furnace.
NOTICE: This furnace must be
electrically grounded. Follow all
local codes. In the absence of
local codes, follow the
National
Electric Code, ANS/NFPA 70
(U.S.) or Canadian Electrical Code
Part I-CSA C22.1 (Canada).