


www.desatech.com
110098-01G 11
SERVICE PROCEDURES
WARNING: Never service
heater while it is plugged in, op
-
erating or hot. Severe burns and
electrical shock can occur. Only
a qualified service person should
service and repair heater.
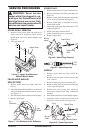
UPPER SHELL REMOVAL
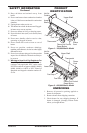
1. Remove screws along each side and top of
heater using 5/16" nut-driver. These screws
attach upper and lower shells together (see
Figure 6).
2. Lift upper shell off.
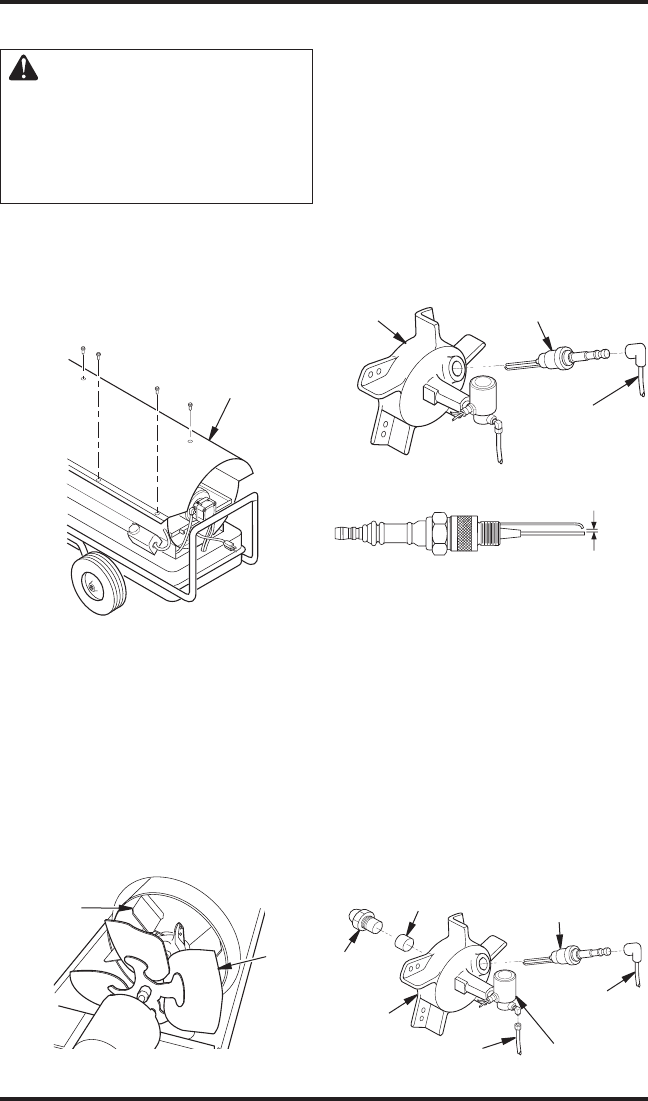
Figure 6 - Upper Shell Removal,
600,000 Btu/Hr Model
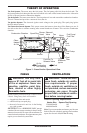
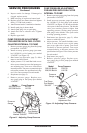
FAN BLADES AND AIR
DEFLECTORS
1. Remove upper shell (see Upper Shell Re-
moval).
2. Clean fan blades and air deflectors with clean,
soft cloth moistened with kerosene or solvent
(see Figure 7).
3. Dry fan blades and air deflectors thoroughly.
4. Replace upper shell.
Figure 7 - Fan Blades and Air Deflectors
Fan
Blade
Air
Deflector
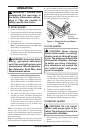
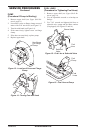
Figure 8 - Spark Plug Removal
Spark Plug
Wire
Spark Plug
Burner
Head
.075
inch
Figure 9 - Spark Plug Gap
SPARK PLUG
1.
Remove upper shell (see Upper Shell Removal).
2. Remove spark plug wire from spark plug (see
Figure 8).
3. Remove spark plug from burner head using
13/16" open-end wrench (see Figure 8).
4. Replace spark plug if damaged or heavily
coated with carbon.
5. Clean and regap spark plug electrodes to .075
inch (see Figure 9).
6. Install spark plug in burner head.
7. Attach spark plug wire to spark plug.
8. Replace upper shell.
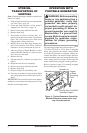
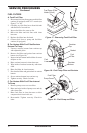
Figure 10 - Replacing Nozzle
Spark Plug
Burner
Head
Fuel Line
Solenoid Valve
Plug
Nozzle
Spark Plug
Wire
Upper Shell
NOZZLE
1. Remove upper shell (see Upper Shell Re-
moval).
2. Remove fuel line from solenoid valve using
7/16" wrench.
3. Remove spark plug wire from spark plug.
4. Remove spark plug from burner head using
13/16" open-end wrench.
5. Remove five screws using 5/16" nut-driver
and remove burner head from combustion
chamber.
6. Place burner head into vise and lightly tighten.
7. Carefully remove nozzle from burner head
using 5/8" socket wrench (see Figure 10).