


111739-01A
For more information, visit www.desatech.com
For more information, visit www.desatech.com
9
9
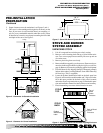
STOVE AND BURNER
SYSTEM ASSEMBLY
Continued
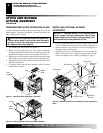
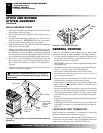
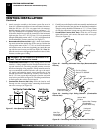
Thermocouple
Thermopile
Pilot Target
Figure 16 - Pilot Target Alignment
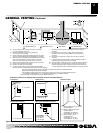
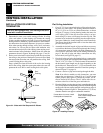
Gas Control Valve Conversion
If your burner system is natural gas, do not install
conversion kit. This kit is for users with propane/LP
gas only.
Convert the gas control valve from natural gas to propane/LP gas by
swapping out the valve regulator portion of the gas valve.
1. Open bottom swing door on stove to allow access to gas con-
trol valve.
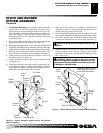
2. Using a phillips head screwdriver, remove the two mounting
screws fastening the regulator assembly to the gas control valve
(see Figure 17).
3. Remove regulator assembly and rubber gasket from control valve
(see Figure 17).
4. Place rubber gasket supplied with regulator kit on gas control
valve. Align two of the holes on the gasket with orientation
pins on gas control valve.
IMPORTANT:
Make sure gasket is properly seated and aligned
on gas control valve.
5. Position regulator assembly supplied with conversion kit over
rubber gasket on gas control valve. Align the notch in the regu-
lator assembly with the pin on the gas control valve.
6. Attach regulator assembly to gas control valve using the two
mounting screws removed in step 2. Tighten screws securely
(approximately 25 in-lbs.) (see Figure 17).
STOVE AND BURNER SYSTEM ASSEMBLY
Installing Propane/LP Conversion Kit (Cont.)
L
O
H
I
P
I
L
O
T
OFF
ON
Mounting Screws
(Phillips Head)
Regulator Assembly
Rubber
Gasket
Gas Control
Valve
Figure 17 - Removing/Replacing Regulator Assembly and Rubber
Gasket
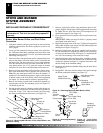
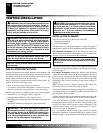
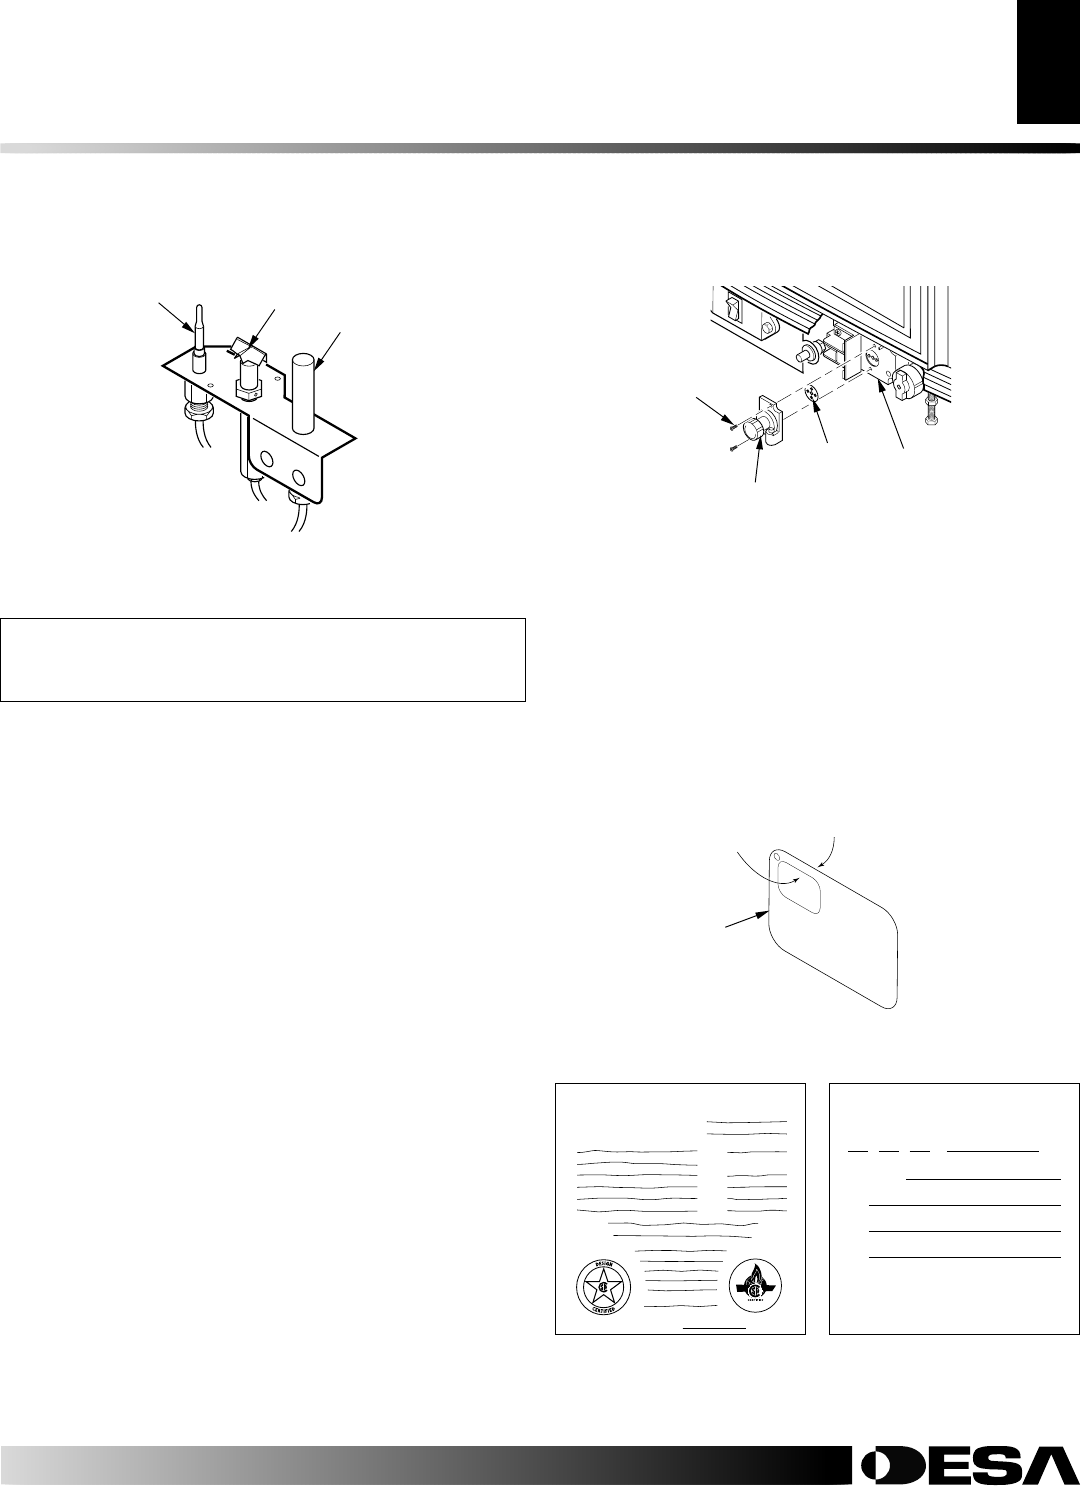
Conversion Labeling and Placement
1. Apply the English and French conversion labels over the top of the
existing certification labels (see Figure 18). Existing certification
labels are located on the lighting instruction plate inside the gas
valve compartment area. With permanent ink, print the previous
model number on the label in the space provided (see Figure 19).
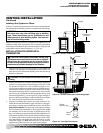
2. After filling in the data required on the conversion information la-
bel, affix it to the stove bottom next to the gas control valve. Make
sure it is easily seen when the swing door is opened (see Figure 20).
English This
Side
French This
Side
Figure 18 - Applying English and French Conversion Labels
over Existing Certification Labels on Lighting Instruction Plate
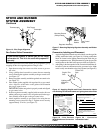
DIRECT VENT DECORATIVE FIREPLACE
Conversion Kit Model
Type of Gas
Previous Model #
Figure 19 - Print Previous
Model Number on Conversion
Labels
Lighting
Instruction
Plate
CONVERSION INFORMATION LABEL
This appliance was converted on
(name and address of organization making
this conversion), which accepts the
responsibility that this conversion has been
properly made.
Day Month Year
– – to gas
with Kit No.
by
106080-0156060
Figure 20 - Conversion
Information Label