


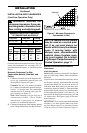

www.desatech.com
111160-01C 13
INSTALLATION
Continued
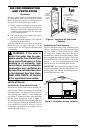
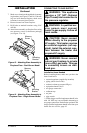
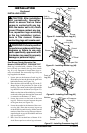
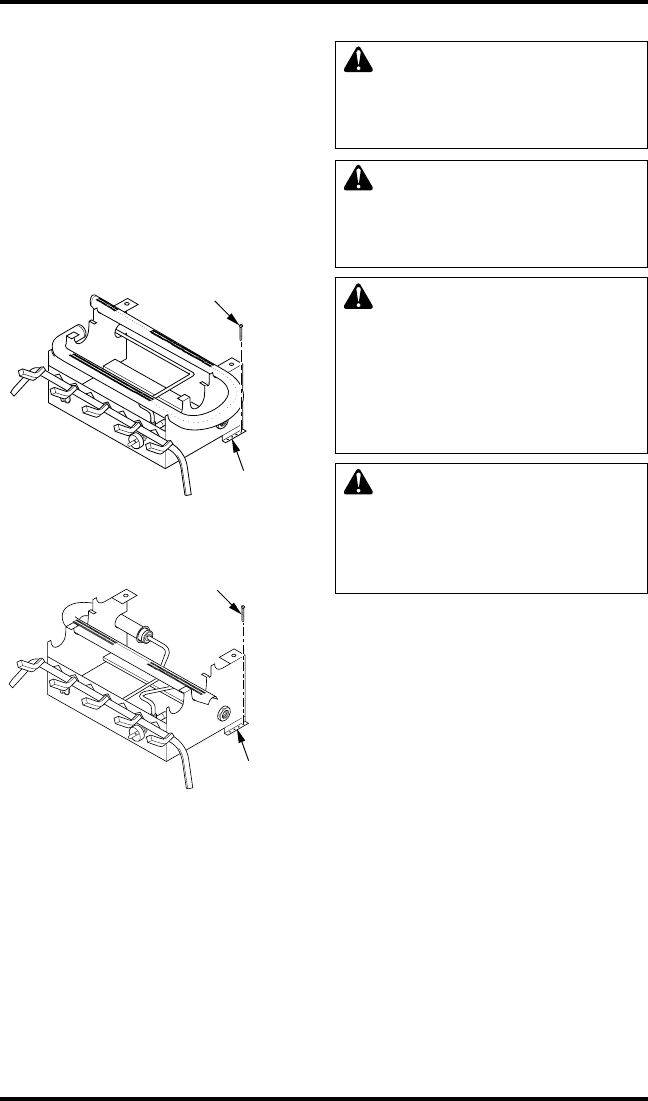
Figure 13 - Attaching Base Assembly to
Fireplace Floor - Dual Burner Model
Masonry
Screw
Mounting
Bracket
Masonry
Screw
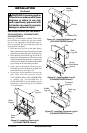
Figure 14 - Attaching Base Assembly to
Fireplace Floor - Single Burner Model
Mounting
Bracket
7. Mark screw locations through holes in mount-
ing brackets (see Figure 13 and 14). If install-
ing in a brick-bottom fireplace, mark screw
locations in mortar joint of bricks.
8. Remove heater base from fireplace.
9. Drill holes at marked locations using 3/16"
drill bit.
10. Attach base assembly to fireplace floor using
two masonry screws (in hardware package)
(see Figure 13 or 14).
CONNECTING TO GAS SUPPLY
WARNING: This appliance
requires a 1/2" NPT (National
Pipe Thread) inlet connection to
the pressure regulator.
WARNING: A qualified ser-
vice person must connect
heater to gas supply. Follow all
local codes.
CAUTION: Never connect
heater directly to the propane/
LP supply. This heater requires
an external regulator (not sup-
plied). Install the external regu-
lator between the heater and
propane/LP supply.
WARNING: Never connect
natural gas fireplace to private
(non-utility) gas wells. This gas
is commonly known as well-
head gas.
Installation Items Needed
Before installing heater, make sure you have the
items listed below.
• external regulator (supplied by installer)
• piping (check local codes)
• sealant (resistant to propane/LP gas)
• equipment shutoff valve *
• test gauge connection *
• sediment trap
• tee joint
• pipe wrench
* A CSA design-certified equipment shutoff valve
with 1/8" NPT tap is an acceptable alternative to
test gauge connection. Purchase the optional CSA
design-certified equipment shutoff valve from your
dealer. See Accessories, page 43.