


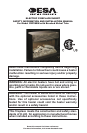

www.desatech.com
116863-01B
10
4. Hold socket and push in new bulb (DO NOT
exceed wattage).
5. Replace spring clip onto bulb.
6. Repeat steps 3 through 5 for second bulb.
7. Gently push ember bed down until rear edge
is resting against rear ledge of unit.
8. Replace glass.
Flame Generation Bulbs
1. Carefully remove glass (see step 1 under
Cleaning Firebox Compartment, page 9).
2. From the bottom, gently pull forward and lift
up log set ember bed until front edge clears
the front of the unit (do not pull up on logs).
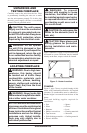
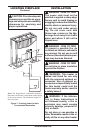
3. Loosen left and right screws/brackets that hold
glass in place. These are located at the bottom
of glass panel (see Figure 7).
4. With gloves and safety glasses in place, lift up
on bottom of glass by placing fingers in notches
(see Figure 7) and pull forward. Place glass on
smooth, soft surface to avoid breakage.
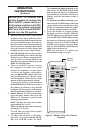
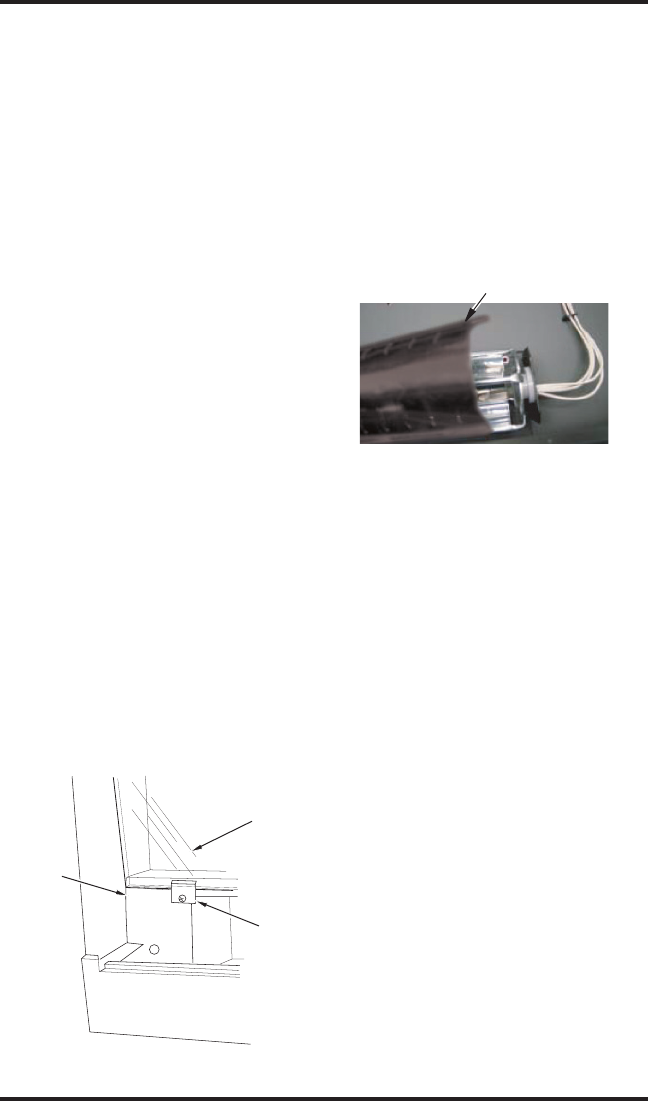
5. Locate flame generation cylindrical drum,
figure 8.
6. Squeeze half of drum cylinder until it's top
edge clears the top drum track. Remove bot
-
tom edge of cylinder drum from bottom drum
track. This will give you access to the light
bulbs. Note: Do not exert excessive pressure
on drum cylinder as this may cause damage.
7. Remove spring clip. Hold socket and pull out
old bulb.
8. Hold socket and push in new bulb (DO NOT
exceed wattage). Replace spring clip.
CLEANING AND
MAINTENANCE
Continued
TECHNICAL SERVICE
You may have further questions about installation,
operation or troubleshooting. If so, contact DESA
Heating Productsʼ Technical Service Department
at 1-866-672-6040. When calling please have your
model and serial numbers of your heater ready.
You can also visit DESA Heating Productsʼ techni
-
cal services web site at www.desatech.com.
Flame Cylinder Drum
Figure 8 - Flame Generation Cylinder
Drum
Figure 7 - Glass and Bracket Location
Glass
Bracket
Glass
Notch for
Access
to Glass
Panel
9. Repeat steps 5 and 6 for second bulb.
10. Insert bottom edge of removed cylinder half
into bottom drum track. Squeeze drum cylin
-
der until it's top edge fits into top drum rack.
11. With gloves, carefully replace glass. Slide top
of glass into metal slot and slide bottom onto
ledge.
12. Place brackets against glass and tighten
screws.
13. Gently push ember bed down until rear edge
is resting against rear ledge of unit.
14. Replace glass.