


116170-01A 5
www.desatech.com
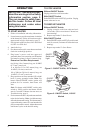
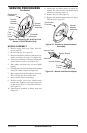
ASSEMBLY
(FOR 40, 55 AND 70 MODELS ONLY)
These models are furnished with a nose cone
guard. Nose cone guard and mounting screws are
found in the shipping carton.
Tools Needed
• 5/16" nut driver or wrench
1. Place nose cone guard on top of upper shell
flange. Make sure nose cone guard is on hot
air outlet end of heater.
2. Insert screws through nose cone guard and
upper shell flange.
3. Tighten screws firmly.
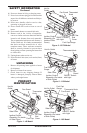
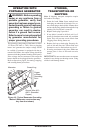
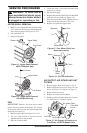
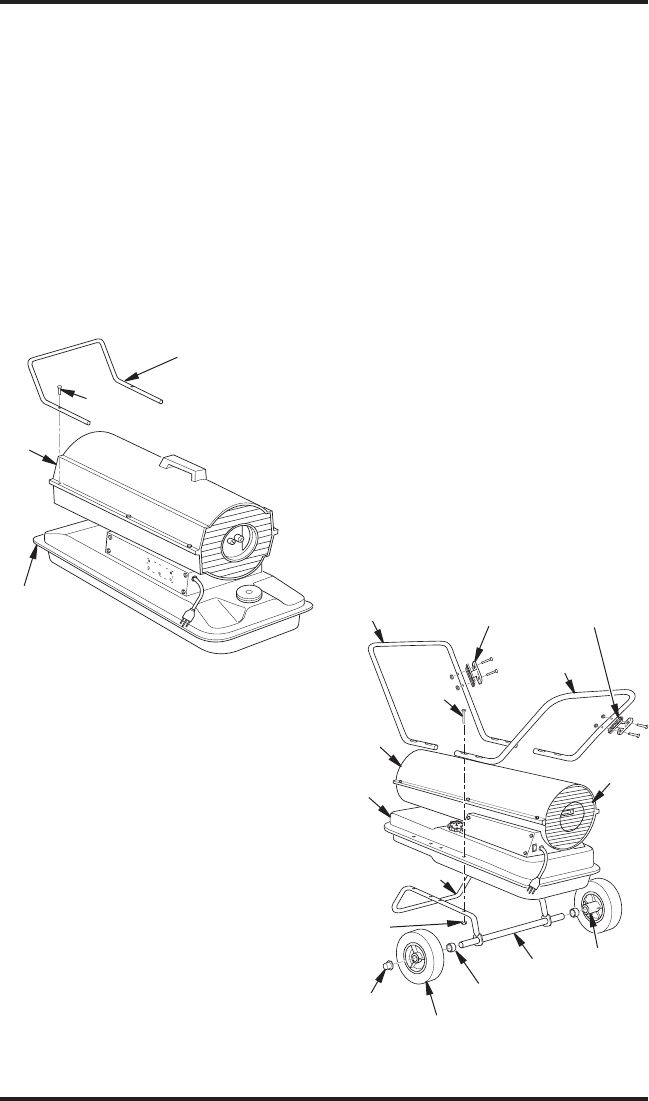
Figure 7 - Wheel and Handle Assembly,
115/165 Models Only
Wheel Support
Frame
Fuel
Tank
Flange
Cap Nut
Wheel
Nut
Axle
Extended
Hub
Air
Inlet
Handle (If
provided)
Hot Air
Outlet
Screw
Wheel Spacer
(If Provided)
Cord Cleat with Bolts
and Nuts (If provided)
Handle
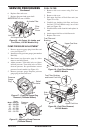
(FOR 115 AND 165 MODELS ONLY)
These models are furnished with wheels and a
handle. Some models are furnished with a second
handle also. Wheels, handle(s), and the mounting
hardware are found in the shipping carton.
Tools Needed
• Medium Phillips Screwdriver
• 3/8" Open or Adjustable Wrench
• Hammer
1.
Slide axle through wheel support frame. Install
wheel spacers if provided. Install wheels on axle.
IMPORTANT: When installing wheels, point
extended hub of wheels toward wheel support
frame (see Figure 7).
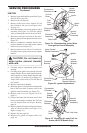
2. Place cap nuts on axle ends. Gently tap with
hammer to secure.
3. Place heater on wheel support frame. Line up
holes on fuel tank flange with holes on wheel
support frame. Be sure wheels are mounted
under the air inlet of heater.
4. Place handle(s) on top of fuel tank flange. In
-
sert screws through handle(s), fuel tank flange,
and wheel support frame. Attach nut finger
tight after each screw is inserted. If only one
handle is provided, be sure to mount handle
over outlet end of heater.
5. After all screws are inserted, tighten nuts
firmly.
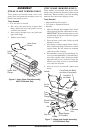
Figure 6 - Nose Cone Guard Assembly,
40/55/70 Models Only
Nose Cone
Guard
Screw
Hot Air
Outlet
Upper Shell
Flange